Introduction to Cherry Pie Bars
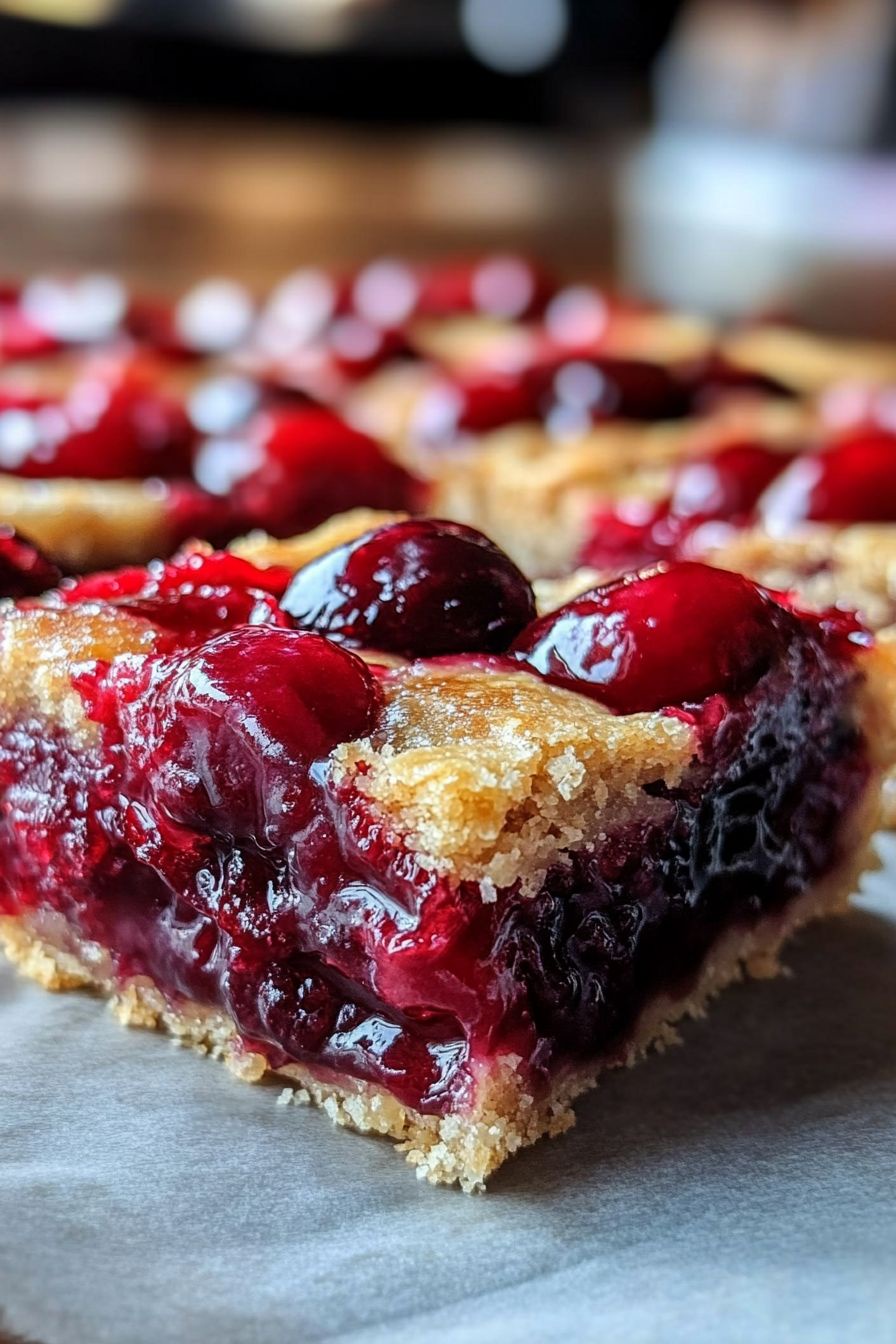
Cherry Pie Bars are a delightful twist on the classic cherry pie. They combine the rich, buttery flavor of a pie crust with a sweet cherry filling, all in a convenient bar form. This makes them not only delicious but also easy to serve and enjoy. Whether you’re hosting a gathering or simply craving a sweet treat, these bars are sure to impress.
What Makes Cherry Pie Bars Special?
What sets Cherry Pie Bars apart is their unique texture and flavor combination. The buttery crust provides a satisfying crunch, while the cherry filling adds a burst of sweetness. Unlike traditional pies, these bars are easy to cut and serve, making them perfect for parties or picnics. Plus, they can be enjoyed warm or cold, which adds to their versatility.
Perfect Occasions for Cherry Pie Bars
Cherry Pie Bars are perfect for a variety of occasions. They shine at family gatherings, birthday parties, and holiday celebrations. You can also serve them at casual get-togethers or bake sales. Their vibrant color and delicious taste make them a hit with both kids and adults. No matter the event, these bars are sure to be a crowd-pleaser!
Ingredients for Cherry Pie Bars
To create these scrumptious Cherry Pie Bars, you’ll need a few simple ingredients. Each component plays a vital role in achieving that perfect balance of flavor and texture. Here’s what you’ll need:
- 1 cup unsalted butter, softened: This is the base of your crust and topping, providing richness and flavor.
- 1 cup granulated sugar: Sugar sweetens the bars and helps create a lovely golden color when baked.
- 4 large eggs: Eggs bind the ingredients together and add moisture to the bars.
- 1 tsp vanilla extract: Vanilla enhances the overall flavor, making the bars even more delicious.
- 3 cups all-purpose flour: Flour gives structure to the bars, creating a sturdy yet tender crust.
- ½ tsp salt: A pinch of salt balances the sweetness and enhances the flavors.
- 1 21 oz can cherry pie filling: This is the star of the show! The cherry filling adds sweetness and a burst of fruity flavor.
Gathering these ingredients is the first step toward making your Cherry Pie Bars. Each item contributes to the delightful taste and texture that everyone loves. Now that you have everything ready, you can move on to the preparation!
Step-by-Step Preparation of Cherry Pie Bars
Now that you have all your ingredients ready, it’s time to dive into the fun part: preparing your Cherry Pie Bars! Follow these simple steps to create a delicious treat that everyone will love.
Step 1: Preheat the Oven and Prepare the Pan
First things first, preheat your oven to 350°F (175°C). This ensures that your bars bake evenly. While the oven is heating, grab a 9×13-inch baking pan and grease it well. You can use butter or cooking spray for this. A well-greased pan helps the bars come out easily after baking.
Step 2: Creaming Butter and Sugar
In a large mixing bowl, add the softened unsalted butter and granulated sugar. Using an electric mixer, beat them together until the mixture is light and fluffy. This step is crucial as it incorporates air into the batter, making your bars tender and delicious. It should take about 2-3 minutes.
Step 3: Mixing in Eggs and Vanilla
Next, crack the four large eggs into the bowl. Add the teaspoon of vanilla extract as well. Mix everything together until it’s well combined. The mixture should look smooth and creamy. This adds moisture and flavor to your Cherry Pie Bars.
Step 4: Combining Dry Ingredients
In a separate bowl, combine the all-purpose flour and salt. Gradually add this dry mixture to the wet ingredients. Mix until a dough forms. Be careful not to overmix; just combine until you see no dry flour. The dough should be soft and slightly sticky.
Step 5: Assembling the Cherry Pie Bars
Now it’s time to assemble your bars! Take half of the dough and spread it evenly in the greased baking pan. Make sure to cover the bottom completely. Next, open the can of cherry pie filling and spread it over the dough layer. Finally, drop spoonfuls of the remaining dough on top of the cherry filling. This creates a lovely, rustic look.
Step 6: Baking the Cherry Pie Bars
Place the pan in the preheated oven and bake for 35-40 minutes. Keep an eye on them! You want the top to be golden brown. The aroma of baking cherry pie bars will fill your kitchen, making it hard to wait!
Step 7: Cooling and Drizzling with Glaze
Once baked, remove the pan from the oven and let it cool completely. This is important as it helps the bars set. After cooling, you can drizzle a simple glaze over the top for added sweetness. Just mix powdered sugar with a little milk until you reach your desired consistency, then drizzle it on. Your Cherry Pie Bars are now ready to be enjoyed!
Variations of Cherry Pie Bars
While Cherry Pie Bars are delicious as they are, there are many fun variations you can try! These alternatives allow you to customize the bars to suit your taste or dietary needs. Let’s explore some exciting options!
Different Fruit Fillings
If cherries aren’t your favorite, don’t worry! You can easily swap the cherry pie filling for other fruit fillings. Blueberry, raspberry, or peach fillings work wonderfully. Each fruit brings its unique flavor, making the bars just as delightful. You can even mix different fruits for a fun twist! Just ensure the filling is thick enough to hold up during baking.
Gluten-Free Options
For those who need gluten-free options, you can still enjoy these tasty bars! Simply replace the all-purpose flour with a gluten-free flour blend. Many blends work well in baking, so choose one that you like. Additionally, make sure your baking powder is gluten-free. This way, everyone can indulge in the deliciousness of Cherry Pie Bars without worry!
Adding Nuts or Chocolate
Want to add a little crunch or richness? Consider adding nuts or chocolate to your Cherry Pie Bars! Chopped walnuts or pecans can be mixed into the dough for a delightful texture. If you’re a chocolate lover, try adding chocolate chips to the dough or drizzling melted chocolate over the top after baking. These additions can elevate the flavor and make your bars even more irresistible!
With these variations, you can create a new favorite treat every time you bake. Whether you stick with the classic cherry filling or try something new, these bars are sure to please!
Cooking Note for Cherry Pie Bars
When making Cherry Pie Bars, a few cooking notes can help ensure your baking experience is smooth and successful. First, always use fresh ingredients. Fresh butter, eggs, and flour can significantly impact the taste and texture of your bars. If your ingredients are nearing their expiration dates, consider replacing them for the best results.
Next, be mindful of the temperature of your ingredients. Softened butter is essential for creaming with sugar. If your butter is too cold, it won’t mix well, leading to a denser texture. To soften butter quickly, cut it into small pieces and let it sit at room temperature for about 15 minutes. Alternatively, you can microwave it for about 10 seconds, but be careful not to melt it.
Another important note is to check your oven’s temperature. Ovens can vary, and an oven thermometer can help ensure accuracy. If your oven runs hot, your bars may bake faster than expected. Conversely, if it runs cool, they may take longer. Keep an eye on the bars as they bake, and use the golden brown color as your guide for doneness.
Lastly, let the bars cool completely in the pan before cutting. This helps them set and makes slicing easier. If you’re in a hurry, you can place the pan in the refrigerator for a quicker cool-down. Following these cooking notes will help you create perfect Cherry Pie Bars every time!
Serving Suggestions for Cherry Pie Bars
Cherry Pie Bars are not only delicious on their own, but they can also be enhanced with some delightful accompaniments. Here are a couple of serving suggestions that will take your Cherry Pie Bars to the next level!
Pairing with Ice Cream
One of the best ways to enjoy Cherry Pie Bars is by pairing them with a scoop of ice cream. Vanilla ice cream is a classic choice, as its creamy texture complements the sweet and tart cherry filling perfectly. The cold ice cream contrasts beautifully with the warm bars, creating a delightful experience for your taste buds. You can also try other flavors like chocolate or even a fruity sorbet for a refreshing twist. Just imagine taking a bite of a warm Cherry Pie Bar topped with melting ice cream—pure bliss!
Serving with Fresh Whipped Cream
Another fantastic option is to serve your Cherry Pie Bars with a dollop of fresh whipped cream. The light and airy texture of whipped cream adds a lovely creaminess that balances the sweetness of the bars. To make your whipped cream, simply whip heavy cream with a bit of sugar and vanilla extract until soft peaks form. You can also add a sprinkle of cinnamon or nutmeg for an extra touch of flavor. This simple addition elevates your dessert, making it feel even more special. Plus, it’s a great way to impress your guests!
Whether you choose to serve your Cherry Pie Bars with ice cream, whipped cream, or both, these additions will surely enhance your dessert experience. Enjoy experimenting with different toppings and find your favorite combination!
Tips for Perfect Cherry Pie Bars
To make sure your Cherry Pie Bars turn out perfectly every time, here are some helpful tips. These suggestions will guide you in achieving the right texture and flavor, ensuring that your bars are a hit with everyone!
Ensuring the Right Consistency
Getting the right consistency for your Cherry Pie Bars is key. When mixing the dough, be careful not to overmix. Overmixing can lead to tough bars instead of the tender texture you want. Mix just until the ingredients are combined, and you see no dry flour. Also, when spreading the dough in the pan, make sure it’s even. This helps the bars bake uniformly, preventing some parts from being too dry while others are too gooey.
Another important factor is the cherry filling. If you find the filling too runny, consider draining some of the liquid before spreading it on the dough. This will help keep your bars from becoming soggy. A thicker filling will hold up better during baking, giving you that perfect bite every time. Lastly, let the bars cool completely in the pan before cutting. This allows them to set properly, making it easier to slice into neat squares.
Storing Leftover Bars
If you have any leftover Cherry Pie Bars, storing them correctly is essential to maintain their freshness. First, allow the bars to cool completely. Once cooled, you can cover them with plastic wrap or transfer them to an airtight container. This will help keep them moist and prevent them from drying out.
Cherry Pie Bars can be stored at room temperature for up to three days. If you want to keep them longer, consider refrigerating them. They can last up to a week in the fridge. For even longer storage, you can freeze the bars. Just wrap them tightly in plastic wrap and then in aluminum foil. They can be frozen for up to three months. When you’re ready to enjoy them, simply thaw them in the refrigerator overnight. This way, you can savor the deliciousness of Cherry Pie Bars anytime!
Breakdown of Time for Cherry Pie Bars
Understanding the time needed to make Cherry Pie Bars can help you plan your baking session better. Here’s a simple breakdown of the time involved in preparing and cooking these delightful treats.
Prep Time
The prep time for Cherry Pie Bars is approximately 15 minutes. This includes gathering your ingredients, greasing the baking pan, and mixing the dough. It’s a quick process, allowing you to get started on baking in no time. Make sure to have everything ready before you begin, as this will make the process smoother and more enjoyable.
Cooking Time
Once your bars are assembled, the cooking time is about 35 to 40 minutes. During this time, the bars will bake to a beautiful golden brown. Keep an eye on them as they bake, and use the color as your guide for doneness. The aroma of cherry filling and buttery crust will fill your kitchen, making it hard to wait!
Total Time
In total, you can expect to spend around 55 minutes from start to finish. This includes both prep and cooking time. Once the bars are baked, allow them to cool completely before cutting. This cooling period is essential for achieving the perfect texture. With just under an hour, you can create a delicious dessert that everyone will love!
Nutritional Information for Cherry Pie Bars
Understanding the nutritional content of your Cherry Pie Bars can help you enjoy them in moderation. Here’s a breakdown of the key nutritional components per serving, which is typically one bar. Keep in mind that these values can vary based on specific ingredients and portion sizes.
Calories
Each Cherry Pie Bar contains approximately 200 calories. This makes them a delightful treat without being overly indulgent. The buttery crust and sweet cherry filling contribute to the calorie count, but they also provide a satisfying dessert experience. Enjoying one bar as a treat can fit nicely into a balanced diet.
Protein
In terms of protein, each bar offers about 2 grams. While this isn’t a high protein snack, it does provide some essential nutrients. The eggs in the recipe contribute to this protein content, helping to bind the ingredients together. Pairing your Cherry Pie Bars with a protein-rich food, like a scoop of yogurt or a handful of nuts, can create a more balanced snack.
Sodium
Each serving of Cherry Pie Bars contains around 150 milligrams of sodium. This is a moderate amount, primarily coming from the salt added to the dough. For those watching their sodium intake, it’s good to be mindful of portion sizes. However, this level is generally acceptable for most people, especially when enjoyed as an occasional treat.
Overall, Cherry Pie Bars can be a delightful addition to your dessert repertoire. With their sweet flavor and satisfying texture, they are sure to please your taste buds while still being mindful of nutritional content. Enjoy them as part of a balanced diet, and don’t hesitate to share them with friends and family!
FAQs about Cherry Pie Bars
Can I use fresh cherries instead of canned pie filling?
Absolutely! You can use fresh cherries to make your Cherry Pie Bars. Just make sure to pit and slice the cherries first. You may want to add a bit of sugar and cornstarch to thicken the filling, as fresh cherries can be juicier than canned ones. This will help create a delicious filling that holds up well in the bars. Enjoy the fresh taste of cherries in your dessert!
How do I know when the Cherry Pie Bars are done baking?
Knowing when your Cherry Pie Bars are done baking is key to achieving the perfect texture. Look for a golden brown top, which usually takes about 35-40 minutes in the oven. You can also insert a toothpick into the center of the bars. If it comes out clean or with just a few crumbs, they are ready. If it comes out wet with batter, give them a few more minutes. Trust your senses—the aroma will also be a good indicator that they are close to being done!
Can I freeze Cherry Pie Bars?
Yes, you can freeze Cherry Pie Bars! To do this, allow them to cool completely after baking. Then, wrap them tightly in plastic wrap and place them in an airtight container or freezer bag. They can be frozen for up to three months. When you’re ready to enjoy them, simply thaw them in the refrigerator overnight. This way, you can have a delicious treat ready whenever you want!
What can I substitute for butter in this recipe?
If you need a substitute for butter, there are several options you can use. Coconut oil is a popular choice and provides a nice flavor. You can also use vegetable oil or applesauce for a healthier alternative. If you prefer a dairy-free option, margarine works well too. Just keep in mind that the texture and flavor may vary slightly depending on the substitute you choose. Experiment to find the one that suits your taste best!
Conclusion on Cherry Pie Bars
Cherry Pie Bars are a delightful dessert that combines the best of both worlds: the classic taste of cherry pie and the convenience of a bar. They are easy to make and perfect for any occasion, whether it’s a family gathering, a picnic, or just a sweet treat at home. With their buttery crust and sweet cherry filling, these bars are sure to satisfy your cravings.
Final Thoughts on Making Cherry Pie Bars
As you embark on your journey to create these delicious Cherry Pie Bars, remember that baking is all about having fun and experimenting. Don’t hesitate to try different fruit fillings or add your favorite mix-ins. Each variation can bring a new twist to this classic recipe, making it uniquely yours.
Moreover, the joy of sharing these bars with friends and family is truly special. Watching their faces light up with delight as they take their first bite is a rewarding experience. So, gather your ingredients, preheat that oven, and get ready to create a dessert that will leave everyone asking for seconds!
In the end, whether you enjoy them warm with a scoop of ice cream or chilled with a dollop of whipped cream, Cherry Pie Bars are a treat that brings happiness to any table. Happy baking!