Introduction to Rocky Road Ice Cream
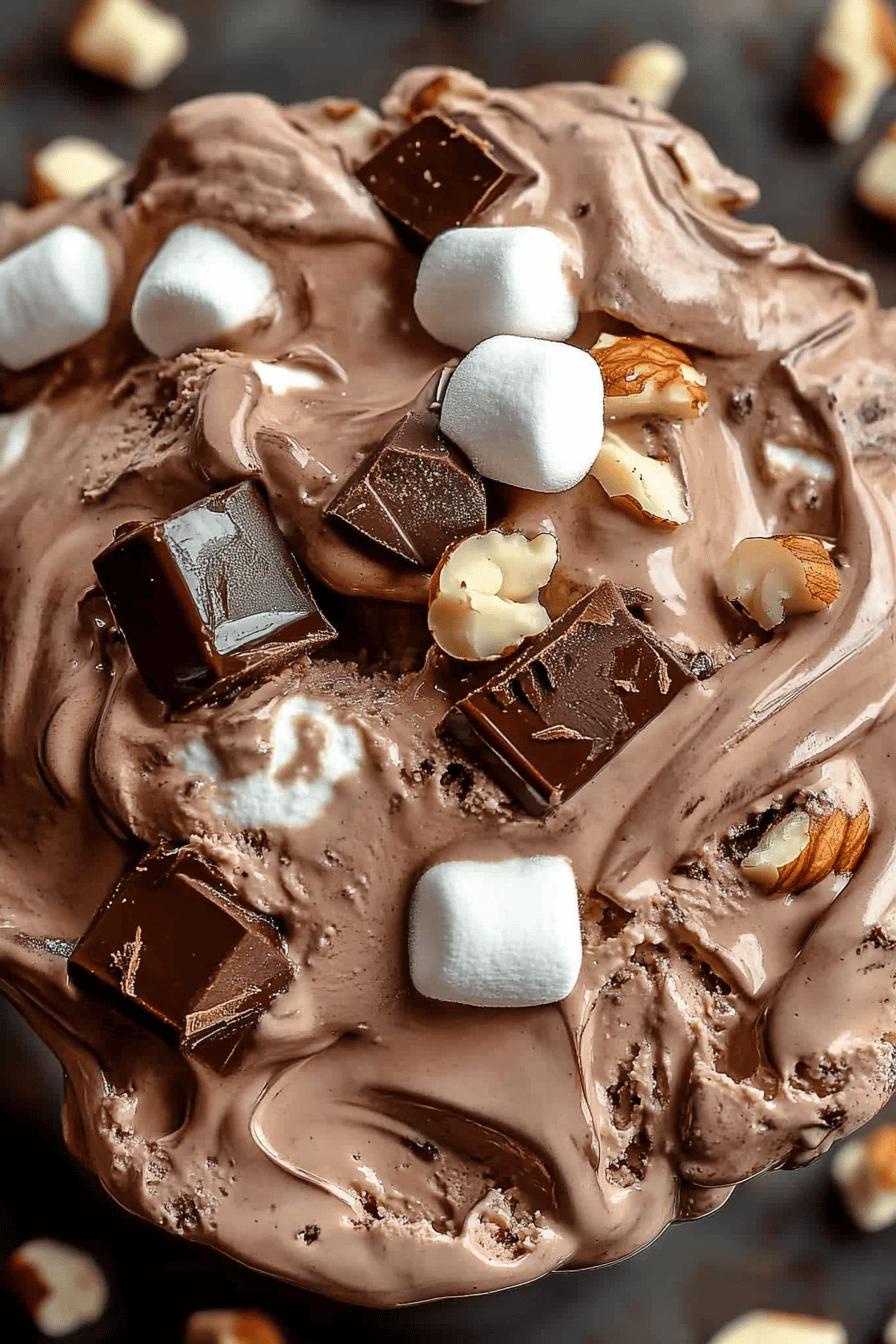
Rocky Road Ice Cream is more than just a dessert; it’s a delightful experience that brings joy to every scoop. This beloved treat combines creamy chocolate ice cream with a mix of textures and flavors. The mini marshmallows add a fluffy sweetness, while the crunchy nuts provide a satisfying bite. Rich chocolate chunks elevate the flavor, making it a favorite among chocolate lovers. Whether you’re enjoying it on a hot summer day or cozying up on a chilly evening, Rocky Road Ice Cream is sure to satisfy your sweet cravings.
What Makes Rocky Road Ice Cream Special?
What sets Rocky Road Ice Cream apart is its unique combination of ingredients. The creamy chocolate base serves as a perfect canvas for the mix-ins. The mini marshmallows bring a light, chewy texture, while the nuts add a delightful crunch. This blend of flavors and textures creates a symphony of taste in every bite. Plus, it’s easy to make at home, allowing you to customize it to your liking. You can choose your favorite nuts or even add extra chocolate for a richer flavor. This versatility makes Rocky Road Ice Cream a special treat for everyone.
The History of Rocky Road Ice Cream
Rocky Road Ice Cream has an interesting history that dates back to the 1920s. It was first created in California, during a time when the Great Depression was affecting many lives. The original recipe was meant to cheer people up, hence the name “Rocky Road.” The combination of chocolate ice cream, nuts, and marshmallows was a hit, and it quickly gained popularity. Over the years, many variations have emerged, but the classic version remains a favorite. Today, Rocky Road Ice Cream is enjoyed worldwide, making it a timeless dessert that continues to bring smiles to faces.
Ingredients for Rocky Road Ice Cream
Creating your own Rocky Road Ice Cream at home is simple and fun! To make this delicious treat, you’ll need a few key ingredients. Here’s what you’ll need:
- 2 cups heavy cream: This gives the ice cream its rich and creamy texture.
- 1 cup whole milk: Whole milk adds creaminess and balances the heaviness of the cream.
- 3/4 cup granulated sugar: Sugar sweetens the ice cream and enhances the chocolate flavor.
- 1 cup unsweetened cocoa powder: This is the star ingredient that gives Rocky Road its chocolatey goodness.
- 1 teaspoon vanilla extract: Vanilla adds a warm, aromatic flavor that complements the chocolate.
- 1 cup mini marshmallows: These fluffy treats add sweetness and a chewy texture.
- 1 cup chopped nuts: Walnuts or almonds work best, providing a crunchy contrast to the creamy ice cream.
- 1 cup chocolate chunks: For an extra chocolatey experience, add rich chocolate chunks to the mix.
Feel free to adjust the quantities based on your preferences. For instance, if you love marshmallows, add more! The beauty of making Rocky Road Ice Cream at home is that you can customize it to suit your taste. Gather these ingredients, and you’ll be ready to create a delightful dessert that everyone will love!
Step-by-Step Preparation of Rocky Road Ice Cream
Now that you have all your ingredients ready, it’s time to dive into the fun part—making your Rocky Road Ice Cream! Follow these simple steps to create a delicious treat that will impress your family and friends.
Step 1: Gather Your Ingredients
Before you start, make sure you have everything you need. Gather your heavy cream, whole milk, sugar, cocoa powder, vanilla extract, mini marshmallows, chopped nuts, and chocolate chunks. Having all your ingredients in one place will make the process smoother and more enjoyable. Plus, it’s always nice to see everything laid out, ready to go!
Step 2: Prepare the Chocolate Base
In a large mixing bowl, combine the heavy cream, whole milk, and granulated sugar. Whisk these ingredients together until the sugar is fully dissolved. Next, add the unsweetened cocoa powder and vanilla extract. Mix well until you achieve a smooth, chocolatey base. This step is crucial, as it sets the foundation for your Rocky Road Ice Cream. The richer the chocolate base, the more delicious your ice cream will be!
Step 3: Mix in the Add-Ins
Once your chocolate base is ready, it’s time to add the fun stuff! Gently fold in the mini marshmallows, chopped nuts, and chocolate chunks. Be careful not to overmix; you want to keep the marshmallows fluffy and the nuts crunchy. This step adds texture and flavor, making each scoop a delightful surprise. Feel free to get creative here—if you have other favorite mix-ins, now is the time to add them!
Step 4: Churn the Ice Cream
Now, pour your mixture into an ice cream maker. Follow the manufacturer’s instructions for churning. Typically, you’ll churn the mixture for about 20 to 30 minutes, or until it reaches a soft-serve consistency. Churning incorporates air into the ice cream, making it light and creamy. If you don’t have an ice cream maker, don’t worry! You can still make this treat by following the no-churn method, which we’ll discuss later.
Step 5: Freeze and Set
After churning, transfer the ice cream to an airtight container. Smooth the top with a spatula and cover it tightly. Place the container in the freezer for at least 4 hours, or until the ice cream is firm. This final freezing step is essential for achieving that perfect scoopable texture. Once it’s set, your homemade Rocky Road Ice Cream will be ready to enjoy!
Variations of Rocky Road Ice Cream
While the classic Rocky Road Ice Cream is a beloved favorite, there are many ways to enjoy this delightful treat. Whether you have dietary restrictions or simply want to try something new, these variations will satisfy your cravings while keeping the spirit of Rocky Road alive!
Vegan Rocky Road Ice Cream
If you’re following a vegan diet, you can still indulge in Rocky Road Ice Cream! To make a vegan version, simply swap out the dairy ingredients for plant-based alternatives. Use coconut cream or almond milk instead of heavy cream and whole milk. For sweetness, opt for maple syrup or agave nectar instead of granulated sugar. You can also find vegan chocolate that is dairy-free. The rest of the ingredients, like mini marshmallows and nuts, can be easily found in vegan-friendly options. This way, you can enjoy a creamy, chocolatey treat without any animal products!
Gluten-Free Rocky Road Ice Cream
For those who need to avoid gluten, making gluten-free Rocky Road Ice Cream is a breeze! The classic recipe is naturally gluten-free, as it doesn’t contain any wheat products. Just ensure that the chocolate chunks and any mix-ins you choose are labeled gluten-free. You can use gluten-free nuts and marshmallows to keep everything safe for those with gluten sensitivities. This variation allows everyone to enjoy a scoop of Rocky Road without worry!
These variations not only cater to different dietary needs but also allow you to explore new flavors and textures. So, whether you’re vegan, gluten-free, or just looking for a twist on the classic, these adaptations will keep your Rocky Road Ice Cream experience exciting and delicious!
Cooking Note for Rocky Road Ice Cream
When making Rocky Road Ice Cream, a few cooking notes can help ensure your dessert turns out perfectly every time. First, always use high-quality ingredients. The better the chocolate and cream, the richer and more flavorful your ice cream will be. Look for cocoa powder that is unsweetened and has a deep, dark color for the best results.
Next, temperature matters! Make sure your heavy cream and milk are cold before mixing. This helps the ice cream churn more effectively, resulting in a creamier texture. If you’re using an ice cream maker, pre-chill the bowl according to the manufacturer’s instructions. This step is crucial for achieving that smooth, soft-serve consistency.
Additionally, don’t rush the freezing process. Allowing the ice cream to set for at least four hours ensures it reaches the right firmness. If you try to scoop it too soon, it may be too soft and difficult to serve. Patience is key when it comes to homemade ice cream!
Lastly, feel free to experiment with your mix-ins. While mini marshmallows, nuts, and chocolate chunks are traditional, you can add other ingredients like crushed cookies, caramel swirls, or even fruit for a unique twist. Just remember to keep the balance of flavors in mind. Enjoy the process, and have fun creating your own version of this classic treat!
Serving Suggestions for Rocky Road Ice Cream
Once your homemade Rocky Road Ice Cream is ready, it’s time to serve it up! This delightful treat can be enjoyed in many creative ways. Whether you’re hosting a party or just treating yourself, these serving suggestions will elevate your ice cream experience.
Creative Ways to Serve Rocky Road Ice Cream
Get creative with how you serve your Rocky Road Ice Cream! Here are some fun ideas:
- Ice Cream Sundae: Scoop your Rocky Road Ice Cream into a bowl and top it with whipped cream, a drizzle of chocolate syrup, and a cherry on top. This classic sundae is sure to impress!
- Ice Cream Sandwich: Use two cookies, like chocolate chip or graham crackers, to create a delicious ice cream sandwich. The combination of flavors and textures will delight your taste buds.
- Rocky Road Milkshake: Blend a scoop of Rocky Road Ice Cream with milk for a creamy milkshake. Top it with whipped cream and chocolate shavings for an extra treat!
- In a Cone: Serve your Rocky Road Ice Cream in a waffle cone for a fun, portable dessert. Add sprinkles or nuts on top for a festive touch.
These creative serving ideas not only make your dessert more exciting but also allow you to share the joy of Rocky Road Ice Cream with others. Feel free to mix and match these suggestions to find your favorite way to enjoy this classic treat!
Pairing Rocky Road Ice Cream with Other Desserts
Rocky Road Ice Cream pairs wonderfully with other desserts, enhancing your sweet experience. Here are some delicious combinations:
- Brownies: Serve a scoop of Rocky Road Ice Cream on top of warm brownies. The combination of fudgy brownies and creamy ice cream is heavenly!
- Chocolate Cake: A slice of rich chocolate cake with a scoop of Rocky Road Ice Cream creates a decadent dessert duo that chocolate lovers will adore.
- Fruit Salad: For a lighter option, serve Rocky Road Ice Cream alongside a fresh fruit salad. The sweetness of the fruit balances the richness of the ice cream.
- Pie: Pair your ice cream with a slice of pie, like pecan or apple. The contrast of flavors and textures will make for a delightful dessert experience.
These pairing suggestions not only enhance the flavors of your Rocky Road Ice Cream but also create a memorable dessert spread. Enjoy experimenting with different combinations to find your perfect match!
Tips for Making the Perfect Rocky Road Ice Cream
Choosing the Right Chocolate
When it comes to making Rocky Road Ice Cream, the chocolate you choose plays a vital role in the overall flavor. Opt for high-quality chocolate that you enjoy eating on its own. Dark chocolate, semi-sweet, or even milk chocolate can work well, depending on your taste preference. If you prefer a richer flavor, dark chocolate is the way to go. It adds depth and a slight bitterness that balances the sweetness of the marshmallows and sugar.
For the cocoa powder, select a brand that is unsweetened and has a deep, rich color. This will ensure your ice cream has that intense chocolate flavor that Rocky Road is known for. If you want to experiment, consider using flavored chocolate, like mint or orange, to give your ice cream a unique twist. Remember, the better the chocolate, the more delicious your Rocky Road Ice Cream will be!
Storing Your Rocky Road Ice Cream
Once you’ve made your delicious Rocky Road Ice Cream, proper storage is key to keeping it fresh and tasty. Transfer the ice cream into an airtight container to prevent freezer burn. Make sure to smooth the top with a spatula before sealing it tightly. This helps to minimize air exposure, which can lead to ice crystals forming on the surface.
Store your Rocky Road Ice Cream in the coldest part of your freezer, usually at the back. This ensures it stays firm and scoopable. Homemade ice cream is best enjoyed within two weeks for optimal flavor and texture. However, it can last up to a month if stored properly. Just remember to let it sit at room temperature for a few minutes before scooping, as this will make it easier to serve. Enjoy your homemade treat whenever the craving strikes!
Breakdown of Time for Rocky Road Ice Cream
Understanding the time needed to make Rocky Road Ice Cream can help you plan your dessert-making adventure. Here’s a simple breakdown of the time involved in each step, so you know what to expect!
Prep Time
The prep time for Rocky Road Ice Cream is about 15 to 20 minutes. This includes gathering your ingredients, measuring them out, and preparing the chocolate base. It’s a quick process, especially if you have everything ready to go. Just make sure to take your time mixing the ingredients well to achieve that smooth chocolate base!
Cooking Time
Cooking time, or rather churning time, typically takes around 20 to 30 minutes. This is when your ice cream maker works its magic, incorporating air into the mixture to create a light and creamy texture. If you’re using the no-churn method, you won’t have a cooking time, but you will need to mix the ingredients thoroughly before freezing.
Total Time
In total, you should expect to spend about 4 hours and 50 minutes from start to finish. This includes the prep time, cooking time, and the necessary freezing time of at least 4 hours. While the waiting can be tough, the delicious reward of homemade Rocky Road Ice Cream is well worth it!
Nutritional Information for Rocky Road Ice Cream
Understanding the nutritional content of your homemade Rocky Road Ice Cream can help you enjoy it even more. While this treat is certainly indulgent, knowing what’s in it can help you make informed choices. Here’s a breakdown of the key nutritional components of Rocky Road Ice Cream.
Calories in Rocky Road Ice Cream
One serving of Rocky Road Ice Cream, which is about half a cup, typically contains around 250 to 300 calories. This can vary based on the specific ingredients you use, especially if you opt for full-fat or lower-fat options. The rich chocolate base, combined with the mini marshmallows and nuts, contributes to the calorie count. While it’s a sweet treat, enjoying it in moderation can fit into a balanced diet.
Protein Content
Rocky Road Ice Cream also provides a decent amount of protein, thanks to the dairy ingredients. A half-cup serving usually contains about 4 to 6 grams of protein. This protein comes primarily from the heavy cream and whole milk used in the recipe. While it’s not a significant source of protein, it does add a little nutritional value to your dessert. If you’re looking to boost the protein content, consider adding some chopped nuts, as they are also a good source of protein.
Sodium Levels
In terms of sodium, a serving of Rocky Road Ice Cream generally contains around 50 to 100 milligrams. This amount can vary based on the specific ingredients and brands you choose. The sodium content is relatively low, making it a suitable treat for most diets. However, if you’re watching your sodium intake, be mindful of the types of nuts and chocolate you use, as some may contain added salt.
Overall, while Rocky Road Ice Cream is a delicious indulgence, it’s important to enjoy it in moderation. Knowing the nutritional information can help you savor each scoop while keeping your dietary goals in mind. So go ahead, treat yourself to this delightful dessert, and enjoy every creamy, chocolatey bite!
FAQs About Rocky Road Ice Cream
Can I make Rocky Road Ice Cream without an ice cream maker?
Absolutely! You can make Rocky Road Ice Cream without an ice cream maker using a simple no-churn method. Start by mixing your ingredients as usual, creating the chocolate base and adding your mix-ins. Then, pour the mixture into a large, freezer-safe container. Stir it every 30 minutes for the first 2 to 3 hours to help incorporate air and prevent ice crystals from forming. After that, let it freeze for at least 4 hours or until firm. This method may take a bit longer, but you’ll still enjoy delicious homemade Rocky Road Ice Cream!
How long does Rocky Road Ice Cream last in the freezer?
When stored properly, Rocky Road Ice Cream can last in the freezer for about 2 to 4 weeks. To keep it fresh, make sure to transfer it to an airtight container and smooth the top before sealing. This helps prevent freezer burn and keeps your ice cream tasting great. However, for the best flavor and texture, it’s recommended to enjoy your homemade treat within the first two weeks. After that, it may still be safe to eat, but the quality might start to decline.
What nuts are best for Rocky Road Ice Cream?
Traditionally, walnuts and almonds are the go-to nuts for Rocky Road Ice Cream. Walnuts add a rich, earthy flavor, while almonds provide a nice crunch. However, you can use any nuts you prefer! Pecans, hazelnuts, or even macadamia nuts can work wonderfully. Just make sure to chop them into smaller pieces so they mix well with the ice cream. Feel free to experiment with different nuts to find your favorite combination!
Can I use different types of chocolate in Rocky Road Ice Cream?
Yes, you can definitely use different types of chocolate in your Rocky Road Ice Cream! While the classic recipe calls for unsweetened cocoa powder and chocolate chunks, you can mix it up by using dark chocolate, milk chocolate, or even white chocolate. Each type will give your ice cream a unique flavor profile. If you’re feeling adventurous, try flavored chocolates like mint or orange for a fun twist. Just remember to adjust the sweetness if you use sweeter chocolates to keep the balance right!
Conclusion: Enjoying Your Homemade Rocky Road Ice Cream
Making your own Rocky Road Ice Cream is not just about satisfying your sweet tooth; it’s about creating joyful moments. This delightful dessert brings together rich chocolate, fluffy marshmallows, and crunchy nuts, making it a treat for all ages. Whether you’re enjoying it on a sunny day or sharing it with loved ones during a cozy movie night, each scoop is a reminder of the simple pleasures in life.
As you savor your homemade Rocky Road Ice Cream, take a moment to appreciate the effort you put into making it. The process of gathering ingredients, mixing, and churning is a fun and rewarding experience. Plus, the ability to customize your ice cream with your favorite mix-ins makes it even more special. You can experiment with different flavors, textures, and toppings, ensuring that every batch is uniquely yours.
So, the next time you crave something sweet, remember that you can whip up a batch of Rocky Road Ice Cream right in your kitchen. It’s a delicious way to treat yourself and share happiness with others. Enjoy every creamy, chocolatey bite, and don’t forget to share your creations with friends and family. After all, the joy of homemade ice cream is best when shared!
Relevant Recipes Link:
Craving more frozen delights to cool off this summer? Dive into these irresistible ice cream recipes:
- Mexican Fried Ice Cream: A Must-Try Dessert
- Raspberry Rose Ice Cream Recipe: A Sweet Treat
- Cherry Chocolate Ice Cream Cake: A Must-Try Dessert
For more delightful recipes and culinary inspiration, follow us on Pinterest!