Introduction to Homemade Krispy Kremes
The Allure of Homemade Krispy Kremes
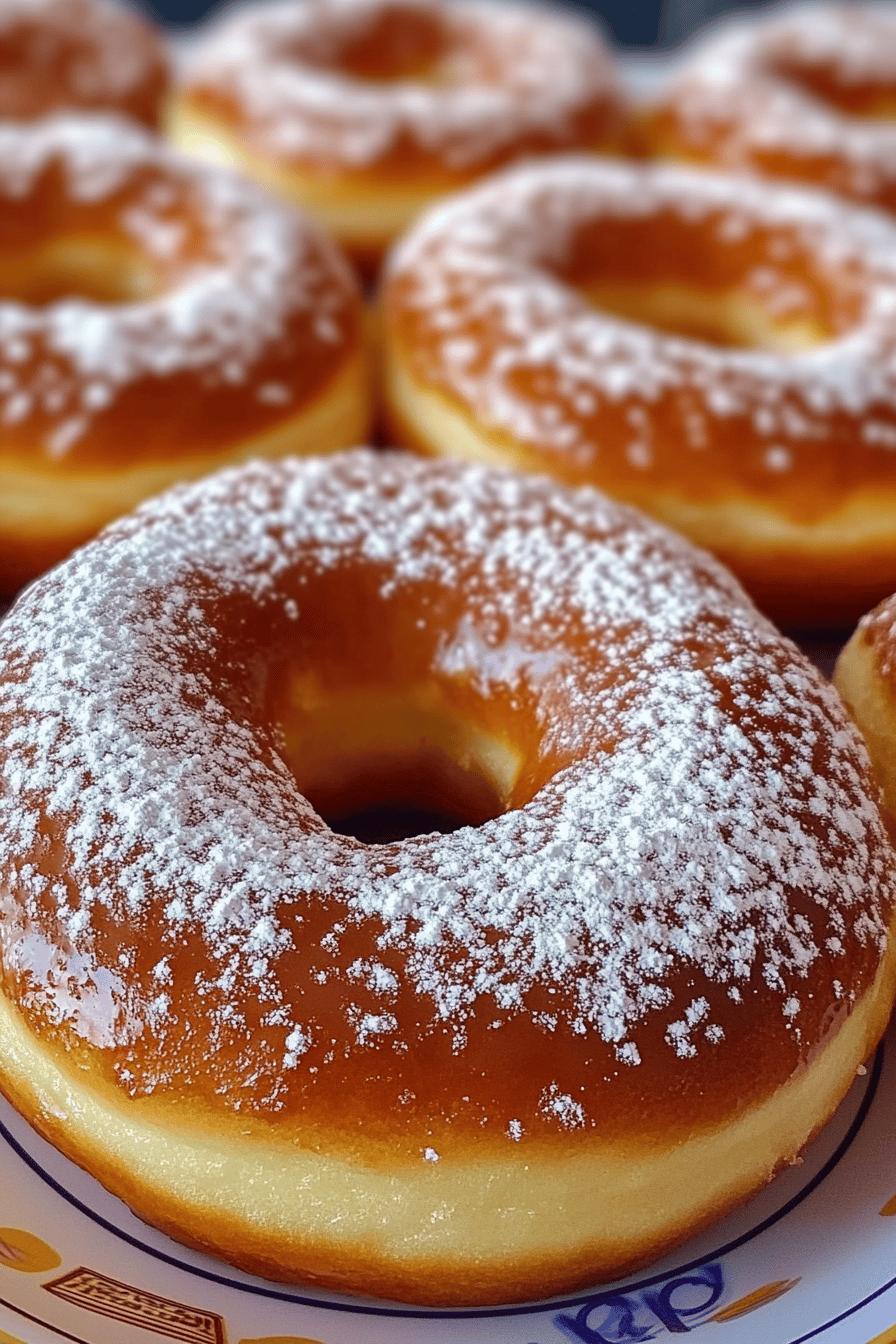
There’s something magical about the smell of fresh doughnuts wafting through your home. Homemade Krispy Kremes bring that magic right to your kitchen. These delightful treats are not just any doughnuts; they are fluffy, sweet, and melt-in-your-mouth delicious. Imagine biting into a warm, golden doughnut, coated in a sweet glaze that makes your taste buds dance with joy. It’s a simple pleasure that can brighten anyone’s day.
Making Krispy Kremes at home is easier than you might think. With just a few ingredients and some patience, you can create a batch that rivals your favorite bakery. The best part? You can customize them to your liking! Whether you prefer classic glazed, chocolate-covered, or filled with cream, the possibilities are endless.
Gather your family and friends, because these homemade doughnuts are perfect for sharing. They make a wonderful breakfast treat, a delightful brunch addition, or a sweet snack any time of day. Plus, the joy of making them together can turn into a cherished family tradition. So, roll up your sleeves and get ready to indulge in the delightful world of homemade Krispy Kremes!
Ingredients for Homemade Krispy Kremes
To create your own batch of delicious Homemade Krispy Kremes, you’ll need a few simple ingredients. Each one plays a vital role in achieving that perfect fluffy texture and sweet glaze. Here’s what you’ll need:
- 2 ¼ teaspoons active dry yeast – This is essential for making the dough rise.
- ½ cup warm milk – Warm milk helps activate the yeast.
- ¼ cup granulated sugar – This adds sweetness to the dough.
- 1 large egg – Eggs provide richness and help bind the ingredients.
- 2 tablespoons unsalted butter, melted – Butter adds flavor and moisture.
- 1 teaspoon vanilla extract – This enhances the overall flavor of the doughnuts.
- 2 cups all-purpose flour – Flour is the main ingredient that gives structure to the dough.
- ½ teaspoon salt – Salt balances the sweetness and enhances flavor.
- Vegetable oil for frying – This is necessary for frying the doughnuts to a golden brown.
For the glaze, you will need:
- 1 cup powdered sugar – This is the main ingredient for the sweet glaze.
- 2 tablespoons milk – Milk helps achieve the right consistency for the glaze.
- ½ teaspoon vanilla extract – This adds a lovely flavor to the glaze.
With these ingredients on hand, you’re ready to embark on your doughnut-making adventure. Each component contributes to the delightful taste and texture of your Homemade Krispy Kremes. So, gather your supplies and let’s get cooking!
Step-by-Step Preparation of Homemade Krispy Kremes
Step 1: Preparing the Dough
To start, you need to prepare the dough. First, in a small bowl, combine the warm milk and active dry yeast. Let it sit for about 5 minutes until it becomes frothy. This means the yeast is active and ready to work its magic!
Next, in a large mixing bowl, whisk together the granulated sugar, melted butter, egg, and vanilla extract. Once combined, add the frothy yeast mixture. Stir well to combine all the wet ingredients.
Now, gradually add the all-purpose flour and salt to the wet mixture. Mix until a soft dough forms. You can use a wooden spoon or your hands for this. If the dough feels too sticky, sprinkle in a little more flour until it’s manageable. Remember, the goal is a soft, pliable dough that isn’t too sticky.
Step 2: Letting the Dough Rise
Once your dough is ready, it’s time to let it rise. Lightly grease a large bowl with a bit of oil. Place the dough in the bowl, turning it to coat all sides with oil. Cover the bowl with a clean kitchen towel or plastic wrap. This helps keep the warmth in, allowing the dough to rise.
Let the dough rise in a warm place for about 1 to 1.5 hours, or until it has doubled in size. This is the perfect time to clean up your kitchen and prepare for the next steps!
Step 3: Shaping the Doughnuts
After the dough has risen, it’s time to shape your doughnuts. Start by punching down the dough to release any air bubbles. Then, turn it out onto a lightly floured surface. Roll the dough out to about ½ inch thick.
Using a doughnut cutter or two round cookie cutters (one larger and one smaller), cut out doughnut shapes. Place the cut doughnuts on a floured baking sheet. Make sure to leave some space between each doughnut, as they will puff up during frying.
Once shaped, cover the doughnuts with a towel and let them rise again for about 30 minutes. This second rise will make them even fluffier!
Step 4: Frying the Doughnuts
Now comes the fun part—frying! In a deep pot or fryer, heat vegetable oil to 350°F (175°C). Carefully drop a few doughnuts into the hot oil, making sure not to overcrowd the pot. Fry them for about 1-2 minutes on each side, or until they are golden brown.
Once cooked, use a slotted spoon to remove the doughnuts from the oil. Place them on a paper towel-lined plate to drain any excess oil. Repeat this process until all doughnuts are fried. The aroma will be heavenly!
Step 5: Glazing the Doughnuts
Finally, it’s time to glaze your doughnuts! In a medium bowl, whisk together the powdered sugar, milk, and vanilla extract until smooth. If the glaze is too thick, add a little more milk until you reach your desired consistency.
Dip each warm doughnut into the glaze, making sure to coat it well. Allow any excess glaze to drip off before placing the doughnuts on a wire rack. This will help the glaze set perfectly. And there you have it—your Homemade Krispy Kremes are ready to be enjoyed!
Variations of Homemade Krispy Kremes
Flavor Variations for Homemade Krispy Kremes
While the classic glazed version of Homemade Krispy Kremes is undeniably delicious, there are many ways to add a twist to your doughnuts. Here are some fun flavor variations to try:
- Chocolate Krispy Kremes: Add ¼ cup of cocoa powder to the dry ingredients for a rich chocolate flavor. You can also dip the finished doughnuts in chocolate glaze for an extra treat!
- Cinnamon Sugar Krispy Kremes: Before glazing, roll the warm doughnuts in a mixture of cinnamon and granulated sugar. This adds a delightful sweetness and a hint of spice.
- Maple Krispy Kremes: Substitute maple extract for vanilla in the dough and glaze. This gives your doughnuts a warm, comforting flavor that’s perfect for fall.
- Fruit-Flavored Krispy Kremes: Mix in a few tablespoons of fruit puree, like strawberry or raspberry, into the dough for a fruity twist. You can also add fruit zest for an extra burst of flavor.
These variations allow you to experiment and find your favorite flavor combinations. Don’t hesitate to get creative and make these doughnuts your own!
Toppings and Fillings for Homemade Krispy Kremes
In addition to flavor variations, you can also enhance your Homemade Krispy Kremes with delicious toppings and fillings. Here are some ideas to inspire you:
- Sprinkles: After glazing, add colorful sprinkles on top for a festive touch. This is especially fun for birthdays or celebrations!
- Cream Filling: For a filled doughnut, use a piping bag to inject your favorite filling, such as vanilla cream, chocolate ganache, or fruit jam, into the center of the doughnut.
- Nuts: Sprinkle chopped nuts, like pecans or almonds, on top of the glaze for added crunch and flavor.
- Shredded Coconut: For a tropical twist, roll the glazed doughnuts in shredded coconut. This adds a chewy texture and a hint of sweetness.
With these toppings and fillings, you can create a variety of delightful doughnuts that will impress your family and friends. The possibilities are endless, so have fun experimenting!
Cooking Note for Homemade Krispy Kremes
When making Homemade Krispy Kremes, there are a few important cooking notes to keep in mind. These tips will help ensure that your doughnuts turn out perfectly every time.
First, temperature is key. Make sure your oil is at the right temperature, around 350°F (175°C), before frying. If the oil is too hot, the doughnuts will brown too quickly on the outside while remaining raw inside. Conversely, if the oil is not hot enough, the doughnuts will absorb too much oil and become greasy.
Next, be mindful of the dough’s consistency. A soft, pliable dough is essential for fluffy doughnuts. If your dough is too sticky, add a little more flour, but avoid adding too much, as this can make the doughnuts dense.
Also, don’t rush the rising process. Allowing the dough to rise properly is crucial for achieving that light and airy texture. If you’re in a hurry, you can place the dough in a warm oven (turned off) to speed up the rising process. Just be sure to keep an eye on it!
Finally, when glazing your doughnuts, do it while they are still warm. This allows the glaze to adhere better and creates a deliciously sweet coating. If you prefer a thicker glaze, let the first layer set before dipping them again.
By following these cooking notes, you’ll be well on your way to making the best Homemade Krispy Kremes that will delight everyone who tries them!
Serving Suggestions for Homemade Krispy Kremes
Once your Homemade Krispy Kremes are ready, it’s time to think about how to serve them. These delightful doughnuts are perfect for various occasions, and with a little creativity, you can make them even more special. Here are some serving suggestions to consider:
- Breakfast Delight: Serve your doughnuts warm alongside a steaming cup of coffee or tea. They make a perfect breakfast treat that will start your day on a sweet note.
- Brunch Buffet: If you’re hosting a brunch, arrange a platter of assorted Krispy Kremes. Include different flavors and toppings to please all your guests. This colorful display will surely be a hit!
- Snack Time: Keep a batch of these doughnuts on hand for an afternoon snack. Pair them with a glass of milk or a smoothie for a delightful pick-me-up.
- Celebration Treat: For birthdays or special occasions, decorate your doughnuts with festive toppings like sprinkles or edible glitter. You can even write messages on them with icing for a personal touch.
- Ice Cream Sandwich: For a fun twist, slice a doughnut in half and fill it with your favorite ice cream. This creates a delicious dessert that’s sure to impress!
These serving suggestions can elevate your Homemade Krispy Kremes from simple treats to memorable experiences. Whether you’re enjoying them alone or sharing with loved ones, these doughnuts are sure to bring smiles and satisfaction. So, gather around the table and enjoy the sweet moments together!
Tips for Perfect Homemade Krispy Kremes
Creating the perfect Homemade Krispy Kremes is an art that can be mastered with a few helpful tips. These suggestions will guide you in achieving that fluffy texture and delightful flavor that everyone loves. Let’s dive into some essential tips for making your doughnuts truly exceptional!
First, always use fresh yeast. If your yeast is old or expired, it may not activate properly, leading to dense doughnuts. To test if your yeast is still good, mix it with warm water and a bit of sugar. If it bubbles and froths, it’s ready to use!
Next, pay attention to the temperature of your ingredients. Using warm milk and room temperature eggs helps the dough rise better. Cold ingredients can slow down the yeast activity, resulting in less fluffy doughnuts.
When rolling out the dough, aim for an even thickness of about ½ inch. This ensures that your doughnuts cook evenly. If the dough is too thick, they may not cook through, and if too thin, they can become crispy instead of fluffy.
Another important tip is to let the doughnuts cool slightly before glazing. If you glaze them while they are too hot, the glaze may melt and run off. Allow them to cool for a few minutes on a wire rack before dipping them in the glaze.
Lastly, don’t be afraid to experiment! Try different flavorings, fillings, and toppings to find your favorite combinations. The beauty of making Homemade Krispy Kremes is that you can customize them to suit your taste. Enjoy the process and have fun creating your perfect doughnut!
Breakdown of Time for Homemade Krispy Kremes
Prep Time
Preparing your Homemade Krispy Kremes is a delightful process that takes about 20 to 30 minutes. This includes gathering your ingredients, mixing the dough, and letting it rise for the first time. While the dough is rising, you can clean up your kitchen or prepare your frying station. It’s a great time to get everything ready for the next steps!
Cooking Time
The cooking time for your doughnuts is relatively quick. Frying the doughnuts will take about 10 to 15 minutes. This includes frying each batch until they are golden brown and delicious. Remember, you’ll want to fry them in small batches to ensure they cook evenly. The aroma of frying doughnuts will fill your kitchen, making the wait worthwhile!
Total Time
In total, you can expect to spend around 2 to 2.5 hours from start to finish. This includes the time for the dough to rise twice and the actual cooking time. While it may seem like a bit of a commitment, the joy of making and enjoying your Homemade Krispy Kremes is well worth it. Plus, you’ll have a batch of warm, fluffy doughnuts to share with family and friends!
Nutritional Information for Homemade Krispy Kremes
Calories in Homemade Krispy Kremes
When indulging in Homemade Krispy Kremes, it’s good to know what you’re enjoying. Each doughnut contains approximately 200 to 250 calories, depending on the size and the amount of glaze used. This makes them a delightful treat, but it’s wise to enjoy them in moderation. Pairing them with a healthy breakfast or snack can help balance your meal.
Protein Content in Homemade Krispy Kremes
Homemade Krispy Kremes are not a significant source of protein. Each doughnut typically contains about 2 to 3 grams of protein. While they are primarily a sweet treat, you can boost the protein content by serving them with a side of yogurt or a glass of milk. This way, you can enjoy a more balanced snack or breakfast.
Sodium Levels in Homemade Krispy Kremes
The sodium content in Homemade Krispy Kremes is relatively low, with each doughnut containing around 100 to 150 milligrams of sodium. This is a reasonable amount for a sweet treat. However, if you’re watching your sodium intake, consider adjusting the salt in the recipe or enjoying these doughnuts as an occasional indulgence rather than a daily snack.
FAQs about Homemade Krispy Kremes
Can I make Homemade Krispy Kremes in advance?
Yes, you can make Homemade Krispy Kremes in advance! However, it’s best to fry them fresh for the best taste and texture. If you want to prepare ahead, you can make the dough and let it rise. After the first rise, shape the doughnuts and place them on a baking sheet. Cover them with plastic wrap and refrigerate overnight. The next day, let them come to room temperature before frying. This way, you can enjoy fresh doughnuts with minimal effort!
What is the best way to store Homemade Krispy Kremes?
To store your Homemade Krispy Kremes, place them in an airtight container at room temperature. They are best enjoyed fresh, but if you have leftovers, they can last for about 1 to 2 days. Avoid refrigerating them, as this can make them dry. If you want to keep them longer, consider freezing them. Just make sure to wrap each doughnut individually in plastic wrap and then place them in a freezer bag. When you’re ready to enjoy, thaw them at room temperature and glaze them again if desired!
Can I bake instead of fry Homemade Krispy Kremes?
Yes, you can bake Homemade Krispy Kremes if you prefer a healthier option! To do this, preheat your oven to 375°F (190°C). Shape the doughnuts as usual and place them on a baking sheet lined with parchment paper. Bake for about 10 to 12 minutes or until they are lightly golden. While baked doughnuts won’t have the same crispy texture as fried ones, they will still be delicious and fluffy. You can glaze them just like the fried version for that sweet finish!
How can I make Homemade Krispy Kremes healthier?
Making Homemade Krispy Kremes healthier can be done with a few simple adjustments. First, consider using whole wheat flour instead of all-purpose flour for added fiber. You can also reduce the sugar in the dough and glaze to cut down on sweetness. Another option is to bake the doughnuts instead of frying them, as mentioned earlier. Additionally, try adding healthier toppings like fresh fruit or nuts instead of sugary sprinkles. These small changes can help you enjoy your doughnuts while being mindful of your health!
Conclusion on Homemade Krispy Kremes
In conclusion, making Homemade Krispy Kremes is a delightful experience that brings joy to both the cook and those who get to enjoy the treats. With simple ingredients and a bit of patience, you can create fluffy, golden doughnuts that rival any bakery. The sweet aroma that fills your kitchen while frying these doughnuts is just the icing on the cake—or should we say, the glaze on the doughnut!
Whether you stick to the classic glazed version or explore the many flavor variations and toppings, each batch of Homemade Krispy Kremes is a chance to create something special. These doughnuts are perfect for breakfast, brunch, or any occasion where a sweet treat is welcome. Plus, they offer a wonderful opportunity to bond with family and friends as you make them together.
So, gather your ingredients, roll up your sleeves, and dive into the world of homemade doughnuts. With the tips and recipes provided, you’re well on your way to mastering the art of Krispy Kremes. Enjoy every bite, and remember, the best part of making these doughnuts is sharing them with loved ones. Happy frying!
Relevant Recipes Link:
Craving more delightful and easy-to-make recipes? Dive into these fantastic options:
- Homemade English Muffins: A Tasty Breakfast Choice
- Green Rice Krispie Treats: Fun and Festive Snack
- Homemade Popcorn Chicken: A Flavorful Snack Twist
For more amazing recipes and culinary inspiration, follow us on Pinterest!