Introduction to Homemade Cappuccino Ice Cream
The Allure of Homemade Ice Cream
There’s something magical about homemade ice cream. It’s not just a dessert; it’s an experience. When you make ice cream at home, you control every ingredient. You can choose fresh, high-quality items that suit your taste. Plus, the process of making ice cream can be a fun activity for the whole family. Imagine the joy of churning your own creamy creation! The excitement builds as you wait for it to freeze, and the best part? You get to enjoy it right after. Homemade ice cream is a treat that brings smiles and satisfaction.
Why Choose Homemade Cappuccino Ice Cream?
Homemade cappuccino ice cream is a delightful twist on a classic favorite. It combines the rich flavors of espresso with the sweetness of chocolate, creating a perfect balance. This recipe is not only easy to follow but also allows you to customize it to your liking. Want it sweeter? Add more sugar! Prefer a stronger coffee flavor? Just increase the espresso. The possibilities are endless! Plus, making your own ice cream means you can avoid artificial flavors and preservatives found in store-bought versions. So, why not indulge in a scoop of homemade cappuccino ice cream? It’s a delicious way to satisfy your coffee cravings!
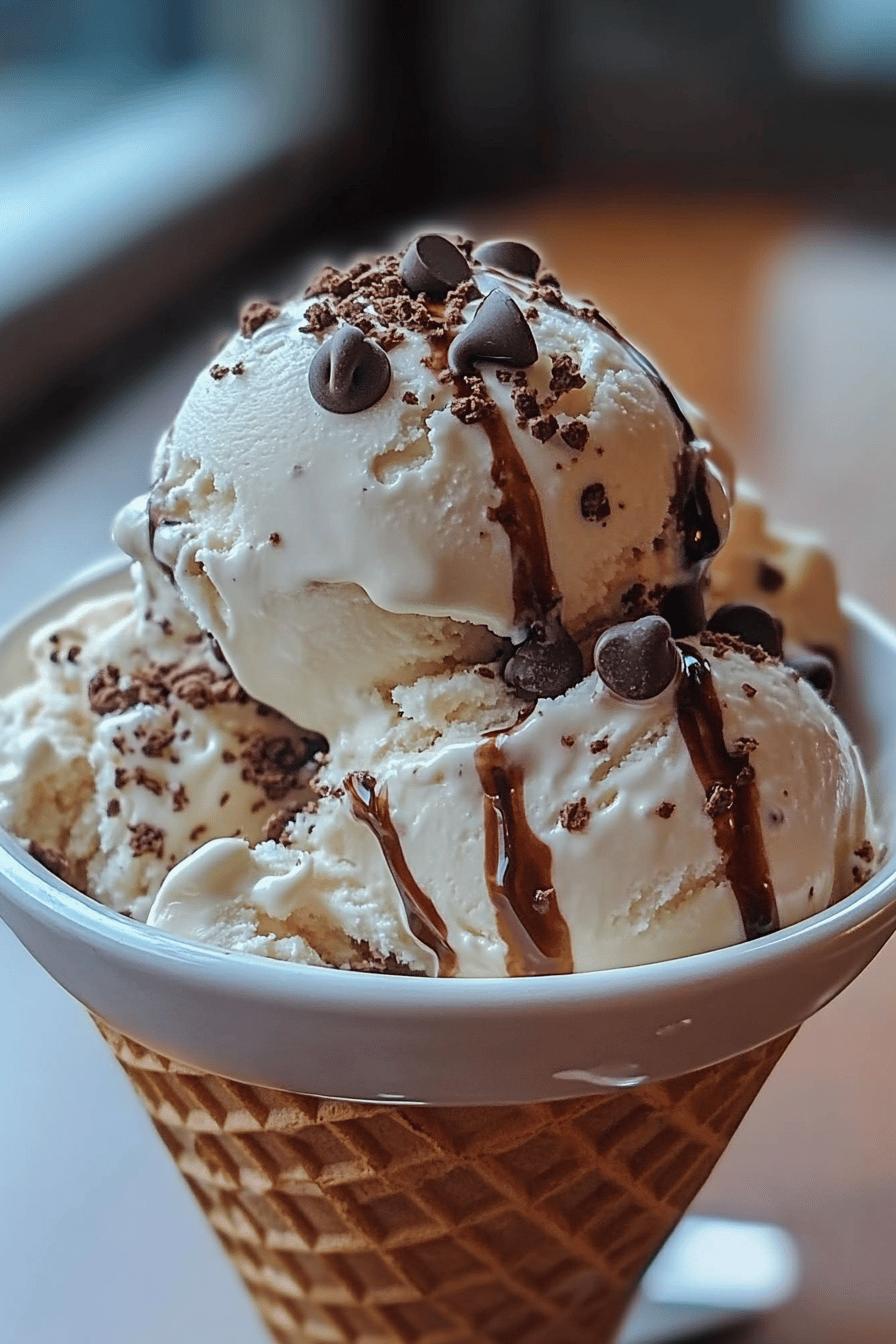
Ingredients for Homemade Cappuccino Ice Cream
To create your own delicious homemade cappuccino ice cream, you’ll need a few simple ingredients. Each one plays a vital role in achieving that creamy texture and rich flavor. Here’s what you’ll need:
- 2 cups heavy cream: This gives the ice cream its rich and creamy texture.
- 1 cup whole milk: Whole milk adds creaminess while keeping the ice cream smooth.
- 1 cup granulated sugar: Sugar sweetens the mixture and enhances the flavors.
- 1 tablespoon pure vanilla extract: Vanilla adds a lovely depth of flavor.
- 1 cup brewed espresso: Freshly brewed espresso provides that bold coffee flavor.
- ½ cup chocolate chips: Chocolate chips add a delightful crunch and sweetness.
- Pinch of salt: A little salt balances the sweetness and enhances the flavors.
These ingredients are easy to find and can be adjusted based on your preferences. For instance, if you want a stronger coffee flavor, feel free to add more espresso. If you prefer a sweeter treat, increase the sugar. The beauty of making homemade cappuccino ice cream is that you can tailor it to your taste!
Step-by-Step Preparation of Homemade Cappuccino Ice Cream
Step 1: Brew the Espresso
To start your homemade cappuccino ice cream, you need to brew the espresso. Use fresh coffee beans for the best flavor. If you have an espresso machine, that’s perfect! Simply follow the machine’s instructions to brew one cup of espresso. If you don’t have an espresso machine, you can use a stovetop espresso maker or a French press. Just make sure the coffee is strong and rich. Once brewed, let it cool to room temperature. This step is crucial because hot espresso can melt your ice cream base!
Step 2: Prepare the Ice Cream Base
Next, it’s time to prepare the ice cream base. In a large mixing bowl, combine the heavy cream, whole milk, and granulated sugar. Whisk these ingredients together until the sugar is fully dissolved. This may take a minute or two. Then, add the pure vanilla extract and a pinch of salt. The salt enhances the flavors, making your ice cream even more delicious. Mix everything well until you have a smooth and creamy base. This is the foundation of your homemade cappuccino ice cream!
Step 3: Combine Espresso and Chocolate
Now, it’s time to bring in the star ingredients: espresso and chocolate! Pour the cooled espresso into the ice cream base you just prepared. Stir gently to combine the flavors. Next, add the chocolate chips. They will add a delightful crunch and sweetness to your ice cream. Make sure everything is well mixed. The rich coffee and chocolate flavors will create a heavenly combination that you won’t be able to resist!
Step 4: Churn the Mixture
Once your mixture is ready, it’s time to churn it! If you have an ice cream maker, pour the mixture into the machine and churn according to the manufacturer’s instructions. This usually takes about 20 to 30 minutes. If you don’t have an ice cream maker, don’t worry! You can still make this ice cream. Just pour the mixture into a shallow dish and place it in the freezer. Every 30 minutes, stir the mixture with a fork to break up any ice crystals. Repeat this process until the ice cream is thick and creamy.
Step 5: Freeze the Ice Cream
After churning, transfer your ice cream to an airtight container. Smooth the top with a spatula and cover it tightly. Place the container in the freezer for at least 4 hours, or until the ice cream is firm. This final freezing step is essential for achieving that perfect scoopable texture. Once it’s ready, you can enjoy your homemade cappuccino ice cream! Just scoop it into bowls or cones and savor the deliciousness!
Variations of Homemade Cappuccino Ice Cream
Adding Flavor Enhancements
While the classic homemade cappuccino ice cream is already a treat, you can easily enhance its flavor. Consider adding a splash of coffee liqueur for an adult twist. This addition will deepen the coffee flavor and add a hint of sweetness. If you love spices, try incorporating a dash of cinnamon or nutmeg. These spices can bring warmth and complexity to your ice cream. For a richer chocolate experience, you can use dark chocolate chips instead of regular ones. This will give your ice cream a more intense chocolate flavor, making it even more decadent!
Alternative Ingredients for Dietary Needs
Making homemade cappuccino ice cream can be inclusive for everyone, even those with dietary restrictions. If you’re looking for a dairy-free option, substitute the heavy cream and whole milk with coconut cream and almond milk. This will still provide a creamy texture while being suitable for lactose-intolerant individuals. For a lower-sugar version, consider using a sugar substitute like stevia or erythritol. These alternatives can help you enjoy your ice cream without the extra calories. Lastly, if you want to make it vegan, ensure that all your ingredients, including chocolate chips, are plant-based. With these variations, everyone can enjoy a scoop of this delightful treat!
Cooking Note for Homemade Cappuccino Ice Cream
When making homemade cappuccino ice cream, a few cooking notes can help ensure your success. First, always use fresh ingredients. Fresh cream and milk will enhance the flavor and texture of your ice cream. Additionally, using high-quality espresso will make a significant difference in taste. If possible, grind your coffee beans just before brewing for the best flavor.
Another important tip is to chill your ice cream base before churning. This step helps the mixture freeze faster, resulting in a smoother texture. You can chill the base in the refrigerator for about 1 to 2 hours before churning. If you’re short on time, placing it in the freezer for 30 minutes can also work.
Lastly, remember that homemade ice cream can be softer than store-bought versions. This is because it lacks stabilizers and preservatives. If your ice cream is too soft after churning, give it extra time in the freezer. Allow it to firm up for a few hours before serving. With these cooking notes in mind, you’ll be well on your way to creating a delicious batch of homemade cappuccino ice cream!
Serving Suggestions for Homemade Cappuccino Ice Cream
Creative Toppings and Pairings
When it comes to serving your homemade cappuccino ice cream, the fun doesn’t stop at just the ice cream itself! You can elevate your dessert with a variety of creative toppings and pairings. Here are some delightful ideas:
- Whipped Cream: A dollop of freshly whipped cream adds a light and airy touch. You can even sprinkle some cocoa powder or cinnamon on top for extra flavor.
- Chocolate Syrup: Drizzling warm chocolate syrup over your ice cream creates a delicious contrast. The rich chocolate pairs perfectly with the coffee flavor.
- Espresso Beans: For a crunchy texture, consider adding chocolate-covered espresso beans. They provide a delightful bite and enhance the coffee experience.
- Caramel Sauce: A drizzle of caramel sauce can add a sweet and buttery flavor that complements the coffee and chocolate beautifully.
- Crushed Nuts: Chopped almonds or hazelnuts can add a nice crunch. They also bring a nutty flavor that pairs well with the ice cream.
Feel free to mix and match these toppings to create your perfect scoop! You can also serve your cappuccino ice cream alongside a slice of chocolate cake or a warm brownie for a decadent dessert experience.
Presentation Ideas for Serving
Presentation is key when serving homemade cappuccino ice cream. Here are some simple yet effective ideas to make your dessert look as good as it tastes:
- Ice Cream Cones: Serve your ice cream in waffle cones for a classic touch. You can dip the edges in melted chocolate and sprinkle with nuts for added flair.
- Elegant Bowls: Use clear glass bowls to showcase the beautiful swirls of chocolate and coffee in your ice cream. Add a sprig of mint on top for a pop of color.
- Layered Parfaits: Create a layered parfait by alternating layers of cappuccino ice cream with whipped cream and chocolate syrup in a tall glass. This not only looks stunning but also adds different textures to each bite.
- Garnish with Fresh Fruit: Fresh berries, like raspberries or strawberries, can add a refreshing contrast to the rich flavors of the ice cream. They also add a splash of color to your presentation.
With these serving suggestions, your homemade cappuccino ice cream will not only taste amazing but also look irresistible. Enjoy sharing this delightful treat with family and friends!
Tips for Perfecting Your Homemade Cappuccino Ice Cream
Creating the perfect homemade cappuccino ice cream is an art. With a few helpful tips, you can elevate your ice cream-making skills and ensure a delightful treat every time. Here are some essential tips to keep in mind:
- Use Quality Ingredients: The flavor of your ice cream starts with the ingredients. Always opt for high-quality heavy cream, whole milk, and fresh espresso. The better the ingredients, the richer and more delicious your ice cream will be.
- Chill Your Base: Before churning, chill your ice cream base in the refrigerator for at least an hour. This helps it freeze faster and results in a smoother texture. A cold base also helps to incorporate air more effectively during churning.
- Don’t Over-Churn: If you’re using an ice cream maker, keep an eye on the mixture. Over-churning can lead to a grainy texture. Stop churning once the ice cream reaches a soft-serve consistency.
- Let It Firm Up: After churning, transfer your ice cream to an airtight container and let it freeze for several hours. This step is crucial for achieving that perfect scoopable texture. If it’s too soft, it won’t hold its shape when served.
- Experiment with Flavors: Don’t hesitate to get creative! Try adding different flavorings, like almond extract or a hint of orange zest, to give your ice cream a unique twist. You can also mix in other ingredients like crushed cookies or caramel swirls for added texture.
- Store Properly: To keep your ice cream fresh, store it in an airtight container. Press a piece of parchment paper directly onto the surface of the ice cream before sealing. This helps prevent ice crystals from forming.
- Serve at the Right Temperature: For the best texture and flavor, let your ice cream sit at room temperature for about 5-10 minutes before serving. This allows it to soften slightly, making it easier to scoop.
By following these tips, you’ll be well on your way to mastering the art of homemade cappuccino ice cream. Each scoop will be a delightful blend of creamy, coffee goodness that you and your loved ones will enjoy!
Breakdown of Time for Homemade Cappuccino Ice Cream
Prep Time
Preparing your homemade cappuccino ice cream is a breeze! The prep time mainly involves gathering your ingredients and mixing them together. You can expect to spend about 15 to 20 minutes on this step. This includes brewing the espresso, measuring out the ingredients, and whisking everything into a smooth base. It’s a quick and enjoyable process that sets the stage for your delicious treat!
Cooking Time
When it comes to cooking time, the main focus is on churning the ice cream mixture. If you’re using an ice cream maker, this will take around 20 to 30 minutes. During this time, the mixture transforms into a creamy delight as it freezes and incorporates air. If you’re opting for the manual method, you’ll need to stir the mixture every 30 minutes for about 2 to 3 hours until it reaches the desired consistency. So, while the active cooking time is short, the waiting period is essential for achieving that perfect texture!
Total Time
In total, you should plan for about 5 to 6 hours to make your homemade cappuccino ice cream. This includes the prep time, cooking time, and the final freezing period. After churning, it’s best to let the ice cream firm up in the freezer for at least 4 hours. This ensures that your ice cream is scoopable and ready to serve. So, while the process may take some time, the end result is well worth the wait!
Nutritional Information for Homemade Cappuccino Ice Cream
Calories
When indulging in homemade cappuccino ice cream, it’s good to know the calorie content. A typical serving size of about half a cup contains approximately 250 to 300 calories. This can vary based on the specific ingredients you use, such as the type of milk or the amount of sugar. While it’s a delightful treat, enjoying it in moderation is key to maintaining a balanced diet. Remember, the rich flavors come with a few extra calories, but they are well worth the indulgence!
Protein
Protein is an essential nutrient, and homemade cappuccino ice cream provides a decent amount. Each serving typically contains around 4 to 5 grams of protein. This comes mainly from the heavy cream and whole milk used in the recipe. While it’s not a primary source of protein, it does contribute to your daily intake. Pairing your ice cream with a protein-rich snack, like nuts, can help balance your dessert and make it more satisfying!
Sodium
Sodium content is another important factor to consider. A serving of homemade cappuccino ice cream usually contains about 50 to 70 milligrams of sodium. This is relatively low, especially compared to many store-bought ice creams that can have added preservatives and sodium. The pinch of salt in the recipe enhances the flavors without significantly increasing the sodium content. So, you can enjoy your treat without worrying too much about sodium levels!
FAQs about Homemade Cappuccino Ice Cream
Can I use decaf espresso for this recipe?
Absolutely! If you prefer to enjoy the flavors of cappuccino ice cream without the caffeine kick, decaf espresso is a great option. It will still provide that rich coffee taste without keeping you up at night. Just brew your decaf espresso as you normally would, and follow the recipe as directed. You’ll still get to savor the deliciousness of homemade cappuccino ice cream!
How long can I store homemade ice cream?
Homemade cappuccino ice cream can be stored in the freezer for about 2 to 3 weeks. To keep it fresh, make sure to store it in an airtight container. Press a piece of parchment paper directly onto the surface of the ice cream before sealing the container. This helps prevent ice crystals from forming and keeps your ice cream creamy. After a few weeks, the texture may change, but it will still be safe to eat!
What can I substitute for heavy cream?
If you’re looking for a substitute for heavy cream, there are several options available. For a lighter version, you can use half-and-half or whole milk. However, keep in mind that this may result in a less creamy texture. If you need a dairy-free option, coconut cream is an excellent choice. It provides a rich and creamy consistency while being suitable for those with lactose intolerance. Just make sure to use full-fat coconut cream for the best results!
Is it possible to make this ice cream without an ice cream maker?
Yes, you can definitely make homemade cappuccino ice cream without an ice cream maker! Simply pour your ice cream mixture into a shallow dish and place it in the freezer. Every 30 minutes, take it out and stir vigorously with a fork to break up any ice crystals. Repeat this process for about 2 to 3 hours until the ice cream reaches a creamy consistency. While it may take a bit more effort, you’ll still end up with a delicious frozen treat!
Conclusion on Homemade Cappuccino Ice Cream
Final Thoughts on Enjoying Your Creation
Making homemade cappuccino ice cream is not just about satisfying your sweet tooth; it’s about creating a delightful experience. From the moment you brew the espresso to the first scoop of your creamy creation, each step is filled with joy and anticipation. This recipe allows you to explore your creativity, whether by adding unique flavors or experimenting with toppings. The best part? You can share this delicious treat with family and friends, making it a perfect addition to gatherings or cozy nights in.
As you enjoy your homemade cappuccino ice cream, take a moment to appreciate the rich flavors and the effort you put into making it. Each bite is a reminder of the simple pleasures in life. So, whether it’s a hot summer day or a chilly winter evening, this ice cream is sure to bring warmth and happiness. Don’t forget to try out the variations and serving suggestions to make it your own. Happy scooping!
Relevant Recipes Link:
Looking to satisfy your sweet tooth with homemade ice cream? Try these delectable recipes:
- Homemade Peach Ice Cream: A Summer Delight
- Homemade Baileys Ice Cream: A Must-Try Treat
- Homemade Vanilla Oreo Ice Cream: A Must-Try Treat
For more fantastic recipes and food inspiration, follow us on Pinterest!