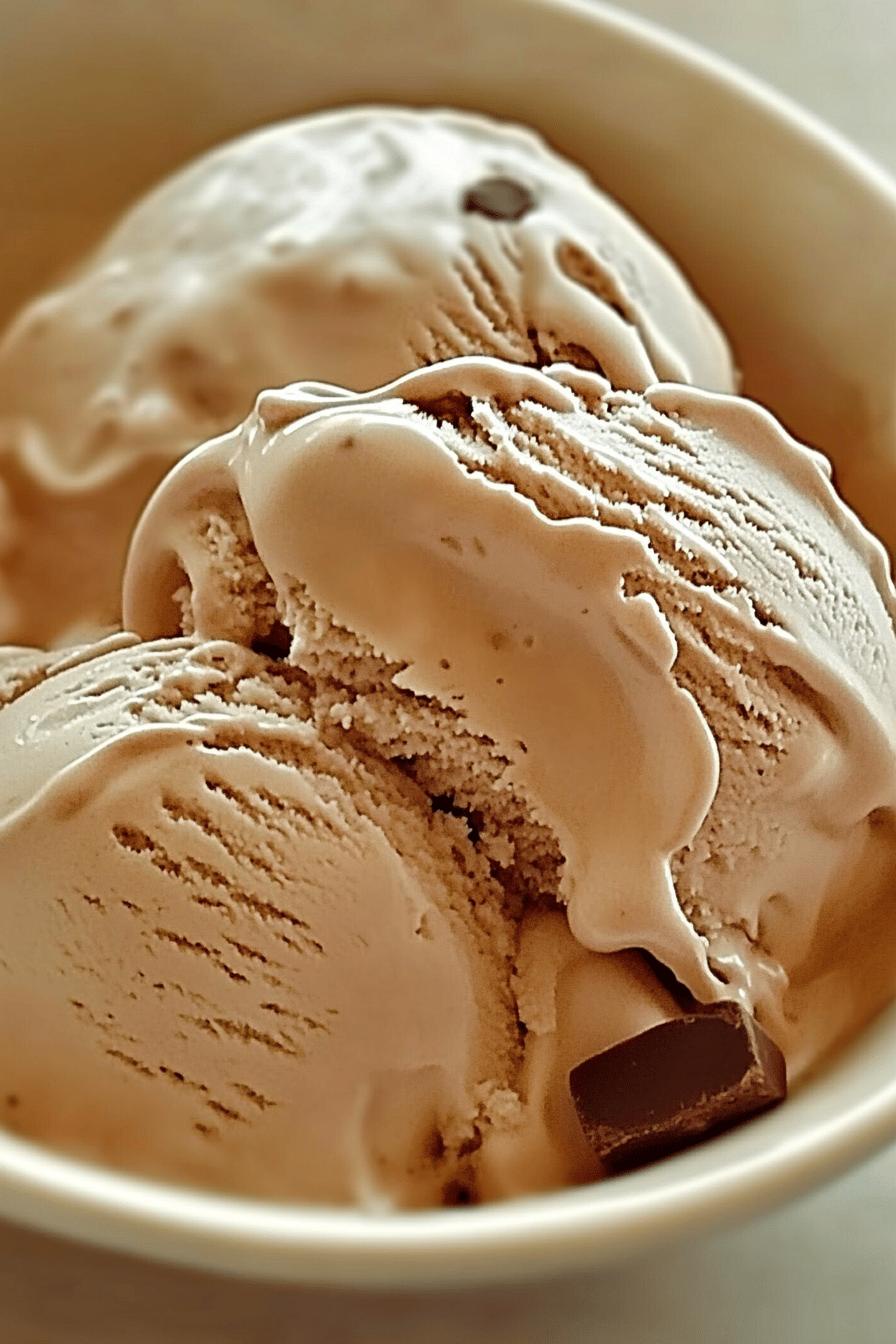
Introduction to Caffeine Cascade Dream Ice Cream
Are you ready to dive into a world of creamy delight? The Caffeine Cascade Dream Ice Cream is not just any dessert; it’s a celebration of coffee in its most delicious form. This ice cream combines the rich, bold flavors of freshly brewed coffee with a smooth, creamy texture that melts in your mouth. Whether you’re enjoying it on a sunny afternoon or as a sweet treat after dinner, this ice cream is sure to impress.
What Makes Caffeine Cascade Dream Ice Cream Special?
What sets this ice cream apart? It’s all about the ingredients and the love that goes into making it. The base is crafted from high-quality cream and milk, which gives it that luxurious feel. But the star of the show is the coffee. Using freshly brewed coffee ensures that every scoop is packed with flavor. Plus, the process of making this ice cream is simple, making it accessible for everyone, even those who are new to ice cream making.
The Perfect Treat for Coffee Lovers
If you’re a coffee enthusiast, this ice cream is your dream come true. Imagine the rich aroma of coffee combined with the sweetness of ice cream. It’s a match made in heaven! Each bite offers a delightful balance of flavors that will satisfy your coffee cravings. Whether you enjoy it plain or topped with your favorite goodies, this ice cream is a must-try for anyone who loves coffee. So, grab your ingredients and get ready to whip up a batch of this dreamy delight!
Ingredients for Caffeine Cascade Dream Ice Cream
Creating the Caffeine Cascade Dream Ice Cream is a breeze, especially when you have the right ingredients on hand. Here’s what you’ll need to make this delightful frozen treat:
- 2 cups of heavy cream: This gives the ice cream its rich and creamy texture.
- 1 cup of whole milk: Whole milk adds a smoothness that balances the cream.
- 1 cup of freshly brewed coffee: Use your favorite coffee blend for the best flavor.
- 3/4 cup of granulated sugar: This sweetens the mixture perfectly.
- 1 teaspoon of vanilla extract: A hint of vanilla enhances the overall flavor.
- Pinch of salt: Just a little salt brings out the sweetness.
These ingredients come together to create a luscious ice cream that’s bursting with coffee flavor. Feel free to experiment with different types of coffee or even add a splash of coffee liqueur for an adult twist. The possibilities are endless!
Step-by-Step Preparation of Caffeine Cascade Dream Ice Cream
Now that you have all your ingredients ready, it’s time to bring your Caffeine Cascade Dream Ice Cream to life! Follow these simple steps to create a deliciously creamy coffee ice cream that will leave you wanting more.
Step 1: Brew the Coffee
Start by brewing your favorite coffee. You can use a coffee maker, French press, or any method you prefer. Aim for a strong brew, as this will enhance the flavor of your ice cream. Once brewed, let the coffee cool to room temperature. This step is crucial because hot coffee can affect the texture of your ice cream base.
Step 2: Mix the Base Ingredients
In a large mixing bowl, combine the heavy cream, whole milk, granulated sugar, vanilla extract, and a pinch of salt. Whisk these ingredients together until the sugar is fully dissolved. This mixture will serve as the creamy base for your ice cream. Make sure everything is well combined for a smooth texture.
Step 3: Combine Coffee with the Mixture
Once your coffee has cooled, slowly pour it into the cream mixture. Stir gently to combine. This is where the magic happens! The rich coffee flavor will blend beautifully with the creamy base, creating a delightful mixture. Taste it at this stage; you can adjust the sweetness if needed by adding a bit more sugar.
Step 4: Churn the Ice Cream
Now it’s time to churn! Pour the combined mixture into your ice cream maker. Follow the manufacturer’s instructions for churning time. Typically, it takes about 20 to 25 minutes for the ice cream to reach a soft-serve consistency. Keep an eye on it, as you want it to be creamy and fluffy.
Step 5: Freeze the Ice Cream
After churning, transfer the ice cream to an airtight container. Smooth the top with a spatula and seal it tightly. Place the container in the freezer for at least 4 hours, or until the ice cream is firm. This final freezing step is essential for achieving that perfect scoopable texture.
And there you have it! Your Caffeine Cascade Dream Ice Cream is ready to be enjoyed. Scoop it into bowls or cones, and get ready to indulge in a creamy coffee dream!
Variations of Caffeine Cascade Dream Ice Cream
While the Caffeine Cascade Dream Ice Cream is already a delightful treat, there are many ways to customize it to suit your taste. Let’s explore some fun variations that can elevate your ice cream experience even further!
Adding Flavor Enhancements
Why not take your ice cream to the next level? Here are some flavor enhancements you can try:
- Chocolate Swirl: Add a rich chocolate sauce during the churning process. This creates a beautiful marbled effect and adds a delicious chocolatey flavor.
- Nutty Delight: Stir in some chopped nuts, like almonds or hazelnuts, for a crunchy texture. Toasting the nuts beforehand will enhance their flavor.
- Spiced Coffee: Add a pinch of cinnamon or nutmeg to the mixture for a warm, spiced flavor. This is perfect for those cozy evenings!
- Minty Fresh: Incorporate a few drops of peppermint extract for a refreshing twist. This pairs wonderfully with the coffee flavor.
Feel free to mix and match these enhancements to create your own unique version of this ice cream. The possibilities are endless, and each variation brings a new taste adventure!
Dairy-Free Options
If you’re looking for a dairy-free version of the Caffeine Cascade Dream Ice Cream, you’re in luck! Here’s how to make it without dairy:
- Coconut Milk Base: Substitute the heavy cream and whole milk with full-fat coconut milk. This will give your ice cream a creamy texture and a hint of coconut flavor.
- Almond Milk Alternative: Use unsweetened almond milk for a lighter option. You may want to add a bit more sugar to balance the flavors.
- Cashew Cream: Blend soaked cashews with water to create a creamy base. This adds a rich texture and nutty flavor to your ice cream.
These dairy-free options ensure that everyone can enjoy the deliciousness of Caffeine Cascade Dream Ice Cream. So, whether you’re lactose intolerant or simply prefer a plant-based treat, you can still indulge in this coffee-infused delight!
Cooking Note for Caffeine Cascade Dream Ice Cream
When making the Caffeine Cascade Dream Ice Cream, a few cooking notes can help ensure your ice cream turns out perfectly every time. Here are some tips to keep in mind:
- Quality Ingredients Matter: Always use high-quality coffee and fresh dairy products. The flavor of your ice cream will greatly depend on the quality of the ingredients you choose.
- Chill Your Equipment: For the best results, chill your ice cream maker bowl in the freezer for a few hours before use. This helps the ice cream freeze faster, resulting in a creamier texture.
- Don’t Rush the Cooling Process: Allow your brewed coffee to cool completely before mixing it with the other ingredients. Hot coffee can cause the cream to curdle, affecting the final texture.
- Adjust Sweetness to Taste: Everyone has different preferences when it comes to sweetness. Feel free to taste the mixture before churning and adjust the sugar as needed.
- Storage Tips: Store your ice cream in an airtight container to prevent ice crystals from forming. This keeps your ice cream smooth and creamy for longer.
By following these cooking notes, you’ll be well on your way to creating a delightful batch of Caffeine Cascade Dream Ice Cream. Enjoy the process and savor the delicious results!
Serving Suggestions for Caffeine Cascade Dream Ice Cream
Now that you’ve made your Caffeine Cascade Dream Ice Cream, it’s time to think about how to serve it! This delicious treat can be enjoyed in many ways. Let’s explore some delightful serving suggestions that will make your ice cream experience even more enjoyable.
Pairing with Toppings
Toppings can elevate your ice cream to a whole new level. Here are some tasty options to consider:
- Whipped Cream: A dollop of freshly whipped cream adds a light and airy touch. It’s a classic choice that never disappoints!
- Chocolate Shavings: Sprinkle some chocolate shavings on top for a rich, decadent finish. Dark chocolate pairs beautifully with coffee.
- Caramel Sauce: Drizzle warm caramel sauce over your ice cream for a sweet and buttery flavor. This combination is simply irresistible!
- Chopped Nuts: Add some crunch with chopped nuts like walnuts or pecans. They provide a delightful texture contrast to the creamy ice cream.
- Fresh Berries: Top your ice cream with fresh strawberries, raspberries, or blueberries. The tartness of the berries balances the sweetness perfectly.
Feel free to mix and match these toppings to create your own signature scoop. The right toppings can make your Caffeine Cascade Dream Ice Cream even more special!
Creative Serving Ideas
Serving your ice cream can be just as fun as making it! Here are some creative ideas to impress your friends and family:
- Ice Cream Sundae: Create a classic sundae by layering your ice cream with toppings in a tall glass. Add whipped cream, nuts, and a cherry on top for a fun presentation.
- Affogato Style: Pour a shot of hot espresso over a scoop of your ice cream. This Italian treat combines hot and cold for a delightful experience.
- Ice Cream Sandwich: Use two cookies to create an ice cream sandwich. Chocolate chip or oatmeal cookies work great for this fun treat!
- Milkshake: Blend a scoop of your ice cream with milk for a creamy milkshake. This is a perfect way to enjoy your ice cream on a hot day.
- Layered Parfait: Layer your ice cream with granola and fruit in a glass for a beautiful parfait. This makes for a great breakfast or brunch option!
These creative serving ideas will not only make your Caffeine Cascade Dream Ice Cream look appealing but also enhance the overall flavor experience. Enjoy experimenting with different presentations and toppings!
Tips for Making the Best Caffeine Cascade Dream Ice Cream
Creating the perfect Caffeine Cascade Dream Ice Cream is all about attention to detail. Here are some helpful tips to ensure your ice cream turns out creamy, flavorful, and utterly delightful:
- Use Fresh Coffee: The flavor of your ice cream heavily relies on the coffee you use. Opt for freshly brewed coffee from high-quality beans. This will enhance the overall taste and aroma of your ice cream.
- Chill Your Ingredients: For the best results, chill your cream and milk before mixing. Cold ingredients help the ice cream freeze faster, resulting in a smoother texture.
- Don’t Over-Churn: Keep an eye on the churning process. Over-churning can lead to a grainy texture. Stop churning once the ice cream reaches a soft-serve consistency.
- Let It Rest: After churning, let your ice cream sit at room temperature for about 5-10 minutes before serving. This makes it easier to scoop and enhances the flavor.
- Experiment with Sweetness: Everyone has different preferences for sweetness. Taste your mixture before freezing and adjust the sugar to your liking. You can always add more, but it’s hard to take it out!
- Store Properly: To keep your ice cream fresh, store it in an airtight container. Press a piece of plastic wrap directly onto the surface of the ice cream before sealing the lid. This helps prevent ice crystals from forming.
- Try Infusions: For a unique twist, consider infusing your cream with flavors like vanilla beans or spices before mixing. This adds depth to your ice cream and makes it even more special.
By following these tips, you’ll be well on your way to making the best Caffeine Cascade Dream Ice Cream possible. Enjoy the process and savor every delicious scoop!
Breakdown of Time for Caffeine Cascade Dream Ice Cream
Understanding the time needed to make your Caffeine Cascade Dream Ice Cream can help you plan better. Here’s a simple breakdown of the time involved in each step of the process:
Prep Time
The prep time for this delightful ice cream is about 15 minutes. This includes brewing your coffee and mixing all the base ingredients together. Make sure to allow some time for the coffee to cool down before combining it with the cream mixture. This step is crucial for achieving the right texture.
Cooking Time
Cooking time, or rather churning time, takes approximately 20 to 25 minutes. This is when your ice cream maker works its magic, transforming your mixture into a creamy delight. Keep an eye on it to ensure it reaches that perfect soft-serve consistency.
Total Time
In total, you should expect to spend around 4 hours and 40 minutes from start to finish. This includes the prep time, cooking time, and the necessary freezing time of at least 4 hours. While the waiting can be tough, the end result is well worth it!
So, gather your ingredients and get ready to enjoy the deliciousness of Caffeine Cascade Dream Ice Cream! With just a little bit of time and effort, you’ll have a refreshing treat that’s perfect for any coffee lover.
Nutritional Information for Caffeine Cascade Dream Ice Cream
Understanding the nutritional content of your Caffeine Cascade Dream Ice Cream can help you enjoy it guilt-free. Here’s a breakdown of the key nutritional components per serving (approximately 1/2 cup):
Calories
Each serving of this delightful ice cream contains about 250 calories. This makes it a rich treat, perfect for satisfying your sweet tooth without overindulging. The combination of cream and sugar contributes to the calorie count, but the joy it brings is worth every bite!
Protein
In terms of protein, you can expect around 4 grams per serving. The protein comes mainly from the milk and cream used in the recipe. While it’s not a high-protein dessert, it does provide a small boost, making it a more balanced option compared to other sugary treats.
Sodium
The sodium content in each serving is approximately 50 milligrams. This is relatively low, especially for a dessert, making it a suitable choice for those watching their sodium intake. The pinch of salt added to the mixture enhances the flavors without significantly increasing the sodium levels.
Overall, the Caffeine Cascade Dream Ice Cream is a delicious indulgence that can fit into a balanced diet. Enjoy it as an occasional treat, and savor the rich flavors and creamy texture that make it so special!
FAQs about Caffeine Cascade Dream Ice Cream
Can I use decaf coffee for this recipe?
Absolutely! If you prefer to enjoy the flavors of coffee without the caffeine kick, decaf coffee is a great option. The taste will still be rich and satisfying, making your Caffeine Cascade Dream Ice Cream just as delightful. Feel free to use your favorite decaf blend to create this creamy treat!
How long can I store Caffeine Cascade Dream Ice Cream?
Your homemade Caffeine Cascade Dream Ice Cream can be stored in the freezer for up to two weeks. To keep it fresh, make sure to store it in an airtight container. Pressing plastic wrap directly onto the surface of the ice cream before sealing will help prevent ice crystals from forming. This way, you can enjoy your delicious treat for days to come!
Can I make this ice cream without an ice cream maker?
Yes, you can! If you don’t have an ice cream maker, you can still make Caffeine Cascade Dream Ice Cream using a simple method. After mixing your ingredients, pour the mixture into a shallow dish and place it in the freezer. Every 30 minutes, stir the mixture with a fork to break up any ice crystals. Repeat this process for about 3-4 hours until the ice cream reaches a creamy consistency. It may take a bit longer, but the results will be just as delicious!
What are some good toppings for Caffeine Cascade Dream Ice Cream?
Toppings can really enhance your ice cream experience! Here are some tasty options to consider:
- Whipped Cream: A light and fluffy topping that adds a classic touch.
- Chocolate Syrup: Drizzle some chocolate syrup for a rich, sweet contrast.
- Chopped Nuts: Add some crunch with walnuts or almonds for texture.
- Caramel Sauce: A drizzle of caramel brings a buttery sweetness that pairs perfectly with coffee.
- Fresh Fruit: Top with berries or banana slices for a refreshing twist.
Feel free to mix and match these toppings to create your own perfect scoop of Caffeine Cascade Dream Ice Cream!
Conclusion: Enjoying Your Caffeine Cascade Dream Ice Cream
Now that you’ve crafted your very own Caffeine Cascade Dream Ice Cream, it’s time to sit back, relax, and enjoy the fruits of your labor. This delightful treat is not just about satisfying your sweet tooth; it’s an experience that brings joy and comfort. Each scoop is a celebration of rich coffee flavor and creamy texture, perfect for any occasion.
Whether you’re enjoying it on a hot summer day or serving it at a gathering with friends, this ice cream is sure to impress. The versatility of Caffeine Cascade Dream Ice Cream allows you to customize it with various toppings and flavors, making it a fun dessert for everyone. From whipped cream to chocolate syrup, the options are endless!
As you savor each bite, take a moment to appreciate the simple pleasure of homemade ice cream. It’s a wonderful way to indulge yourself and share a special moment with loved ones. So, grab a bowl, scoop out some of that creamy goodness, and let the flavors transport you to a coffee lover’s paradise.
Remember, the joy of making and enjoying Caffeine Cascade Dream Ice Cream lies in the experience. Don’t hesitate to experiment with different variations and toppings. Each time you make it, you can create a new flavor adventure. So, go ahead and treat yourself to this dreamy delight—you deserve it!
Relevant Recipes Link:
Craving more delectable ice cream treats like the Salted Caramel Swirl Ice Cream? Indulge in these irresistible recipes:
- Salted Caramel Swirl Ice Cream: A Must-Try Treat
- Salted Caramel Swirl Ice Cream: A Summer Delight
- Caramel Chocolate Chunk Ice Cream: A Must-Try
For more delightful recipes and culinary inspiration, follow us on Pinterest!