Introduction to Cherry Pie Bars A Sweet & Buttery Treat!
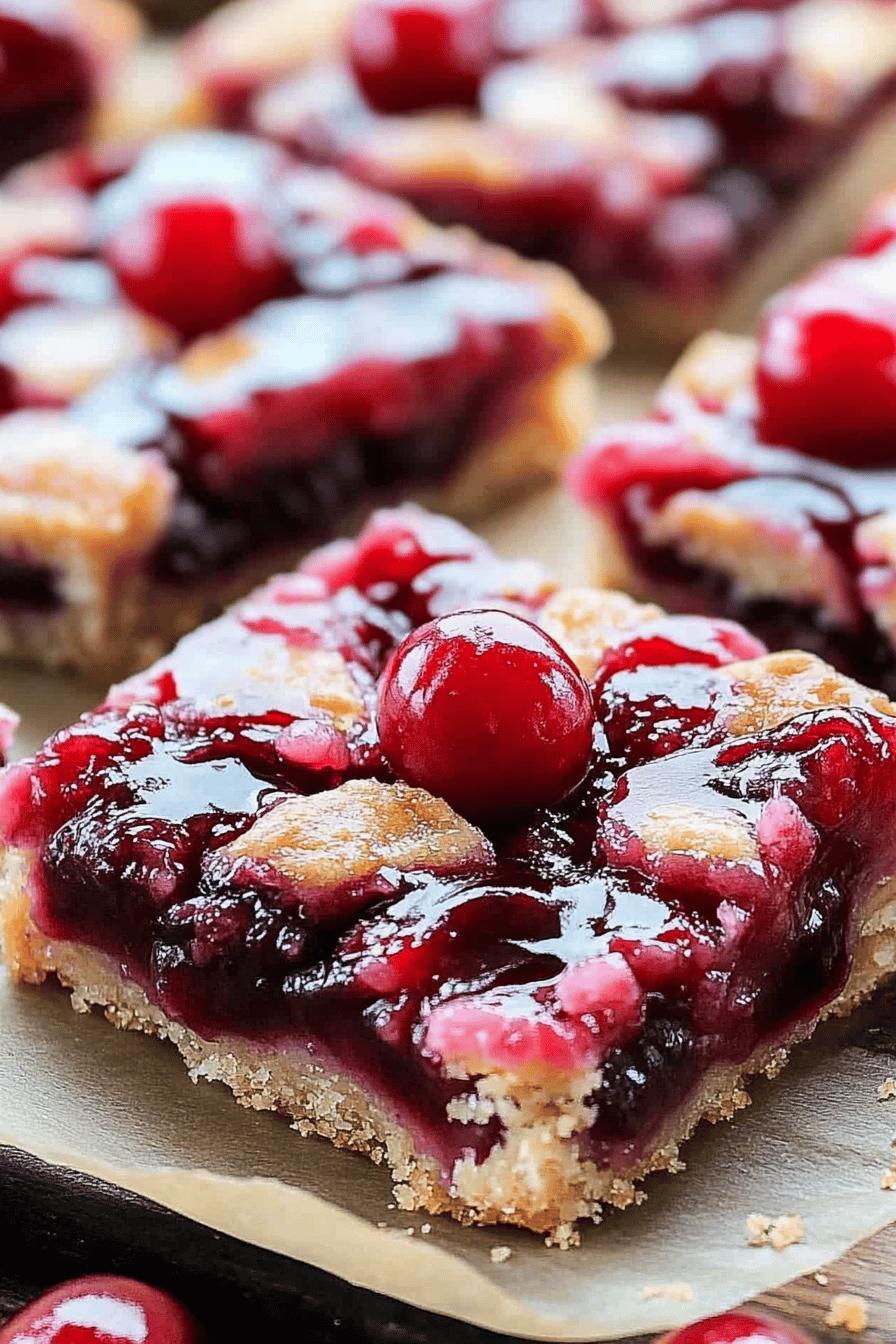
Cherry Pie Bars are a delightful twist on the classic cherry pie. They combine the rich, buttery flavor of a traditional pie crust with a luscious cherry filling. These bars are not only easy to make but also perfect for any gathering. Whether you’re hosting a picnic, a birthday party, or just enjoying a cozy night at home, these bars will surely satisfy your sweet tooth.
What Makes Cherry Pie Bars Special?
What sets Cherry Pie Bars apart is their simplicity and versatility. Unlike a traditional pie, which can be tricky to prepare, these bars come together quickly. The buttery crust is easy to press into a pan, and the cherry filling is bursting with flavor. Plus, the sweet glaze on top adds an extra touch of sweetness that makes each bite irresistible. You can enjoy them warm or cold, making them a delightful treat any time of year.
The Perfect Dessert for Any Occasion
Cherry Pie Bars are the ultimate dessert for any occasion. They are great for summer picnics, holiday gatherings, or even as a sweet snack after dinner. Their portable nature makes them easy to share, and they look beautiful on any dessert table. With their vibrant red color and glossy glaze, they are sure to catch the eye of your guests. Plus, they are a hit with both kids and adults alike, making them a crowd-pleaser!
Ingredients for Cherry Pie Bars A Sweet & Buttery Treat!
To create these delicious Cherry Pie Bars, you’ll need a few simple ingredients. Each component plays a vital role in achieving that perfect balance of flavors and textures. Here’s what you’ll need:
- For the Crust:
- 1 cup unsalted butter, softened
- 1 cup granulated sugar
- 2 cups all-purpose flour
- 1/2 teaspoon salt
- 1 teaspoon vanilla extract
- For the Cherry Filling:
- 2 cups fresh or frozen cherries, pitted
- 1/2 cup granulated sugar
- 2 tablespoons cornstarch
- 1 tablespoon lemon juice
- 1/2 teaspoon almond extract (optional)
- For the Sweet Glaze:
- 1 cup powdered sugar
- 2 tablespoons milk
- 1/2 teaspoon vanilla extract
These ingredients come together to create a delightful treat that is both sweet and buttery. The buttery crust provides a sturdy base, while the cherry filling adds a burst of flavor. Finally, the sweet glaze ties everything together, making these bars irresistible. Gather your ingredients, and let’s get ready to bake!
Step-by-Step Preparation of Cherry Pie Bars A Sweet & Buttery Treat!
Now that you have all your ingredients ready, it’s time to dive into the fun part—preparing your Cherry Pie Bars! Follow these simple steps to create a delicious dessert that everyone will love.
Step 1: Prepare the Crust
Start by preheating your oven to 350°F (175°C). This ensures that your bars bake evenly. In a large mixing bowl, cream together the softened butter and granulated sugar until the mixture is light and fluffy. This usually takes about 2-3 minutes. Next, add in the vanilla extract and mix well. Gradually incorporate the all-purpose flour and salt, mixing until a soft dough forms. Once your dough is ready, press it evenly into the bottom of a greased 9×13 inch baking pan. This will be the base of your Cherry Pie Bars.
Step 2: Make the Cherry Filling
For the cherry filling, combine the pitted cherries, granulated sugar, cornstarch, lemon juice, and almond extract (if using) in a medium saucepan. Stir the mixture over medium heat until it starts to bubble and thicken, which should take about 5-7 minutes. Once thickened, remove it from the heat and let it cool slightly. This filling is what makes your bars so juicy and flavorful!
Step 3: Assemble the Bars
After your crust and filling are ready, it’s time to assemble the bars. Pour the cherry filling evenly over the prepared crust in the baking pan. Spread it out gently with a spatula to ensure every bite has that delicious cherry goodness. If you have any leftover crust dough, crumble it over the top of the cherry filling for a nice texture contrast. This will create a lovely topping that adds to the overall appeal of your bars.
Step 4: Bake to Perfection
Place the baking pan in your preheated oven and bake for about 30-35 minutes. You’ll know they are done when the edges are golden brown and the filling is bubbly. Keep an eye on them to prevent over-baking. Once baked, remove the pan from the oven and let it cool completely on a wire rack. This cooling time helps the bars set up nicely, making them easier to cut.
Step 5: Add the Sweet Glaze
While your bars are cooling, prepare the sweet glaze. In a small bowl, whisk together the powdered sugar, milk, and vanilla extract until smooth. Once the bars are completely cool, drizzle the glaze over the top. This sweet touch adds a beautiful finish and enhances the flavor of your Cherry Pie Bars. Now, they’re ready to be sliced and served!
Variations of Cherry Pie Bars A Sweet & Buttery Treat!
While Cherry Pie Bars are delicious on their own, there are many fun variations you can try! These alternatives allow you to customize the flavors to suit your taste or dietary needs. Let’s explore some exciting options!
Different Fruit Fillings
If cherries aren’t your favorite, don’t worry! You can easily swap them out for other fruits. Here are some tasty alternatives:
- Blueberry Filling: Use fresh or frozen blueberries for a sweet and tangy twist.
- Peach Filling: Fresh peaches or canned peaches work well for a summery flavor.
- Apple Filling: Diced apples mixed with cinnamon create a cozy, fall-inspired treat.
- Mixed Berry Filling: Combine strawberries, raspberries, and blueberries for a berry medley.
Feel free to experiment with your favorite fruits! Just remember to adjust the sugar and cornstarch based on the sweetness and juiciness of the fruit you choose. This way, you can create a delightful filling that suits your palate.
Gluten-Free Options
For those who need a gluten-free option, making Cherry Pie Bars is still possible! Here’s how you can adapt the recipe:
- Gluten-Free Flour: Substitute all-purpose flour with a gluten-free flour blend. Make sure it’s a 1:1 ratio blend for the best results.
- Oats Crust: Use ground oats or almond flour to create a unique crust. This adds a nutty flavor and a different texture.
When using gluten-free ingredients, always check the labels to ensure they are certified gluten-free. This way, you can enjoy these sweet treats without worry!
With these variations, you can enjoy Cherry Pie Bars in many delightful ways. Whether you stick with the classic cherry filling or try something new, these bars are sure to be a hit!
Cooking Note for Cherry Pie Bars A Sweet & Buttery Treat!
When making Cherry Pie Bars, a few cooking notes can help ensure your dessert turns out perfectly every time. These tips will guide you through the process and enhance your baking experience.
First, always use fresh or high-quality frozen cherries. Fresh cherries provide a vibrant flavor, while frozen cherries can be a convenient option when fresh ones are out of season. If using frozen cherries, there’s no need to thaw them before cooking. Just toss them directly into the saucepan with the other filling ingredients.
Next, be mindful of the sugar content. Depending on the sweetness of your cherries, you may want to adjust the amount of sugar in the filling. Taste the mixture before cooking, and feel free to add a little more sugar if needed. This will ensure your filling is perfectly sweetened.
Another important note is to let the bars cool completely before cutting them. This cooling time allows the filling to set, making it easier to slice into neat squares. If you cut them too soon, the filling may ooze out, resulting in messy bars. Patience is key!
Lastly, consider adding a pinch of salt to the sweet glaze. This small addition can enhance the overall flavor and balance the sweetness. It’s a simple trick that can elevate your Cherry Pie Bars to the next level.
By keeping these cooking notes in mind, you’ll be well on your way to creating delicious Cherry Pie Bars that everyone will love. Happy baking!
Serving Suggestions for Cherry Pie Bars A Sweet & Buttery Treat!
Once your Cherry Pie Bars are baked and glazed, it’s time to think about how to serve them. These bars are delicious on their own, but with a few simple additions, you can elevate them to a whole new level. Here are some delightful serving suggestions that will impress your guests and make your dessert table shine!
Pairing with Ice Cream
One of the best ways to enjoy Cherry Pie Bars is by pairing them with a scoop of ice cream. The creamy texture of ice cream complements the sweet and tart cherry filling perfectly. Here are some great ice cream flavors to consider:
- Vanilla: A classic choice that enhances the cherry flavor without overpowering it.
- Chocolate: The rich taste of chocolate ice cream adds a decadent twist.
- Almond: This nutty flavor pairs beautifully with the cherry filling, especially if you used almond extract in the recipe.
- Butter Pecan: The buttery notes in this ice cream harmonize with the crust, creating a delightful combination.
To serve, simply place a warm Cherry Pie Bar on a plate and add a scoop of your chosen ice cream on top. Drizzle with extra glaze or chocolate sauce for an extra special touch. Your guests will love this indulgent treat!
Presentation Ideas
Presentation is key when it comes to serving desserts. Here are some creative ideas to make your Cherry Pie Bars look as good as they taste:
- Dust with Powdered Sugar: A light dusting of powdered sugar adds a beautiful finish and makes the bars look elegant.
- Garnish with Fresh Cherries: Top each bar with a fresh cherry or two for a pop of color and freshness.
- Use Decorative Plates: Serve the bars on colorful or patterned plates to make them stand out on the table.
- Slice into Fun Shapes: Instead of traditional squares, try cutting the bars into fun shapes using cookie cutters for a playful presentation.
By incorporating these serving suggestions, you can create a delightful experience for your guests. Whether you choose to pair your Cherry Pie Bars with ice cream or present them in a creative way, they are sure to be a hit at any gathering!
Tips for Making the Best Cherry Pie Bars A Sweet & Buttery Treat!
To ensure your Cherry Pie Bars turn out perfectly every time, here are some helpful tips. These suggestions will guide you in choosing the right ingredients and storing your delicious treats. Let’s dive in!
Choosing the Right Cherries
The type of cherries you use can greatly affect the flavor of your Cherry Pie Bars. Here are some tips for selecting the best cherries:
- Fresh Cherries: Look for cherries that are firm, plump, and shiny. They should have a deep red color, indicating ripeness. Avoid any that are soft or have blemishes.
- Frozen Cherries: If fresh cherries are out of season, frozen cherries are a great alternative. Choose high-quality frozen cherries without added sugar. They are convenient and still packed with flavor.
- Sweet vs. Tart: Decide if you prefer sweet cherries, like Bing cherries, or tart cherries, like Montmorency. Sweet cherries will give you a sweeter filling, while tart cherries add a nice tangy contrast.
By selecting the right cherries, you can enhance the overall taste of your Cherry Pie Bars. Fresh or frozen, the right choice will make your dessert shine!
Storing Leftovers
After enjoying your Cherry Pie Bars, you may have some leftovers. Here’s how to store them properly to keep them fresh:
- Room Temperature: If you plan to eat the bars within a day or two, you can store them at room temperature. Place them in an airtight container to prevent them from drying out.
- Refrigeration: For longer storage, keep the bars in the refrigerator. They can last up to a week when stored properly. Just make sure to cover them well to maintain their moisture.
- Freezing: If you want to save them for later, Cherry Pie Bars freeze beautifully. Wrap individual bars in plastic wrap and place them in a freezer-safe container. They can last for up to three months in the freezer. When ready to enjoy, simply thaw them in the refrigerator overnight.
By following these storage tips, you can enjoy your Cherry Pie Bars for days to come. Whether at room temperature, chilled, or frozen, they will remain a delightful treat!
Breakdown of Time for Cherry Pie Bars A Sweet & Buttery Treat!
Understanding the time needed to make Cherry Pie Bars is essential for planning your baking session. Here’s a simple breakdown of the time you’ll need for each step, so you can enjoy these delicious treats without any surprises!
Prep Time
The prep time for Cherry Pie Bars is quite manageable. You’ll spend about 15-20 minutes gathering your ingredients and preparing the crust and cherry filling. This includes:
- Measuring and mixing the crust ingredients.
- Preparing the cherry filling on the stove.
- Assembling the bars in the baking pan.
With a little organization, you can have everything ready to go in no time!
Cooking Time
Once your bars are assembled, the cooking time is approximately 30-35 minutes. During this time, the bars will bake in the oven until they are golden brown and the filling is bubbly. It’s important to keep an eye on them to avoid over-baking. This step is crucial for achieving that perfect texture!
Total Time
In total, you can expect to spend about 50-55 minutes from start to finish. This includes both prep and cooking time. Once the bars are baked, don’t forget to let them cool completely before slicing. This cooling period is essential for the best results!
With this time breakdown, you can easily plan your baking session. Whether you’re making these Cherry Pie Bars for a special occasion or just a sweet treat at home, you’ll be ready to enjoy them in under an hour!
Nutritional Information for Cherry Pie Bars A Sweet & Buttery Treat!
Understanding the nutritional information of your Cherry Pie Bars can help you enjoy them mindfully. Here’s a breakdown of the key nutritional components per serving, so you can indulge without worry. Keep in mind that these values may vary based on the specific ingredients you use and the size of your bars.
Calories
Each serving of Cherry Pie Bars contains approximately 200-250 calories. This makes them a delightful treat that can fit into a balanced diet. The buttery crust and sweet cherry filling contribute to the calorie count, but they also provide a satisfying dessert experience. Enjoying one or two bars as a treat is a great way to satisfy your sweet tooth without overindulging.
Protein
In terms of protein, each serving offers about 2-3 grams. While this isn’t a high-protein dessert, the small amount comes from the butter and flour used in the crust. If you’re looking to boost the protein content, consider pairing your Cherry Pie Bars with a scoop of Greek yogurt or a dollop of whipped cream. This will add a creamy texture and a protein boost to your dessert!
Sodium
Each serving of Cherry Pie Bars contains roughly 100-150 milligrams of sodium. This amount is relatively low, making these bars a suitable option for those watching their sodium intake. The salt in the crust helps enhance the flavors, but it’s always a good idea to be mindful of your overall sodium consumption throughout the day.
By keeping these nutritional facts in mind, you can enjoy your Cherry Pie Bars as a sweet treat while being aware of their nutritional content. Remember, moderation is key, and these bars can be a delightful addition to your dessert repertoire!
FAQs about Cherry Pie Bars A Sweet & Buttery Treat!
Can I use frozen cherries for the filling?
Absolutely! Frozen cherries are a fantastic option for your Cherry Pie Bars. They are convenient and can be just as flavorful as fresh cherries. When using frozen cherries, there’s no need to thaw them before cooking. Just toss them directly into the saucepan with the other filling ingredients. This will save you time and still give you that delicious cherry flavor!
How do I store leftover Cherry Pie Bars?
Storing your leftover Cherry Pie Bars is easy! If you plan to eat them within a day or two, you can keep them at room temperature in an airtight container. For longer storage, place them in the refrigerator, where they can last up to a week. Just make sure to cover them well to maintain their moisture. If you want to save them for later, you can freeze the bars. Wrap each bar in plastic wrap and place them in a freezer-safe container. They can last for up to three months in the freezer. When you’re ready to enjoy them, simply thaw them in the refrigerator overnight!
Can I make Cherry Pie Bars ahead of time?
Yes, you can definitely make Cherry Pie Bars ahead of time! They are perfect for preparing in advance for parties or gatherings. You can bake them a day or two before your event and store them in the refrigerator. Just remember to add the sweet glaze right before serving for the best presentation. This way, you can enjoy your time with guests without the stress of last-minute baking!
Conclusion on Cherry Pie Bars A Sweet & Buttery Treat!
In conclusion, Cherry Pie Bars are a delightful and easy dessert that everyone can enjoy. With their buttery crust, juicy cherry filling, and sweet glaze, these bars are sure to impress at any gathering. Whether you’re celebrating a special occasion or simply treating yourself, they offer a perfect balance of flavors and textures.
Not only are they simple to make, but they also allow for creativity with various fruit fillings and gluten-free options. This versatility makes them a go-to recipe for any baker, regardless of skill level. Plus, the tips and serving suggestions provided will help you elevate your dessert game, ensuring that your Cherry Pie Bars are a hit every time.
So, gather your ingredients, follow the steps, and enjoy the process of baking these delicious bars. Your friends and family will love the sweet and buttery treat you’ve created. Happy baking, and may your Cherry Pie Bars bring joy to your table!
Relevant Recipes Link:
Craving more delicious recipes like the one you just explored? Satisfy your taste buds with these must-try dishes:
- Creamy Peanut Butter Ice Cream: A Must-Try Dessert
- Creamy Beef Garlic Butter Pasta: A Flavorful Delight
- Guava Butter Cookies: An Irresistible Sweet Treat
For more fantastic recipes and food inspiration, follow us on Pinterest!