Introduction to Chocolate Rice Krispie Balls
What Are Chocolate Rice Krispie Balls?
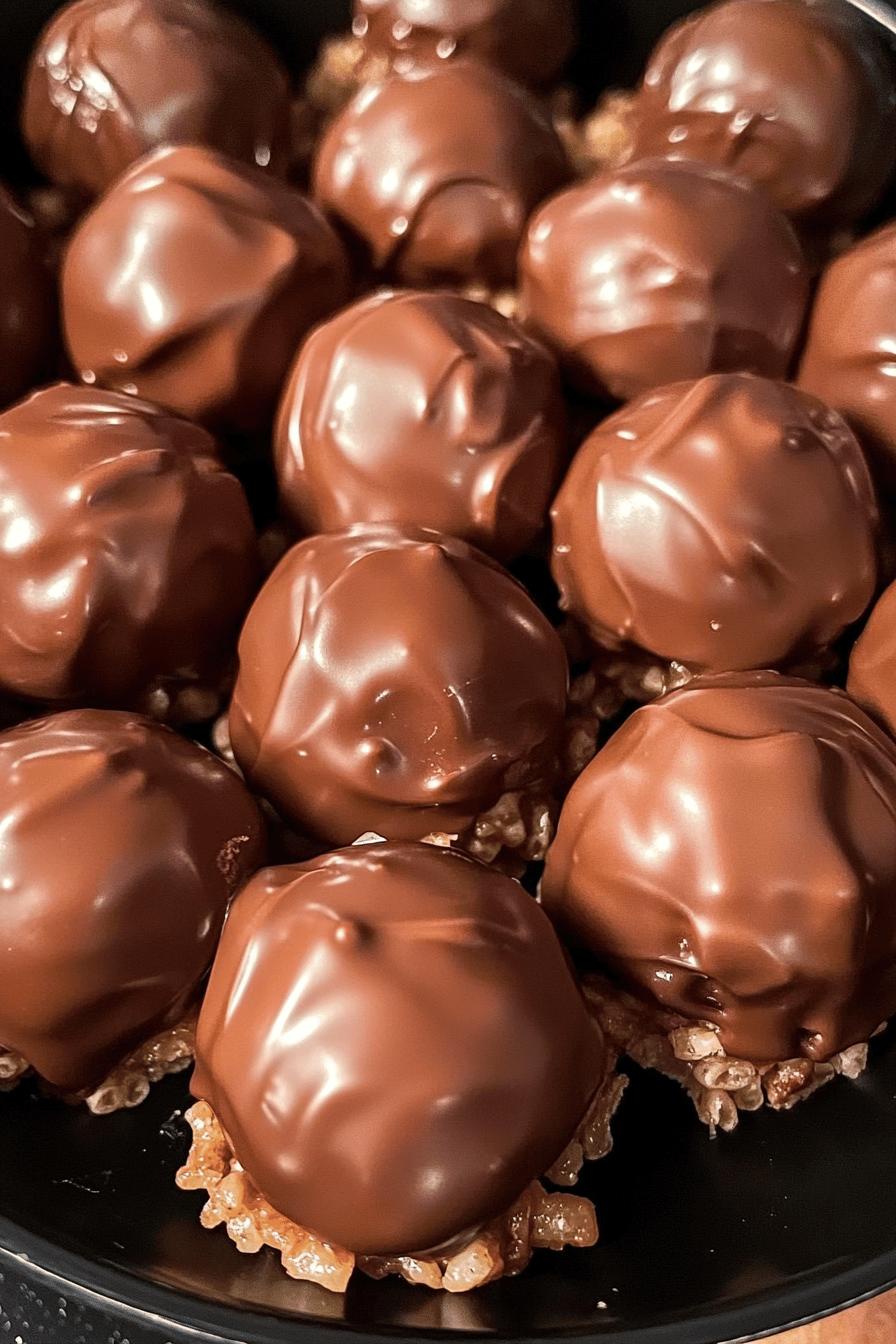
Chocolate Rice Krispie Balls are delightful no-bake treats that combine the crunch of Rice Krispies with the creamy goodness of peanut butter. These little bites are then coated in rich chocolate, making them a perfect sweet snack. They are round, bite-sized, and packed with flavor, making them a favorite among both kids and adults. With just a few simple ingredients, you can whip up a batch in no time. Whether you’re hosting a holiday party or just craving something sweet, these treats are sure to please!
Why You Should Make Chocolate Rice Krispie Balls
There are many reasons to make Chocolate Rice Krispie Balls. First, they are incredibly easy to prepare. You don’t need to bake anything, which saves time and effort. Second, they require minimal ingredients, making them budget-friendly. Plus, they are versatile! You can customize them with different toppings or nut butters to suit your taste. Lastly, these treats are perfect for sharing. They make a great addition to any dessert table, especially during festive occasions like Christmas. So, gather your ingredients and get ready to enjoy a delicious treat that everyone will love!
Ingredients for Chocolate Rice Krispie Balls
To create your own Chocolate Rice Krispie Balls, you’ll need just a handful of simple ingredients. Here’s what you’ll need:
- 3 cups of Rice Krispies: This cereal provides the perfect crunch and texture.
- 1 cup of creamy peanut butter: Choose your favorite brand for a rich flavor.
- 1 cup of chocolate chips: Milk chocolate works best, but feel free to use dark chocolate for a richer taste.
- 1/4 cup of honey or maple syrup: This adds sweetness and helps bind the ingredients together.
- 1 teaspoon of vanilla extract: A splash of vanilla enhances the overall flavor.
Optional ingredients include:
- Sprinkles or crushed nuts: For added texture and decoration.
- Sea salt: A sprinkle on top can elevate the flavor.
With these ingredients, you’re all set to make a batch of these delightful treats. They are not only easy to prepare but also fun to customize. So, gather your supplies and let’s get started!
Step-by-Step Preparation of Chocolate Rice Krispie Balls
Step 1: Gather Your Ingredients
Before you start making your Chocolate Rice Krispie Balls, it’s important to gather all your ingredients. This will make the process smooth and enjoyable. Make sure you have:
- 3 cups of Rice Krispies
- 1 cup of creamy peanut butter
- 1 cup of chocolate chips
- 1/4 cup of honey or maple syrup
- 1 teaspoon of vanilla extract
- Optional toppings like sprinkles or crushed nuts
Having everything ready will help you stay organized and focused. Plus, it’s always fun to see all the ingredients laid out!
Step 2: Melt the Chocolate
Next, it’s time to melt the chocolate. You can do this using a microwave or a double boiler. If you choose the microwave, place the chocolate chips in a microwave-safe bowl. Heat them in 30-second intervals, stirring in between until smooth. If you prefer the double boiler method, fill a pot with water and bring it to a simmer. Place a heatproof bowl on top, making sure it doesn’t touch the water. Add the chocolate chips and stir until melted. This step is crucial, as melted chocolate will coat your Rice Krispie Balls beautifully!
Step 3: Mix Peanut Butter and Rice Krispies
In a large mixing bowl, combine the creamy peanut butter, honey or maple syrup, and vanilla extract. Stir until well blended. Then, gently fold in the Rice Krispies. Make sure every piece is coated with the peanut butter mixture. This will create a deliciously crunchy base for your balls. The mixture should be sticky but manageable. If it feels too dry, add a little more peanut butter!
Step 4: Form the Balls
Now comes the fun part! Using your hands, take small amounts of the mixture and roll them into balls about 1 inch in diameter. You can make them bigger or smaller, depending on your preference. Place the formed balls on a baking sheet lined with parchment paper. This will prevent them from sticking and make cleanup easier. Keep rolling until you’ve used up all the mixture!
Step 5: Coat with Chocolate
Once your balls are formed, it’s time to coat them in chocolate. Dip each ball into the melted chocolate, ensuring it’s fully covered. You can use a fork or a toothpick to help with this. Let any excess chocolate drip off before placing them back on the parchment paper. If you want to add toppings like sprinkles or crushed nuts, do it while the chocolate is still wet. This will help them stick!
Step 6: Chill and Set
Finally, place the baking sheet in the refrigerator for about 30 minutes. This will allow the chocolate to harden and the flavors to meld together. Once set, your Chocolate Rice Krispie Balls are ready to enjoy! You can store them in an airtight container in the fridge for up to a week. They make a perfect treat for any occasion!
Variations of Chocolate Rice Krispie Balls
Adding Different Toppings
One of the best things about Chocolate Rice Krispie Balls is their versatility. You can easily customize them with a variety of toppings to suit your taste. Here are some fun ideas:
- Crushed Cookies: Add a layer of crushed Oreos or graham crackers for a delightful crunch.
- Chopped Nuts: Sprinkle chopped almonds, walnuts, or pecans on top for added texture and flavor.
- Shredded Coconut: For a tropical twist, roll your balls in shredded coconut before the chocolate sets.
- Mini Chocolate Chips: Press mini chocolate chips into the top of each ball for an extra chocolatey treat.
- Colored Sprinkles: Use festive sprinkles to make your treats more colorful, especially for holiday gatherings.
These toppings not only enhance the flavor but also make your Chocolate Rice Krispie Balls visually appealing. Feel free to mix and match to create your own unique combinations!
Using Alternative Nut Butters
If you want to switch things up, consider using different nut butters in your Chocolate Rice Krispie Balls. Here are some tasty alternatives:
- Almond Butter: This nut butter has a slightly sweeter taste and pairs wonderfully with chocolate.
- Cashew Butter: Creamy and rich, cashew butter adds a unique flavor to your treats.
- Sunflower Seed Butter: A great option for those with nut allergies, sunflower seed butter offers a nutty flavor without the nuts.
- Hazelnut Spread: For a decadent twist, try using a hazelnut spread like Nutella for a chocolate-hazelnut flavor.
These alternatives can change the taste and texture of your Chocolate Rice Krispie Balls, making them even more exciting. Experiment with different nut butters to find your favorite combination!
Cooking Note for Chocolate Rice Krispie Balls
When making Chocolate Rice Krispie Balls, there are a few important cooking notes to keep in mind. First, ensure that your ingredients are at room temperature. This helps the peanut butter mix smoothly with the other ingredients. If your peanut butter is too thick, you can warm it slightly in the microwave for a few seconds. This will make it easier to blend.
Next, when melting the chocolate, be careful not to overheat it. Chocolate can burn quickly, so stirring frequently is key. If you notice any lumps, continue stirring until the chocolate is completely smooth. If you find that your chocolate is too thick for dipping, you can add a teaspoon of vegetable oil to thin it out. This will help create a nice, even coating on your Rice Krispie Balls.
Additionally, if you want to make your treats even more festive, consider adding a pinch of sea salt on top of the chocolate coating. This contrast of sweet and salty can elevate the flavor profile and make your treats even more delicious.
Lastly, remember that patience is essential when chilling your Chocolate Rice Krispie Balls. Allowing them to set properly in the refrigerator ensures that the chocolate hardens well and the flavors meld together beautifully. Enjoy the process, and soon you’ll have a delightful batch of treats to share!
Serving Suggestions for Chocolate Rice Krispie Balls
When it comes to serving your Chocolate Rice Krispie Balls, the possibilities are endless! These treats are not only delicious but also visually appealing, making them perfect for various occasions. Here are some creative serving suggestions to elevate your dessert experience:
- Festive Platter: Arrange your Chocolate Rice Krispie Balls on a decorative platter. You can use a mix of different toppings to create a colorful display. This makes for an eye-catching centerpiece at any holiday gathering.
- Gift Bags: Package individual balls in small treat bags tied with festive ribbons. These make great homemade gifts for friends and family during the holiday season. Everyone loves a sweet surprise!
- Party Favors: If you’re hosting a party, consider placing a few Chocolate Rice Krispie Balls in small boxes or cups as party favors. Guests will appreciate the thoughtful gesture and enjoy a tasty treat to take home.
- Ice Cream Topping: Crumble some of the balls over vanilla or chocolate ice cream for a delightful dessert. The combination of creamy ice cream and crunchy chocolate balls is sure to impress!
- Hot Chocolate Companion: Serve these treats alongside a warm cup of hot chocolate. The rich flavors of the chocolate balls complement the drink perfectly, making for a cozy treat on a chilly day.
These serving suggestions not only enhance the presentation of your Chocolate Rice Krispie Balls but also make them more enjoyable for everyone. Whether you’re celebrating a special occasion or just indulging in a sweet snack, these ideas will surely impress your guests!
Tips for Perfect Chocolate Rice Krispie Balls
Creating the perfect Chocolate Rice Krispie Balls is all about attention to detail. Here are some handy tips to ensure your treats turn out delicious every time:
- Use Fresh Ingredients: Always check the expiration dates on your ingredients, especially the peanut butter and chocolate chips. Fresh ingredients will enhance the flavor of your treats.
- Measure Accurately: Use measuring cups and spoons for precise measurements. This ensures the right balance of flavors and textures in your mixture.
- Chill Your Ingredients: If your kitchen is warm, consider chilling your peanut butter before mixing. This can help it blend more easily with the other ingredients.
- Don’t Overmix: When combining the Rice Krispies with the peanut butter mixture, mix just until combined. Overmixing can make the mixture too crumbly.
- Experiment with Sizes: Feel free to make your balls larger or smaller based on your preference. Just remember that larger balls may require a bit more chilling time.
- Use Parchment Paper: Line your baking sheet with parchment paper to prevent sticking. This makes it easier to remove the balls once they are set.
- Let Chocolate Cool Slightly: After melting the chocolate, let it cool for a minute before dipping. This prevents the chocolate from being too hot, which can melt the peanut butter mixture.
- Store Properly: Keep your Chocolate Rice Krispie Balls in an airtight container in the fridge. This keeps them fresh and prevents them from becoming too soft.
- Get Creative: Don’t hesitate to try new flavors or toppings! Adding spices like cinnamon or using flavored chocolate can give your treats a unique twist.
By following these tips, you’ll be well on your way to making perfect Chocolate Rice Krispie Balls that everyone will love. Enjoy the process and have fun experimenting with different flavors and toppings!
Breakdown of Time for Chocolate Rice Krispie Balls
Prep Time
The prep time for making Chocolate Rice Krispie Balls is quite short. You can expect to spend about 15 minutes gathering your ingredients and mixing everything together. This includes measuring out the Rice Krispies, peanut butter, and other ingredients. It’s a quick and easy process that makes these treats perfect for any occasion!
Cooking Time
Since these treats are no-bake, the cooking time is minimal. The only time you’ll need to spend is melting the chocolate, which takes about 5 minutes. After that, you’ll form the balls and coat them in chocolate. The real waiting comes when you chill them in the refrigerator, which takes about 30 minutes. This step is essential for allowing the chocolate to set properly.
Total Time
In total, you’ll need approximately 50 minutes to make Chocolate Rice Krispie Balls from start to finish. This includes 15 minutes of prep time, 5 minutes of cooking time, and 30 minutes of chilling time. With such a quick turnaround, you can whip up these delicious treats in no time, making them a fantastic option for last-minute gatherings or sweet cravings!
Nutritional Information for Chocolate Rice Krispie Balls
Calories
When indulging in Chocolate Rice Krispie Balls, it’s good to know the calorie content. Each ball contains approximately 100 calories. This makes them a sweet treat that can fit into your daily calorie allowance without too much guilt. However, moderation is key, especially during festive seasons when it’s easy to overindulge!
Protein
These delightful treats also provide a decent amount of protein, thanks to the peanut butter. Each Chocolate Rice Krispie Ball contains about 3 grams of protein. This protein content can help keep you feeling satisfied, making them a great snack option. Pairing them with a glass of milk can further boost your protein intake!
Sodium
In terms of sodium, each ball has around 50 milligrams. This is relatively low, especially when compared to many other snacks. However, if you’re watching your sodium intake, be mindful of how many you enjoy. Using unsalted peanut butter can also help reduce the sodium content if desired.
Overall, Chocolate Rice Krispie Balls are a tasty treat that can be enjoyed in moderation. They offer a balance of sweetness, crunch, and a bit of nutrition, making them a delightful addition to your dessert table!
FAQs About Chocolate Rice Krispie Balls
Can I make Chocolate Rice Krispie Balls ahead of time?
Absolutely! Chocolate Rice Krispie Balls are perfect for making ahead of time. You can prepare them a day or two in advance and store them in the refrigerator. This makes them a convenient option for busy holiday schedules or last-minute gatherings. Just remember to keep them in an airtight container to maintain their freshness!
How should I store Chocolate Rice Krispie Balls?
To keep your Chocolate Rice Krispie Balls fresh, store them in an airtight container. Place them in the refrigerator, where they can last for up to a week. If you want to keep them for a longer period, you can freeze them. Just make sure to separate layers with parchment paper to prevent sticking. When you’re ready to enjoy them, simply thaw them in the fridge for a few hours.
Can I use dark chocolate instead of milk chocolate?
Yes, you can definitely use dark chocolate instead of milk chocolate! Dark chocolate will give your Chocolate Rice Krispie Balls a richer flavor and a slightly less sweet taste. This can be a great option if you prefer a more intense chocolate experience. Just follow the same melting instructions, and you’ll have a delicious treat!
Are Chocolate Rice Krispie Balls gluten-free?
Yes, Chocolate Rice Krispie Balls can be gluten-free! Just make sure to use gluten-free Rice Krispies, as some brands may contain gluten. The other ingredients, like peanut butter and chocolate, are typically gluten-free as well. Always check the labels to ensure that all your ingredients meet your dietary needs. Enjoy these treats without worry!
Conclusion on Chocolate Rice Krispie Balls
In conclusion, Chocolate Rice Krispie Balls are a delightful and easy-to-make treat that everyone can enjoy. With their crunchy texture and rich chocolate coating, they are perfect for any occasion, especially during the festive season. Not only are they simple to prepare, but they also allow for creativity with various toppings and nut butter options. Whether you’re making them for a holiday gathering, a birthday party, or just a sweet snack at home, these treats are sure to impress.
Moreover, the nutritional benefits, such as protein from peanut butter and the option to use gluten-free ingredients, make them a guilt-free indulgence. Remember to follow the tips provided to ensure your Chocolate Rice Krispie Balls turn out perfectly every time. With a little patience and creativity, you can create a batch that will be the highlight of any dessert table.
So, gather your ingredients, roll up your sleeves, and get ready to enjoy the fun of making these delicious treats. Your friends and family will love them, and you might just find yourself making them again and again. Happy cooking!
Relevant Recipes Link:
Craving more delightful treats to satisfy your sweet tooth? Why not try these must-try recipes:
- Chocolate Crunch Brownie Bars: A Decadent Delight
- Chocolate Chip Cookie Brownie Bars: The Ultimate Indulgence
- Green Rice Krispie Treats: Perfect for St. Patrick’s Day Celebrations
For more mouthwatering recipes and food inspiration, follow us on Pinterest!