Introduction to Coffee Ice Cream
Are you a coffee lover? If so, you’re in for a treat! Coffee Ice Cream is a delightful blend of rich coffee flavor and creamy texture. This frozen dessert is not just a sweet indulgence; it’s a celebration of your favorite morning beverage. Imagine enjoying a scoop of this delicious ice cream on a hot summer day or after a hearty meal. It’s the perfect way to satisfy both your caffeine and dessert cravings!
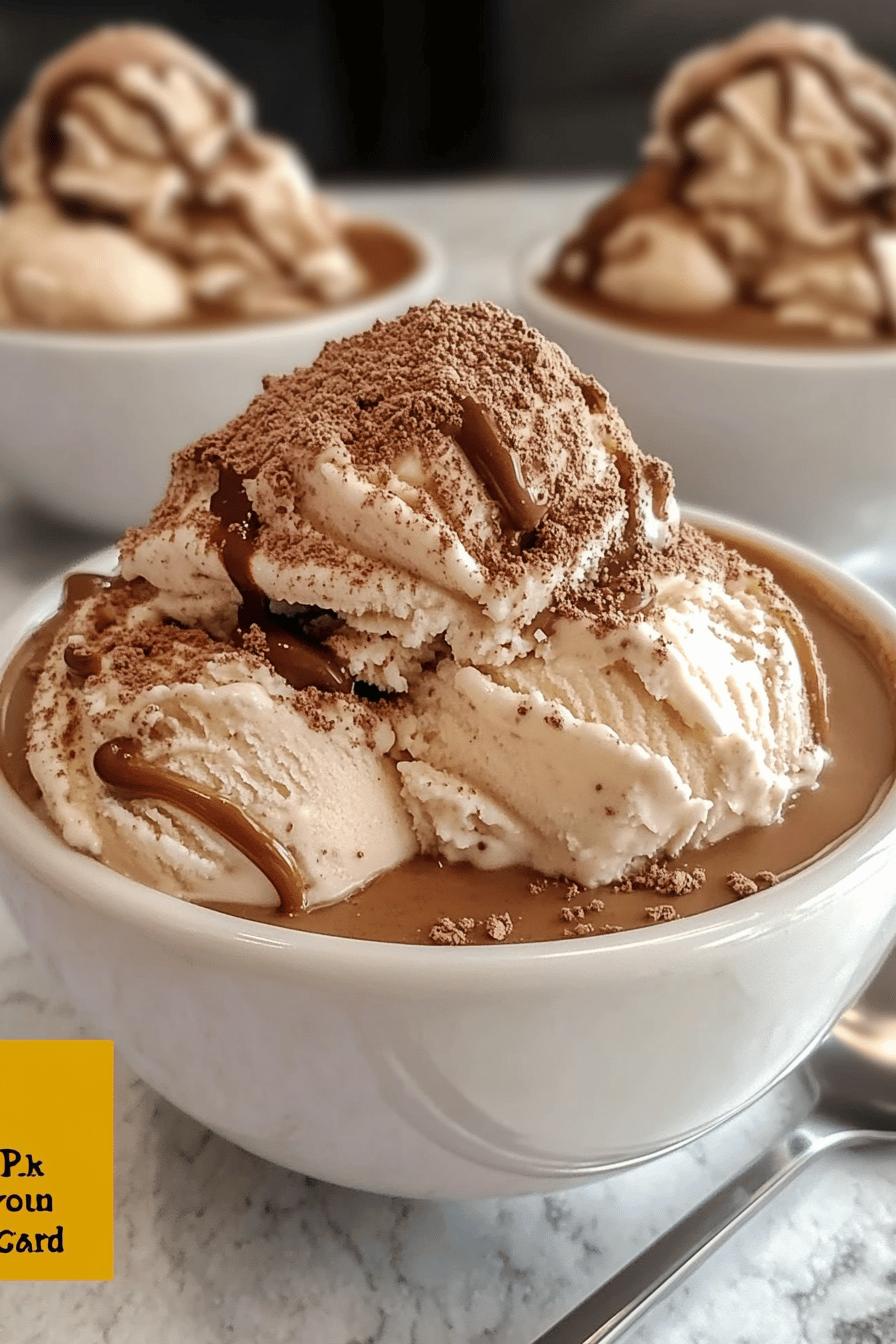
What Makes Coffee Ice Cream Special?
What sets Coffee Ice Cream apart from other flavors? It’s all about the unique combination of coffee and cream. The brewed coffee infuses the ice cream with a deep, robust flavor that is both refreshing and comforting. Plus, the hint of vanilla adds a touch of sweetness, balancing the bitterness of the coffee. This delightful treat is not only creamy but also has a rich aroma that will awaken your senses. The addition of crushed cookies gives it a fun crunch, making every scoop an exciting experience!
The Perfect Dessert for Coffee Lovers
If you adore coffee, this ice cream is a must-try! It’s a fantastic way to enjoy your favorite drink in a new form. Whether you’re hosting a summer barbecue or simply treating yourself, Coffee Ice Cream is sure to impress. It’s versatile too! You can serve it in a cone, a bowl, or even as a topping on your favorite dessert. With its creamy texture and bold flavor, it’s a dessert that coffee enthusiasts will cherish. So, grab your ingredients and get ready to whip up this delightful treat!
Ingredients for Coffee Ice Cream
Creating your own Coffee Ice Cream at home is simple and fun! To make this creamy delight, you’ll need a few key ingredients. Here’s what you’ll need:
- 2 cups of heavy cream: This gives the ice cream its rich and creamy texture.
- 1 cup of whole milk: Whole milk adds creaminess and balances the heavy cream.
- 1 cup of brewed coffee: Use your favorite coffee for the best flavor. Make sure it’s cooled!
- ¾ cup of granulated sugar: This sweetens the ice cream and enhances the coffee flavor.
- 1 teaspoon of vanilla extract: A hint of vanilla adds depth to the flavor.
- ½ cup of crushed cookies: Choose your favorite cookies for a delightful crunch in every scoop.
These ingredients come together to create a deliciously creamy Coffee Ice Cream that’s perfect for any occasion. Feel free to adjust the sugar based on your sweetness preference. Now that you have your ingredients ready, let’s move on to the preparation steps!
Step-by-Step Preparation of Coffee Ice Cream
Now that you have your ingredients ready, it’s time to dive into the fun part—making your Coffee Ice Cream! Follow these simple steps to create a creamy, delicious treat that will impress everyone.
Step 1: Brew the Coffee
Start by brewing your favorite coffee. You can use a coffee maker, French press, or any method you prefer. Aim for a strong brew to ensure the coffee flavor shines through in your ice cream. Once brewed, let the coffee cool to room temperature. This step is crucial, as hot coffee can affect the texture of your ice cream.
Step 2: Mix the Base
In a large mixing bowl, combine the heavy cream, whole milk, granulated sugar, and vanilla extract. Whisk the mixture until the sugar is fully dissolved. Then, slowly pour in the cooled brewed coffee while continuing to whisk. This will create a smooth and creamy base for your ice cream. Make sure everything is well combined for the best flavor!
Step 3: Churn the Ice Cream
Next, it’s time to churn your ice cream! If you have an ice cream maker, pour the mixture into the machine and churn according to the manufacturer’s instructions. This usually takes about 20 to 30 minutes. If you don’t have an ice cream maker, don’t worry! You can still make this treat by placing the mixture in a shallow dish and stirring it every 30 minutes until it reaches a creamy consistency.
Step 4: Add the Crunch
Once your ice cream has reached a soft-serve consistency, it’s time to add the fun part—the crushed cookies! Gently fold in the crushed cookies using a spatula. This will give your Coffee Ice Cream a delightful crunch in every scoop. You can use chocolate cookies, vanilla wafers, or any cookie you love!
Step 5: Freeze and Serve
After mixing in the cookies, transfer the ice cream to an airtight container. Smooth the top with a spatula and cover it tightly. Place the container in the freezer for at least 4 hours, or until the ice cream is firm. When you’re ready to serve, scoop out your delicious Coffee Ice Cream and enjoy! It’s perfect on its own or paired with your favorite toppings.
Variations of Coffee Ice Cream
While the classic Coffee Ice Cream is already a delightful treat, there are many ways to add a twist to this recipe. Whether you want to explore new flavors or cater to dietary preferences, these variations will keep your ice cream experience exciting!
Adding Flavors: Mocha and Hazelnut
If you’re a fan of rich flavors, consider adding mocha or hazelnut to your Coffee Ice Cream. For a mocha twist, simply mix in ½ cup of cocoa powder or melted chocolate into the base during the mixing step. This will give your ice cream a chocolatey richness that pairs beautifully with coffee.
On the other hand, if you love hazelnut, you can add ½ cup of hazelnut spread (like Nutella) to the mixture. This will create a creamy, nutty flavor that complements the coffee perfectly. Both variations are sure to impress your friends and family!
Dairy-Free Options for Coffee Ice Cream
For those who prefer a dairy-free option, making Coffee Ice Cream is still possible! You can substitute the heavy cream and whole milk with coconut cream and almond milk. Use 2 cups of full-fat coconut cream for a rich texture and 1 cup of unsweetened almond milk for a lighter base.
Additionally, you can sweeten your dairy-free ice cream with maple syrup or agave nectar instead of granulated sugar. This will not only keep it dairy-free but also add a unique flavor. With these simple swaps, everyone can enjoy a scoop of delicious Coffee Ice Cream!
Cooking Note for Coffee Ice Cream
When making Coffee Ice Cream, a few cooking notes can help you achieve the best results. First, always use freshly brewed coffee for the most vibrant flavor. The quality of your coffee will directly impact the taste of your ice cream. If you prefer a stronger coffee flavor, feel free to adjust the amount of brewed coffee in the recipe.
Another important tip is to ensure that all your ingredients are well-chilled before mixing. This helps the ice cream churn more effectively and results in a creamier texture. If you’re using an ice cream maker, make sure the bowl is frozen according to the manufacturer’s instructions. A properly chilled bowl will help the ice cream freeze evenly.
Lastly, patience is key! Allow your ice cream to freeze for at least four hours after churning. This will ensure that it reaches the perfect scoopable consistency. If you find your ice cream too hard after freezing, let it sit at room temperature for a few minutes before serving. This will make scooping much easier and more enjoyable!
By following these cooking notes, you’ll be well on your way to creating a delicious batch of Coffee Ice Cream that everyone will love!
Serving Suggestions for Coffee Ice Cream
Now that you’ve made your delicious Coffee Ice Cream, it’s time to think about how to serve it! This creamy treat can be enjoyed in many ways. Whether you want to keep it simple or get a bit creative, here are some serving suggestions that will elevate your dessert experience.
Pairing with Toppings
Toppings can take your Coffee Ice Cream to the next level! Here are some tasty options to consider:
- Chocolate Syrup: Drizzle some rich chocolate syrup over your ice cream for a sweet contrast to the coffee flavor.
- Whipped Cream: A dollop of whipped cream adds a light and fluffy texture that complements the creaminess of the ice cream.
- Chopped Nuts: Sprinkle some chopped almonds or hazelnuts for a crunchy texture and nutty flavor.
- Caramel Sauce: A drizzle of caramel sauce can add a sweet, buttery flavor that pairs beautifully with coffee.
- Chocolate Chips: Add some mini chocolate chips for an extra chocolatey bite in every scoop.
Feel free to mix and match these toppings to create your perfect scoop! You can also serve your Coffee Ice Cream in a cone or a bowl, depending on your preference.
Creative Serving Ideas
Want to impress your guests? Here are some creative serving ideas for your Coffee Ice Cream:
- Affogato: Pour a shot of hot espresso over a scoop of Coffee Ice Cream for a delicious affogato. This combination is a delightful mix of hot and cold!
- Ice Cream Sandwiches: Use your favorite cookies to make ice cream sandwiches. Simply place a scoop of Coffee Ice Cream between two cookies for a fun treat.
- Milkshakes: Blend a scoop of Coffee Ice Cream with milk for a creamy milkshake. Top it with whipped cream and chocolate shavings for a decadent drink.
- Layered Parfaits: Create a layered parfait by alternating layers of Coffee Ice Cream, crushed cookies, and whipped cream in a glass. This makes for a beautiful and delicious dessert!
With these serving suggestions, your Coffee Ice Cream will not only taste amazing but also look fantastic. Enjoy your sweet creation and share it with friends and family!
Tips for Making the Best Coffee Ice Cream
Making the perfect Coffee Ice Cream is an art! With a few helpful tips, you can elevate your homemade treat to a whole new level. Here are some essential tips to ensure your ice cream turns out creamy, flavorful, and absolutely delicious.
Use Quality Coffee
The flavor of your Coffee Ice Cream largely depends on the coffee you use. Opt for high-quality, freshly brewed coffee for the best taste. Whether you prefer a light roast or a dark roast, choose a coffee that you enjoy drinking. This will enhance the overall flavor of your ice cream.
Chill Your Ingredients
Before you start mixing, make sure all your ingredients are well-chilled. This includes the heavy cream, milk, and even the bowl you’ll be using. Chilling helps the ice cream churn more effectively, resulting in a smoother texture. If you’re using an ice cream maker, ensure the bowl is frozen according to the manufacturer’s instructions.
Don’t Rush the Churning Process
Churning is a crucial step in making ice cream. If you’re using an ice cream maker, follow the recommended churning time. Rushing this process can lead to a grainy texture. If you’re making it by hand, be patient and stir every 30 minutes until it reaches the desired consistency.
Experiment with Sweetness
Everyone has different preferences when it comes to sweetness. Feel free to adjust the amount of sugar in the recipe to suit your taste. You can also try using alternative sweeteners like honey or maple syrup for a unique flavor twist.
Let It Sit Before Serving
After freezing, your Coffee Ice Cream may be quite hard. To make scooping easier, let it sit at room temperature for about 5 to 10 minutes before serving. This will soften the ice cream just enough to create perfect scoops without losing its creamy texture.
Store Properly
To keep your Coffee Ice Cream fresh, store it in an airtight container. This will prevent ice crystals from forming and keep the texture smooth. If you have leftovers, make sure to press a piece of plastic wrap directly onto the surface of the ice cream before sealing the container. This extra step helps maintain its quality.
By following these tips, you’ll be well on your way to creating the best Coffee Ice Cream that will impress your family and friends. Enjoy the process and savor every scoop of your delicious creation!
Breakdown of Time for Coffee Ice Cream
Understanding the time needed to make Coffee Ice Cream can help you plan your dessert-making adventure. Here’s a simple breakdown of the time involved in each step of the process. This way, you can enjoy your delicious treat without any surprises!
Prep Time
The prep time for Coffee Ice Cream is about 15 minutes. This includes gathering your ingredients, brewing the coffee, and mixing the base. Make sure to allow some extra time for the coffee to cool down before you mix it into the cream and milk. Proper preparation sets the stage for a smooth ice cream-making experience!
Cooking Time
Cooking time, or rather churning time, typically takes around 20 to 30 minutes if you’re using an ice cream maker. If you’re making it by hand, you’ll need to stir the mixture every 30 minutes until it reaches a creamy consistency. This process can take about 2 to 3 hours, depending on how often you check on it. Remember, patience is key to achieving that perfect texture!
Total Time
In total, you should expect to spend about 4 to 5 hours from start to finish. This includes the prep time, cooking time, and the freezing time needed for the ice cream to firm up. While it may seem like a long process, most of this time is just waiting for the ice cream to freeze. The end result is well worth the wait!
So, gather your ingredients, set aside some time, and get ready to enjoy a delightful scoop of homemade Coffee Ice Cream!
Nutritional Information for Coffee Ice Cream
Understanding the nutritional content of your homemade Coffee Ice Cream can help you enjoy it even more. While this treat is a delightful indulgence, it’s good to know what you’re consuming. Here’s a breakdown of the calories and macronutrients in a typical serving of Coffee Ice Cream.
Calories and Macronutrients
One serving of Coffee Ice Cream (about ½ cup) contains approximately:
- Calories: 250-300 calories
- Fat: 15-20 grams
- Saturated Fat: 10-12 grams
- Carbohydrates: 25-30 grams
- Sugar: 20-25 grams
- Protein: 3-4 grams
These values can vary based on the specific ingredients you use, such as the type of milk or cream. If you opt for lower-fat alternatives or adjust the sugar, you can modify the nutritional content to better fit your dietary needs.
Health Considerations
While Coffee Ice Cream is a delicious treat, it’s important to enjoy it in moderation. The high sugar and fat content can contribute to excess calorie intake if consumed frequently. However, coffee itself has some health benefits, such as antioxidants and potential metabolism-boosting properties.
If you’re looking for a healthier option, consider making variations with less sugar or using dairy-free alternatives. This way, you can still enjoy the rich flavor of Coffee Ice Cream while being mindful of your health. Remember, balance is key! Enjoy your homemade treat as part of a well-rounded diet.
FAQs about Coffee Ice Cream
Can I use decaf coffee for this recipe?
Absolutely! If you prefer to enjoy Coffee Ice Cream without the caffeine kick, decaf coffee is a great option. The flavor will still be rich and delicious, allowing you to savor the creamy treat without the jitters. Just make sure to brew it strong enough to maintain that delightful coffee taste!
How long does homemade coffee ice cream last?
Homemade Coffee Ice Cream can last in the freezer for about 2 to 3 weeks when stored properly in an airtight container. To keep it fresh, press a piece of plastic wrap directly onto the surface of the ice cream before sealing the container. This helps prevent ice crystals from forming and keeps your ice cream smooth and creamy.
Can I make coffee ice cream without an ice cream maker?
Yes, you can! If you don’t have an ice cream maker, you can still make delicious Coffee Ice Cream. Simply pour the mixture into a shallow dish and place it in the freezer. Stir the mixture every 30 minutes for about 2 to 3 hours until it reaches a creamy consistency. This method may take a bit longer, but the end result will still be a delightful treat!
What can I substitute for heavy cream in coffee ice cream?
If you’re looking for a lighter option or have dietary restrictions, you can substitute heavy cream with coconut cream or cashew cream. Both alternatives provide a creamy texture while keeping the ice cream dairy-free. For a lower-fat option, you can also use half-and-half or whole milk, but keep in mind that the texture may be less rich.
Conclusion: Enjoying Your Coffee Ice Cream
Making your own Coffee Ice Cream at home is not just a fun activity; it’s a rewarding experience that brings joy to your taste buds. With its rich coffee flavor and creamy texture, this delightful treat is perfect for any occasion. Whether you’re enjoying it on a hot summer day or serving it as a dessert after dinner, Coffee Ice Cream is sure to impress.
Final Thoughts on Making Coffee Ice Cream at Home
As you embark on your ice cream-making journey, remember that the key to a great Coffee Ice Cream lies in the quality of your ingredients. Using freshly brewed coffee and high-quality cream will elevate the flavor and texture of your dessert. Don’t hesitate to experiment with different flavors and toppings to make it your own!
Moreover, making Coffee Ice Cream at home allows you to control the sweetness and texture, ensuring it meets your preferences. Whether you choose to add crushed cookies, nuts, or even a drizzle of chocolate, the possibilities are endless. So, gather your ingredients, follow the steps, and enjoy the process of creating this delicious frozen treat.
In the end, there’s nothing quite like the satisfaction of enjoying a scoop of homemade Coffee Ice Cream. It’s a delightful way to celebrate your love for coffee while indulging in a sweet treat. So, go ahead, treat yourself and your loved ones to this creamy delight. You deserve it!
Relevant Recipes Link:
Love ice cream desserts? Try these irresistible recipes:
- Mexican Fried Ice Cream: A Must-Try Dessert
- Peppermint Ice Cream Cake: A Festive Delight
- Cherry Chocolate Ice Cream Cake: A Must-Try Dessert
For more sweet treats and dessert inspiration, follow us on Pinterest!