Introduction to Honey Butter Fried Chicken Tenders
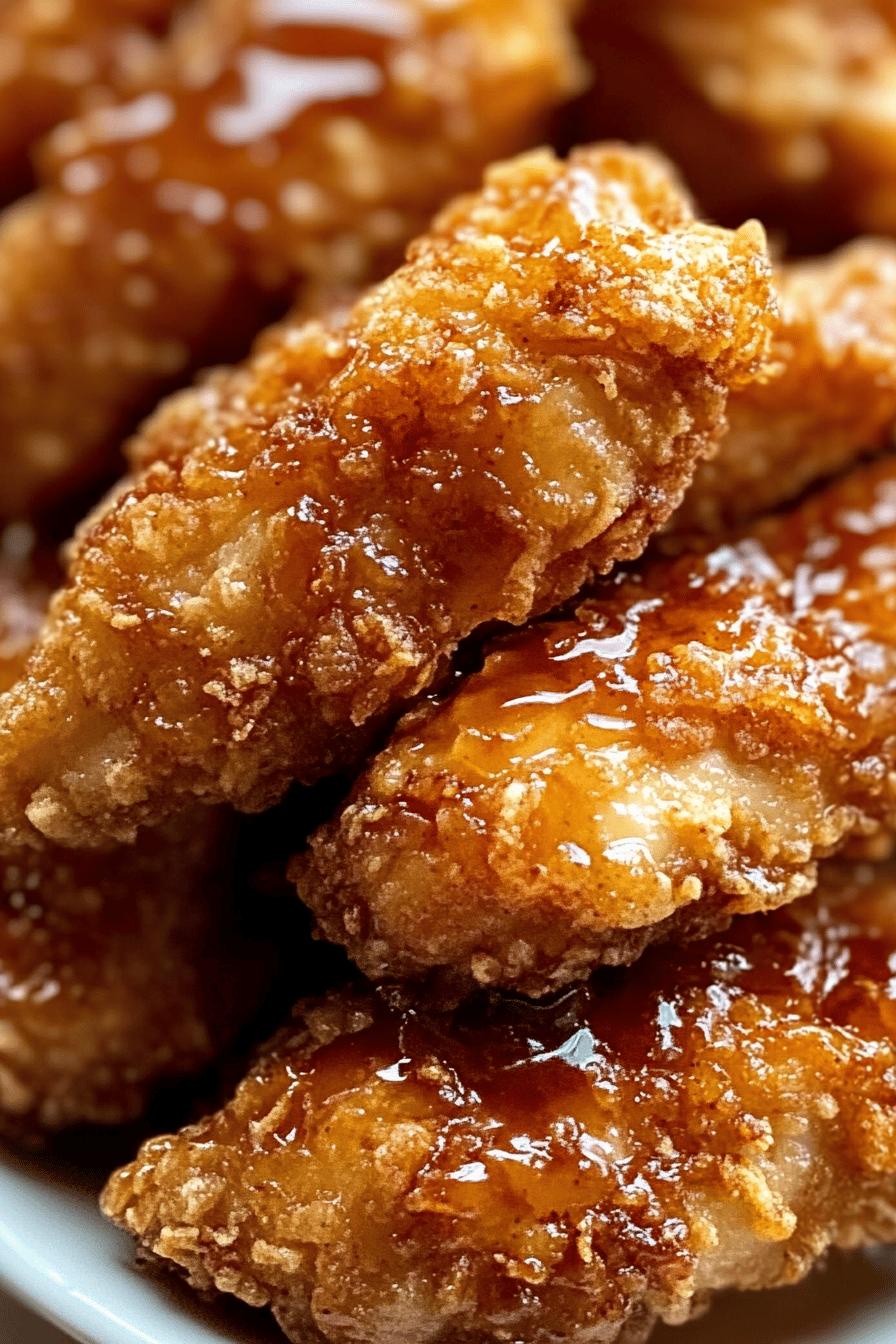
Are you ready to indulge in a dish that combines crispy, sweet, and savory flavors? Look no further than Honey Butter Fried Chicken Tenders! This delightful recipe takes the classic chicken tender and elevates it to new heights. With a juicy, tender interior and a crunchy exterior, these chicken tenders are a crowd-pleaser. The secret lies in the buttermilk marinade, which ensures each bite is moist and flavorful. Plus, the honey butter glaze adds a touch of sweetness that perfectly complements the savory spices.
What Makes Honey Butter Fried Chicken Tenders Special?
What sets Honey Butter Fried Chicken Tenders apart from other chicken recipes? It’s all about the combination of flavors and textures. The buttermilk marinade not only tenderizes the chicken but also infuses it with a rich taste. The coating, made from a blend of spices, gives the tenders a delightful crunch. Finally, the honey butter glaze drizzled on top adds a sweet finish that makes these tenders irresistible. This unique blend of flavors creates a dish that is both comforting and exciting, making it a must-try for any chicken lover.
The Perfect Dish for Any Occasion
Whether you’re hosting a game day party, preparing a quick weeknight dinner, or simply craving a delicious snack, Honey Butter Fried Chicken Tenders are the perfect choice. They are easy to make and can be served in various ways. Pair them with your favorite dipping sauces, or serve them alongside a fresh salad for a complete meal. No matter the occasion, these chicken tenders are sure to impress your family and friends. So, roll up your sleeves and get ready to whip up this delightful dish!
Ingredients for Honey Butter Fried Chicken Tenders
To create the mouthwatering Honey Butter Fried Chicken Tenders, you’ll need a few simple ingredients. Each component plays a vital role in achieving that perfect balance of flavors. Here’s what you’ll need:
- For the Chicken Tenders:
- 1 pound of chicken breast tenders
- 1 cup of buttermilk
- 1 teaspoon of salt
- 1 teaspoon of black pepper
- 1 teaspoon of garlic powder
- 1 teaspoon of onion powder
- 1 teaspoon of paprika
- 1 cup of all-purpose flour
- 1 cup of vegetable oil (for frying)
- For the Honey Butter Glaze:
- 1/2 cup of unsalted butter, melted
- 1/4 cup of honey
- 1/2 teaspoon of cinnamon (optional)
These ingredients come together to create a dish that is not only delicious but also easy to prepare. The buttermilk tenderizes the chicken, while the spices add depth to the flavor. The honey butter glaze is the cherry on top, providing a sweet finish that will have everyone coming back for more. Gather these ingredients, and let’s move on to the next step of preparing your Honey Butter Fried Chicken Tenders!
Step-by-Step Preparation of Honey Butter Fried Chicken Tenders
Now that you have all your ingredients ready, it’s time to dive into the preparation of your Honey Butter Fried Chicken Tenders. Follow these simple steps to create a dish that’s sure to impress!
Step 1: Marinating the Chicken
Start by marinating the chicken tenders. In a large bowl, combine the chicken breast tenders with the buttermilk, salt, black pepper, garlic powder, onion powder, and paprika. Make sure each piece is well-coated. Cover the bowl with plastic wrap and let it marinate in the refrigerator for at least 30 minutes. This step is crucial as it tenderizes the chicken and infuses it with flavor.
Step 2: Preparing the Coating
While the chicken is marinating, prepare the coating. In a separate shallow dish, add the all-purpose flour. You can also mix in a pinch of salt and pepper for extra flavor. This flour mixture will create a crispy outer layer when fried. Once the chicken has marinated, take each tender out of the buttermilk and let the excess drip off. Then, dredge each piece in the flour mixture, ensuring they are fully coated. Shake off any excess flour and set the coated tenders aside on a plate.
Step 3: Frying the Chicken Tenders
Next, it’s time to fry the chicken tenders. In a large skillet, heat the vegetable oil over medium-high heat. You’ll know the oil is ready when it shimmers. Carefully add the coated chicken tenders to the hot oil, making sure not to overcrowd the pan. Fry them for about 4-5 minutes on each side, or until they turn golden brown and crispy. Use a slotted spoon to remove the tenders from the oil and place them on a paper towel-lined plate to drain any excess oil.
Step 4: Making the Honey Butter Glaze
While the chicken is frying, you can prepare the honey butter glaze. In a small saucepan, melt the unsalted butter over low heat. Once melted, stir in the honey and cinnamon (if using). Mix well until everything is combined and smooth. This glaze will add a sweet and buttery finish to your chicken tenders.
Step 5: Drizzling and Serving
Finally, it’s time to bring everything together! Place the fried chicken tenders on a serving platter. Drizzle the warm honey butter glaze generously over the tenders. You can also serve the glaze on the side for dipping. Enjoy your Honey Butter Fried Chicken Tenders while they’re hot, and watch as everyone digs in!
Variations of Honey Butter Fried Chicken Tenders
If you love the classic Honey Butter Fried Chicken Tenders, you’ll be excited to know there are several delicious variations to try! Each version adds a unique twist, making it easy to enjoy this dish in different ways. Let’s explore two popular variations: Spicy Honey Butter Fried Chicken Tenders and Baked Honey Butter Chicken Tenders.
Spicy Honey Butter Fried Chicken Tenders
For those who enjoy a little heat, Spicy Honey Butter Fried Chicken Tenders are the perfect choice! To make this variation, simply add some heat to the marinade and glaze. Here’s how:
- In the marinade, mix in 1-2 teaspoons of cayenne pepper or hot sauce. This will give the chicken a spicy kick.
- For the honey butter glaze, add a pinch of cayenne or a few dashes of hot sauce to the melted butter and honey mixture. This will create a sweet and spicy flavor that’s sure to please your taste buds.
This spicy version is great for those who love bold flavors. Serve it with a cooling dipping sauce, like ranch or blue cheese, to balance the heat!
Baked Honey Butter Chicken Tenders
If you’re looking for a healthier option, Baked Honey Butter Chicken Tenders are a fantastic alternative. Baking instead of frying reduces the amount of oil used, making this dish lighter. Here’s how to prepare them:
- Preheat your oven to 400°F (200°C).
- After coating the chicken tenders in the flour mixture, place them on a baking sheet lined with parchment paper. Make sure to space them out evenly.
- Lightly spray the tenders with cooking spray or drizzle a little olive oil over them. This helps achieve a crispy texture.
- Bake for about 15-20 minutes, flipping halfway through, until they are golden brown and cooked through.
Once baked, drizzle the honey butter glaze over the tenders just like in the original recipe. This variation is perfect for those who want to enjoy the same great taste with fewer calories!
With these variations, you can enjoy Honey Butter Fried Chicken Tenders in new and exciting ways. Whether you prefer them spicy or baked, each version is sure to be a hit at your table!
Cooking Note for Honey Butter Fried Chicken Tenders
When preparing Honey Butter Fried Chicken Tenders, a few cooking notes can help ensure your dish turns out perfectly every time. First, always use fresh chicken breast tenders for the best flavor and texture. If you can, opt for organic or free-range chicken, as it tends to be juicier and more flavorful.
Next, marinating the chicken in buttermilk is essential. This step not only tenderizes the meat but also adds a rich flavor. If you have time, consider marinating the chicken for a few hours or even overnight. The longer it sits, the more flavorful it becomes!
When frying, make sure the oil is hot enough before adding the chicken. If the oil isn’t hot, the tenders will absorb too much oil and become greasy. A good test is to drop a small piece of bread into the oil; if it sizzles and browns quickly, you’re ready to fry.
Also, avoid overcrowding the pan. Frying too many tenders at once can lower the oil temperature, leading to soggy chicken. Fry in batches if necessary, allowing each tender enough space to cook evenly.
Lastly, let the fried chicken tenders rest on a paper towel-lined plate after frying. This helps absorb any excess oil, keeping your tenders crispy. Drizzle the honey butter glaze just before serving to maintain that delightful crunch. With these tips in mind, you’ll create Honey Butter Fried Chicken Tenders that are sure to impress!
Serving Suggestions for Honey Butter Fried Chicken Tenders
Now that you’ve prepared your delicious Honey Butter Fried Chicken Tenders, it’s time to think about how to serve them! This dish is versatile and can be enjoyed in many ways. Here are some serving suggestions that will elevate your meal and impress your guests.
- Classic Dipping Sauces: Serve your chicken tenders with a variety of dipping sauces. Popular choices include ranch dressing, honey mustard, barbecue sauce, or even a spicy sriracha mayo. These sauces add an extra layer of flavor and allow everyone to customize their experience.
- Fresh Salads: Pair the tenders with a fresh salad for a balanced meal. A simple green salad with mixed greens, cherry tomatoes, and a light vinaigrette complements the richness of the chicken. You can also add some avocado or nuts for extra texture.
- Sandwiches: Turn your chicken tenders into a delicious sandwich! Place a few tenders on a toasted bun, add some lettuce, tomato, and a drizzle of honey butter glaze. This makes for a hearty lunch or dinner option that’s sure to satisfy.
- Wraps: For a fun twist, create wraps using tortillas. Add the chicken tenders, some shredded lettuce, diced tomatoes, and your favorite sauce. Roll it up for a tasty on-the-go meal!
- Side Dishes: Serve your chicken tenders with classic side dishes like coleslaw, mashed potatoes, or corn on the cob. These sides enhance the comfort food experience and make for a filling meal.
- Game Day Platter: If you’re hosting a gathering, consider creating a game day platter. Arrange the chicken tenders on a large serving tray with various dipping sauces, fresh veggies, and chips. This makes for a fun and interactive snack for your guests!
With these serving suggestions, your Honey Butter Fried Chicken Tenders will shine at any meal or occasion. Whether you keep it simple or get creative, your family and friends will love this delightful dish!
Tips for Perfect Honey Butter Fried Chicken Tenders
To ensure your Honey Butter Fried Chicken Tenders turn out perfectly every time, consider these helpful tips. Each suggestion will enhance the flavor and texture of your dish, making it even more enjoyable for you and your guests.
- Choose the Right Chicken: Always opt for fresh chicken breast tenders. They are more tender and flavorful than frozen ones. If you can, select organic or free-range chicken for the best taste.
- Marinate Longer: While 30 minutes is the minimum for marinating, letting the chicken sit in the buttermilk for a few hours or overnight will yield even better results. This extra time allows the flavors to penetrate deeply.
- Use a Thermometer: To ensure your chicken is cooked perfectly, use a meat thermometer. The internal temperature should reach 165°F (75°C). This guarantees that your chicken is safe to eat and juicy.
- Maintain Oil Temperature: Keep an eye on the oil temperature while frying. If it drops too low, the chicken will absorb more oil and become greasy. Use a thermometer to monitor the heat, aiming for around 350°F (175°C).
- Fry in Batches: Avoid overcrowding the pan when frying. Frying too many tenders at once can lower the oil temperature, leading to uneven cooking. Fry in small batches for the best results.
- Let Them Rest: After frying, let the chicken tenders rest on a paper towel-lined plate. This helps absorb excess oil and keeps them crispy. Drizzle the honey butter glaze just before serving to maintain that delightful crunch.
- Experiment with Spices: Feel free to customize the spice blend in the coating. Adding a pinch of cayenne pepper or smoked paprika can give your tenders an extra kick. Adjust the spices to suit your taste!
- Serve Immediately: For the best experience, serve the chicken tenders right after frying. They are at their crispiest and most flavorful when hot. If you need to keep them warm, place them in a low oven (around 200°F or 93°C) until ready to serve.
By following these tips, you’ll create Honey Butter Fried Chicken Tenders that are not only delicious but also perfectly cooked. Enjoy the process and the delightful results!
Breakdown of Time for Honey Butter Fried Chicken Tenders
Understanding the time needed to prepare Honey Butter Fried Chicken Tenders is essential for planning your meal. Here’s a simple breakdown of the time required for each step, so you can manage your cooking efficiently and enjoy this delicious dish without any stress.
Prep Time
The prep time for Honey Butter Fried Chicken Tenders is approximately 10 minutes. This includes gathering your ingredients, marinating the chicken, and preparing the coating. While the chicken marinates, you can use this time to set up your cooking area and get everything ready for frying.
Cooking Time
Once you’re ready to cook, the frying process will take about 15-20 minutes. This includes frying the chicken tenders for about 4-5 minutes on each side until they are golden brown and crispy. Additionally, you’ll need a few minutes to prepare the honey butter glaze while the chicken is frying. Overall, the cooking time is quick, making this dish perfect for a weeknight dinner!
Total Time
In total, you can expect to spend around 45-60 minutes from start to finish. This includes the marinating time of at least 30 minutes, plus the 10 minutes of prep and 15-20 minutes of cooking. If you choose to marinate the chicken longer, such as overnight, you can easily adjust your total time accordingly. With this breakdown, you’ll be well-prepared to create your Honey Butter Fried Chicken Tenders!
Nutritional Information for Honey Butter Fried Chicken Tenders
When enjoying a delicious dish like Honey Butter Fried Chicken Tenders, it’s important to consider the nutritional information. This helps you make informed choices about your meals. Below, we break down the key nutritional components of this tasty recipe, so you know what to expect.
Calories
Each serving of Honey Butter Fried Chicken Tenders contains approximately 350-400 calories. This number can vary based on the size of the chicken tenders and the amount of honey butter glaze used. While this dish is indulgent, it can be enjoyed as part of a balanced diet when paired with healthy sides.
Protein
Protein is an essential nutrient, and these chicken tenders deliver! Each serving provides around 25-30 grams of protein. Chicken breast is a great source of lean protein, which helps support muscle growth and repair. Including protein in your meals can also keep you feeling full and satisfied.
Sodium
One serving of Honey Butter Fried Chicken Tenders contains about 600-700 milligrams of sodium. This amount can vary depending on the seasoning used and any additional sauces served alongside. If you’re watching your sodium intake, consider using less salt in the marinade and glaze, or serve with low-sodium dipping sauces.
By keeping these nutritional facts in mind, you can enjoy your Honey Butter Fried Chicken Tenders while being aware of their impact on your diet. Remember, moderation is key, and pairing these tenders with fresh vegetables or a light salad can create a well-rounded meal!
FAQs about Honey Butter Fried Chicken Tenders
Can I use frozen chicken tenders for this recipe?
While it’s best to use fresh chicken breast tenders for optimal flavor and texture, you can use frozen chicken tenders in a pinch. However, make sure to thaw them completely before marinating. This ensures that the buttermilk can properly tenderize the chicken. Keep in mind that frozen tenders may not absorb the marinade as well as fresh ones, which could affect the overall taste.
How do I store leftover Honey Butter Fried Chicken Tenders?
If you have any leftovers, store them in an airtight container in the refrigerator. They can last for up to 3 days. To reheat, place them in an oven preheated to 350°F (175°C) for about 10-15 minutes. This will help maintain their crispiness. Avoid using the microwave, as it can make the tenders soggy.
What can I serve with Honey Butter Fried Chicken Tenders?
Honey Butter Fried Chicken Tenders pair wonderfully with a variety of sides. Consider serving them with classic options like coleslaw, mashed potatoes, or corn on the cob. You can also add a fresh salad or some crispy fries for a complete meal. Dipping sauces like ranch, honey mustard, or barbecue sauce can enhance the flavor even more!
Can I make the honey butter glaze in advance?
Yes, you can prepare the honey butter glaze in advance! Simply melt the butter and mix it with honey and cinnamon, then store it in an airtight container in the refrigerator. When you’re ready to use it, gently reheat the glaze in a saucepan over low heat until it’s warm and pourable. This makes it easy to enjoy your chicken tenders with a delicious glaze without any last-minute fuss!
Conclusion on Honey Butter Fried Chicken Tenders
In conclusion, Honey Butter Fried Chicken Tenders are a delightful dish that brings together crispy, sweet, and savory flavors in every bite. This recipe is not only easy to follow but also allows for creativity with variations and serving options. Whether you’re preparing a quick weeknight dinner or hosting a gathering, these chicken tenders are sure to impress your family and friends.
The combination of a buttermilk marinade, a flavorful coating, and a luscious honey butter glaze creates a unique taste that stands out from traditional fried chicken. Plus, with tips for perfecting your cooking technique, you can ensure that your tenders are always juicy and crispy.
So, why wait? Gather your ingredients and start making these delicious Honey Butter Fried Chicken Tenders today! Enjoy them with your favorite sides, sauces, or even as part of a fun game day platter. No matter how you serve them, this dish is bound to become a new favorite in your household. Happy cooking!
Relevant Recipes Link: