Introduction to Juicy Pineapple Cake
The Allure of Tropical Flavors
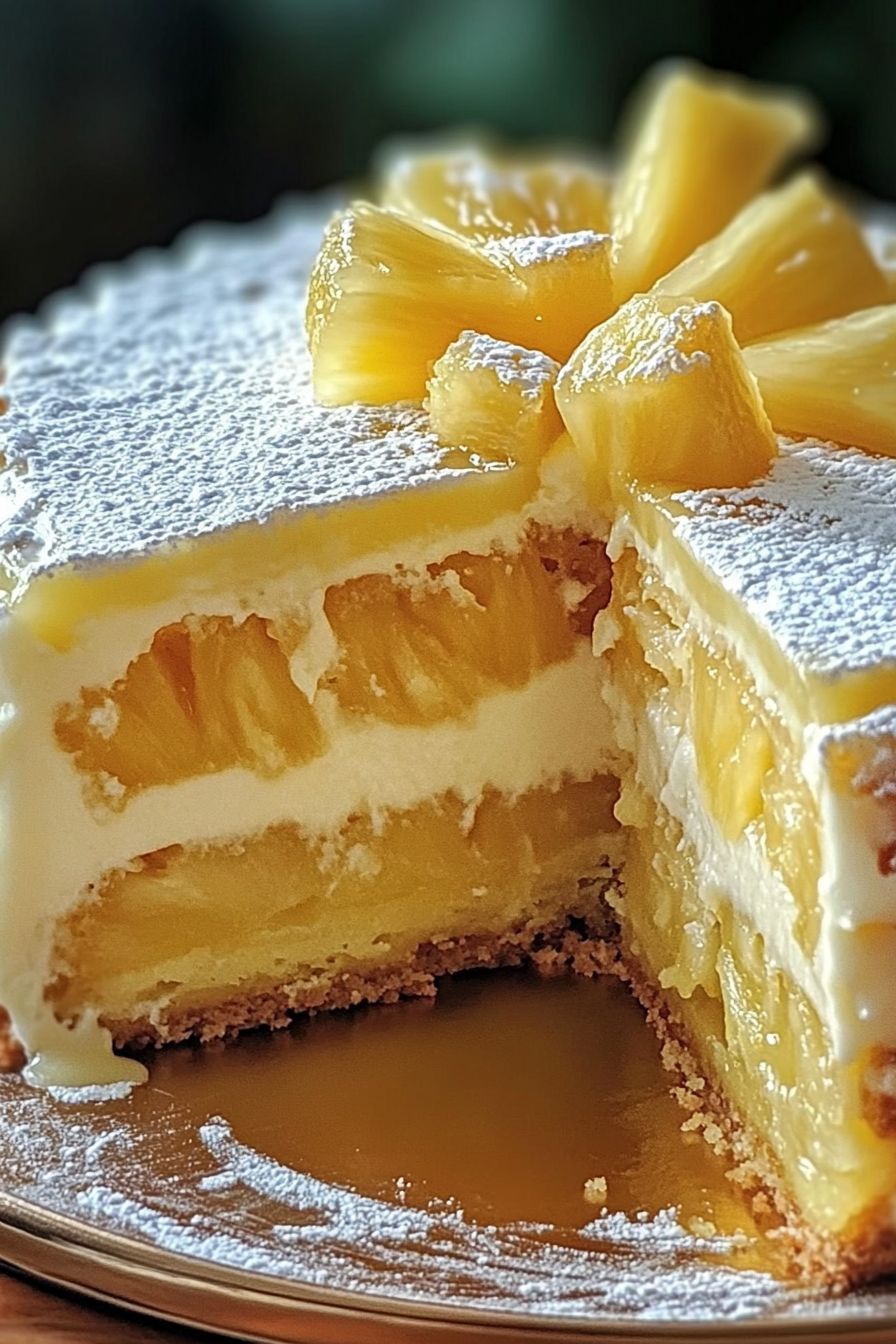
There’s something magical about tropical flavors that instantly transports you to a sunny beach. The Juicy Pineapple Cake is a perfect example of this. With its sweet and tangy pineapple, combined with the rich taste of coconut, this cake brings a slice of paradise to your table. Each bite is a delightful experience, bursting with juicy goodness. The aroma of baking pineapple fills your kitchen, making it hard to resist. Whether you’re celebrating a special occasion or just want a sweet treat, this cake is sure to impress.
Why You Should Try This Recipe
This Juicy Pineapple Cake is not just delicious; it’s also easy to make! With simple ingredients and straightforward steps, even beginner bakers can whip it up. Plus, it’s a versatile dessert. You can serve it at parties, family gatherings, or even as a delightful afternoon snack. The cake is moist and flavorful, making it a crowd-pleaser. Also, it’s a great way to incorporate fruit into your dessert, adding a touch of healthiness to your indulgence. So, why not give this recipe a try? You’ll be glad you did!
Ingredients for Juicy Pineapple Cake
To create this delightful Juicy Pineapple Cake, you’ll need a few simple ingredients. Each one plays a vital role in bringing out the tropical flavors that make this dessert so special. Here’s what you’ll need:
- 1 1/2 cups all-purpose flour
- 1 cup granulated sugar
- 1/2 cup unsalted butter, softened
- 2 eggs
- 1 tsp vanilla extract
- 1 tsp baking soda
- 1/2 tsp salt
- 1 cup crushed pineapple, drained
- 1/2 cup shredded coconut
These ingredients come together to create a moist and flavorful cake. The crushed pineapple adds a juicy texture, while the shredded coconut gives it a delightful chewiness. The combination of butter and sugar ensures a rich taste, making every bite a treat. So, gather these ingredients and get ready to bake a cake that will transport you to a tropical paradise!
Step-by-Step Preparation of Juicy Pineapple Cake
Step 1: Preheat and Prepare the Cake Pan
First things first, preheat your oven to 350°F (175°C). This step is crucial as it ensures your cake bakes evenly. While the oven warms up, grab a 9-inch round cake pan. Grease it well with butter or cooking spray. This will help the cake come out easily once it’s baked. You can also line the bottom with parchment paper for extra protection. Now, your pan is ready for the delicious batter!
Step 2: Creaming Butter and Sugar
Next, take a large mixing bowl and add the softened unsalted butter and granulated sugar. Using an electric mixer, cream them together until the mixture is light and fluffy. This process usually takes about 3-5 minutes. The air you incorporate will make your cake light and tender. Remember, the fluffier the mixture, the better your cake will rise!
Step 3: Incorporating Eggs and Vanilla
Now, it’s time to add the eggs. Crack them into the bowl, one at a time. Make sure to beat well after each addition. This helps to blend everything smoothly. After the eggs, pour in the vanilla extract. The vanilla adds a lovely aroma and enhances the cake’s flavor. Mix until everything is well combined. Your batter is starting to take shape!
Step 4: Mixing Dry Ingredients
In a separate bowl, combine the all-purpose flour, baking soda, and salt. Whisk them together to ensure they are evenly mixed. This step is important because it helps distribute the baking soda and salt throughout the flour. It prevents any clumps from forming in your cake. Once mixed, set this bowl aside for the next step.
Step 5: Combining Wet and Dry Ingredients
Now, it’s time to bring the wet and dry ingredients together. Gradually add the dry mixture to the creamed butter and sugar. Mix gently until just combined. Be careful not to overmix, as this can make your cake dense. A few lumps are okay! The goal is to create a smooth batter without overworking it.
Step 6: Adding Pineapple and Coconut
Here comes the fun part! Fold in the crushed pineapple and shredded coconut into the batter. Use a spatula to gently mix them in. This will add that juicy texture and tropical flavor we all love. Make sure the pineapple is well-drained to avoid excess moisture in the cake. Once everything is combined, your batter is ready for the oven!
Step 7: Baking the Cake
Pour the batter into your prepared cake pan. Spread it evenly with a spatula. Place the pan in the preheated oven and bake for 35-40 minutes. To check if it’s done, insert a toothpick into the center. If it comes out clean, your cake is ready! The aroma of baking pineapple will fill your kitchen, making it hard to wait.
Step 8: Cooling and Serving
Once baked, remove the cake from the oven and let it cool in the pan for about 10 minutes. Then, carefully transfer it to a wire rack to cool completely. This step is important as it prevents the cake from becoming soggy. Once cooled, slice it up and serve. Enjoy the juicy goodness of your homemade Pineapple Cake!
Variations of Juicy Pineapple Cake
Adding Different Fruits
If you love experimenting in the kitchen, consider adding different fruits to your Juicy Pineapple Cake. For instance, mango or banana can complement the pineapple beautifully. Simply replace some of the crushed pineapple with an equal amount of diced mango or mashed banana. This will not only enhance the flavor but also add a unique twist to your cake. You can also try adding berries like blueberries or strawberries for a burst of color and taste. Just remember to adjust the moisture levels accordingly, as some fruits may add extra liquid.
Gluten-Free Options
For those who need a gluten-free option, you can easily adapt this recipe. Substitute the all-purpose flour with a gluten-free flour blend. Make sure to choose a blend that includes xanthan gum, as this will help bind the ingredients together. Additionally, check that your baking soda is gluten-free. The rest of the ingredients remain the same, ensuring you still enjoy the delightful flavors of the Juicy Pineapple Cake. This way, everyone can indulge in this tropical treat, regardless of dietary restrictions!
Cooking Note for Juicy Pineapple Cake
When baking your Juicy Pineapple Cake, there are a few important cooking notes to keep in mind. First, always ensure your ingredients are at room temperature. This helps them blend better, resulting in a smoother batter. For instance, take the butter and eggs out of the fridge about 30 minutes before you start baking.
Another key point is to measure your ingredients accurately. Use measuring cups and spoons for precision. Too much flour can make your cake dry, while too little can lead to a dense texture. If you’re unsure, spoon the flour into the measuring cup and level it off with a knife for the best results.
Also, keep an eye on your cake as it bakes. Every oven is different, and baking times can vary. If your cake starts to brown too quickly, you can cover it loosely with aluminum foil. This will prevent the top from burning while the inside continues to bake.
Lastly, patience is key! Allow your cake to cool completely before slicing. This helps the flavors settle and makes for cleaner cuts. Enjoy the process, and soon you’ll have a delicious Juicy Pineapple Cake to share with family and friends!
Serving Suggestions for Juicy Pineapple Cake
Pairing with Ice Cream
One of the best ways to enjoy your Juicy Pineapple Cake is by pairing it with a scoop of ice cream. The creamy texture of ice cream complements the moistness of the cake perfectly. Vanilla ice cream is a classic choice, as its subtle flavor allows the tropical notes of the cake to shine. However, you can also try coconut or even pineapple-flavored ice cream for an extra burst of flavor. Just imagine the delightful combination of warm cake and cold ice cream melting together in your mouth. It’s a match made in dessert heaven!
Garnishing Ideas
Garnishing your Juicy Pineapple Cake can elevate its presentation and flavor. Consider topping the cake with a sprinkle of shredded coconut for added texture. You can also add fresh pineapple slices or chunks on top for a vibrant look. A drizzle of caramel or chocolate sauce can add a sweet touch that enhances the overall experience. For a refreshing twist, try adding a dollop of whipped cream or a scoop of yogurt. Not only does this add creaminess, but it also balances the sweetness of the cake. With these garnishing ideas, your Juicy Pineapple Cake will not only taste amazing but also look stunning on any dessert table!
Tips for Perfecting Your Juicy Pineapple Cake
Storage Tips
To keep your Juicy Pineapple Cake fresh and delicious, proper storage is essential. First, allow the cake to cool completely before storing it. This prevents moisture from building up, which can make the cake soggy. Once cooled, wrap the cake tightly in plastic wrap or aluminum foil. This will help retain its moisture and flavor.
If you plan to enjoy the cake within a few days, you can store it at room temperature. Just make sure to keep it in a cool, dry place, away from direct sunlight. However, if you want to keep it for a longer period, consider refrigerating it. Place the wrapped cake in the fridge, where it can last for up to a week.
For even longer storage, you can freeze your Juicy Pineapple Cake. Slice the cake into individual pieces and wrap each slice in plastic wrap. Then, place the wrapped slices in a freezer-safe bag or container. This way, you can enjoy a piece of tropical goodness whenever you crave it! Just remember to thaw the slices in the fridge before serving for the best taste and texture.
Troubleshooting Common Issues
Even the best bakers encounter challenges sometimes. Here are some common issues you might face while making your Juicy Pineapple Cake and how to fix them:
- Dense Cake: If your cake turns out dense, it may be due to overmixing the batter. Remember to mix until just combined. Also, ensure your baking soda is fresh, as expired baking soda can affect the rise.
- Dry Cake: A dry cake can result from too much flour or overbaking. Always measure your flour accurately and keep an eye on the baking time. If the toothpick comes out clean, it’s time to take it out!
- Sunken Center: If your cake sinks in the middle, it could be due to underbaking. Make sure to bake it long enough and check with a toothpick. If it’s not done, give it a few more minutes.
- Uneven Baking: If your cake bakes unevenly, ensure your oven is properly calibrated. You can also rotate the cake halfway through baking for even heat distribution.
By following these tips and troubleshooting advice, you’ll be well on your way to creating the perfect Juicy Pineapple Cake every time. Happy baking!
Breakdown of Time for Juicy Pineapple Cake
Prep Time
Preparing your Juicy Pineapple Cake is a breeze! The prep time for this delightful dessert is approximately 15 minutes. During this time, you’ll gather all your ingredients, preheat the oven, and mix the batter. It’s a quick and easy process that allows you to dive into the fun of baking without spending too much time in the kitchen. Just make sure to have everything ready before you start, so you can enjoy the experience!
Cooking Time
The cooking time for your Juicy Pineapple Cake is around 35-40 minutes. This is when the magic happens! As the cake bakes, the sweet aroma of pineapple and coconut fills your home, making it hard to resist. Keep an eye on the cake during this time. You’ll want to check for doneness by inserting a toothpick into the center. If it comes out clean, your cake is ready to be taken out of the oven!
Total Time
In total, you’ll spend about 55-60 minutes from start to finish when making your Juicy Pineapple Cake. This includes both the prep and cooking times. It’s a small investment for a delicious homemade dessert that will surely impress your family and friends. So, gather your ingredients, and get ready to enjoy a slice of tropical paradise!
Nutritional Information for Juicy Pineapple Cake
Calories and Macronutrients
Understanding the nutritional content of your Juicy Pineapple Cake can help you enjoy it even more. Each serving of this delightful cake contains approximately 280 calories. Here’s a breakdown of the macronutrients per serving:
- Carbohydrates: 40g
- Protein: 3g
- Fat: 12g
- Sugar: 20g
This cake is a sweet treat, but it also provides some essential nutrients. The carbohydrates give you energy, while the fats contribute to the cake’s moist texture. Although it’s a dessert, enjoying it in moderation can fit into a balanced diet.
Health Benefits of Ingredients
While indulging in a sweet treat, it’s nice to know that some ingredients in your Juicy Pineapple Cake offer health benefits. Here are a few highlights:
- Pineapple: This tropical fruit is rich in vitamin C, which supports your immune system. It also contains bromelain, an enzyme that may help with digestion.
- Coconut: Shredded coconut adds fiber to the cake, which is beneficial for digestive health. It also contains healthy fats that can provide energy.
- Eggs: Eggs are a great source of protein and contain essential vitamins and minerals, including vitamin D and B12.
- Butter: While butter is high in saturated fat, it also contains fat-soluble vitamins like A, D, E, and K, which are important for overall health.
By incorporating these ingredients, your Juicy Pineapple Cake not only satisfies your sweet tooth but also provides some nutritional value. Enjoying this cake as part of a balanced diet can make your dessert experience even more rewarding!
FAQs about Juicy Pineapple Cake
Can I use fresh pineapple instead of canned?
Absolutely! You can use fresh pineapple to make your Juicy Pineapple Cake. Just make sure to peel, core, and chop the pineapple into small pieces. You can also crush it slightly to mimic the texture of canned crushed pineapple. However, remember to drain any excess juice to avoid making the batter too wet. Fresh pineapple will add a vibrant flavor and a delightful texture to your cake!
How do I store leftover cake?
Storing leftover Juicy Pineapple Cake is simple! First, let the cake cool completely. Then, wrap it tightly in plastic wrap or aluminum foil to keep it fresh. You can store it at room temperature for up to three days. If you want to keep it longer, place the wrapped cake in the refrigerator, where it can last for about a week. For even longer storage, consider freezing individual slices. Just remember to thaw them in the fridge before enjoying!
Can I make this cake ahead of time?
Yes, you can make your Juicy Pineapple Cake ahead of time! This cake actually tastes even better after a day or two, as the flavors have time to meld. You can bake the cake and store it wrapped at room temperature for up to three days. If you want to prepare it even further in advance, consider freezing it. Just make sure to wrap it well to prevent freezer burn. When you’re ready to serve, thaw it in the fridge overnight and enjoy!
What can I substitute for eggs in this recipe?
If you need an egg substitute for your Juicy Pineapple Cake, there are several options! You can use 1/4 cup of unsweetened applesauce for each egg. This will keep the cake moist and add a hint of sweetness. Another option is to use 1/4 cup of yogurt or buttermilk. For a vegan alternative, consider using a flaxseed meal. Mix 1 tablespoon of flaxseed meal with 2.5 tablespoons of water, let it sit for a few minutes, and use it as a substitute for one egg. These alternatives will help you achieve a delicious cake without eggs!
Conclusion: Enjoying Your Juicy Pineapple Cake
In conclusion, the Juicy Pineapple Cake is more than just a dessert; it’s a delightful experience that brings the taste of the tropics right to your home. With its moist texture and vibrant flavors, this cake is perfect for any occasion, whether it’s a birthday party, a family gathering, or simply a sweet treat after dinner. The combination of crushed pineapple and shredded coconut creates a unique flavor profile that is both refreshing and satisfying.
As you slice into this cake, the aroma will fill the air, inviting everyone to indulge. Pair it with a scoop of ice cream or a dollop of whipped cream for an extra special touch. Don’t forget to experiment with different fruits or gluten-free options to make it your own. The possibilities are endless!
Remember, baking is not just about following a recipe; it’s about enjoying the process and sharing the results with loved ones. So, gather your ingredients, roll up your sleeves, and get ready to create a delicious masterpiece. Your Juicy Pineapple Cake awaits, and it’s sure to be a hit with everyone who tries it. Happy baking!