Introduction to Red Velvet Tree Cake
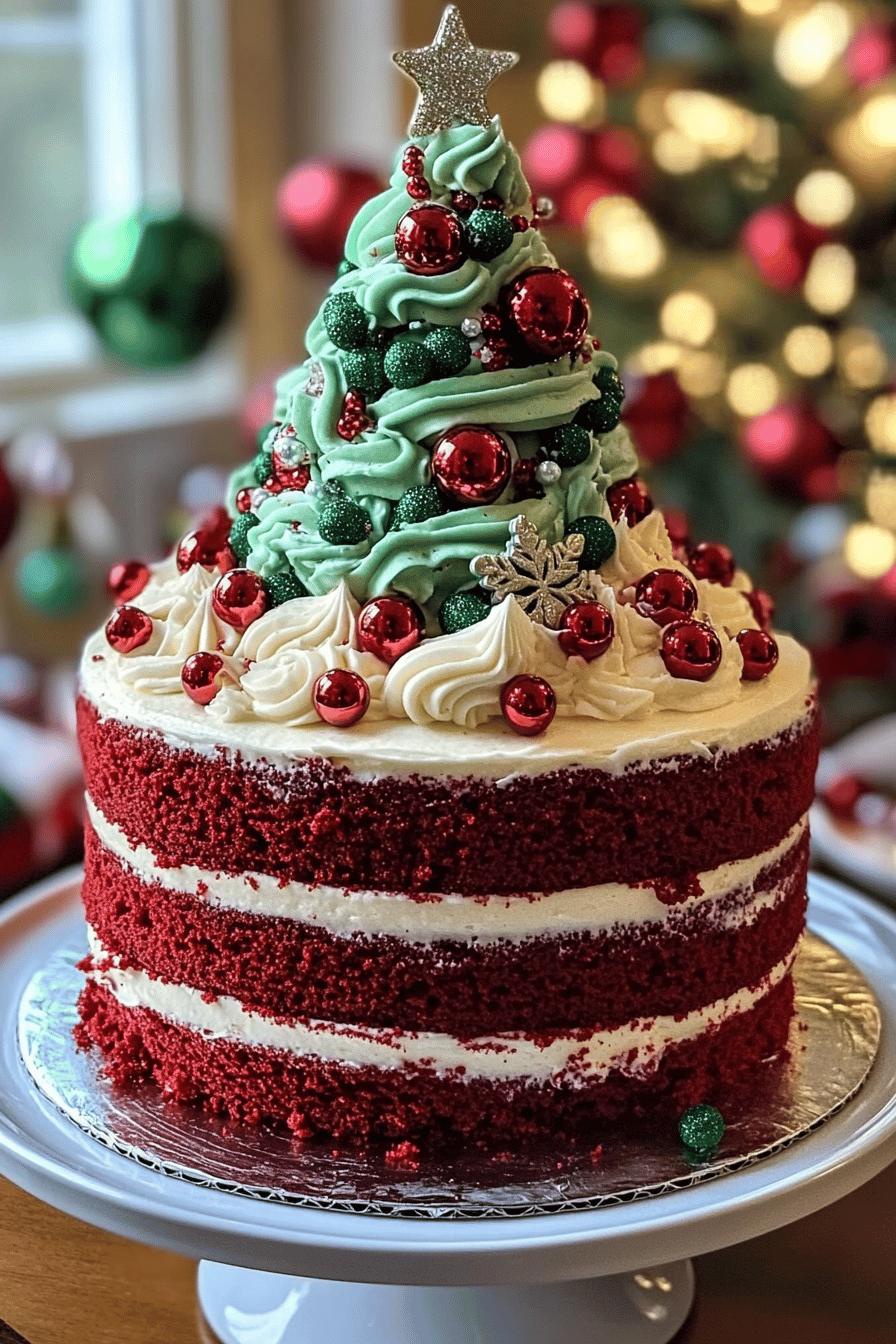
As the holiday season approaches, many of us look for ways to make our celebrations special. One delightful way to do this is by baking a stunning Red Velvet Tree Cake. This cake is not just a treat for the taste buds; it’s also a feast for the eyes. With its vibrant red layers and creamy green frosting, it captures the spirit of the season beautifully.
The Significance of Red Velvet Tree Cake in Holiday Celebrations
The Red Velvet Tree Cake has become a beloved dessert during the holidays. Its rich, velvety texture and unique flavor make it a favorite among many. Traditionally, red velvet cake symbolizes love and passion, making it a perfect choice for festive gatherings. The tree shape adds a whimsical touch, reminding us of the joy and warmth of the season.
Moreover, this cake serves as a wonderful centerpiece for holiday tables. Imagine your family and friends gathered around, admiring the beautiful layers and colorful sprinkles. It sparks conversations and creates lasting memories. Whether it’s a Christmas party, a winter gathering, or a New Year’s celebration, this cake is sure to impress everyone.
In addition to its visual appeal, the Red Velvet Tree Cake is versatile. You can customize it with different flavors or frostings to suit your taste. This adaptability makes it a go-to recipe for many bakers during the holiday season. So, let’s dive into the ingredients and steps needed to create this festive masterpiece!
Ingredients for Red Velvet Tree Cake
To create a delightful Red Velvet Tree Cake, you’ll need a selection of ingredients that come together to form its rich flavor and vibrant color. Here’s what you’ll need:
- For the Cake:
- 2 ½ cups all-purpose flour
- 1 ½ cups granulated sugar
- 1 teaspoon baking soda
- 1 teaspoon salt
- 1 teaspoon cocoa powder
- 1 ½ cups vegetable oil
- 1 cup buttermilk, room temperature
- 2 large eggs, room temperature
- 2 tablespoons red food coloring
- 1 teaspoon vanilla extract
- 1 teaspoon white vinegar
- For the Creamy Green Frosting:
- 1 cup unsalted butter, softened
- 4 cups powdered sugar
- 2 tablespoons heavy cream
- 1 teaspoon vanilla extract
- Green food coloring (to achieve desired shade)
- For Decoration:
- Colorful sprinkles
- Edible glitter (optional)
These ingredients will help you create a moist and flavorful cake that stands out on any holiday table. Make sure to gather everything before you start baking, as it will make the process smoother and more enjoyable. Now that you have your ingredients ready, let’s move on to the preparation steps!
Step-by-Step Preparation of Red Velvet Tree Cake
Now that you have gathered all your ingredients, it’s time to dive into the fun part: preparing your Red Velvet Tree Cake! Follow these simple steps to create a delicious and festive dessert that will wow your guests.
Step 1: Preparing the Cake Batter for Red Velvet Tree Cake
Start by preheating your oven to 350°F (175°C). This ensures that your cake bakes evenly. Next, in a large mixing bowl, combine the all-purpose flour, granulated sugar, baking soda, salt, and cocoa powder. Whisk these dry ingredients together until they are well mixed.
In another bowl, mix the vegetable oil, buttermilk, eggs, red food coloring, vanilla extract, and white vinegar. Whisk these wet ingredients until they are smooth and combined. Gradually add the wet mixture to the dry ingredients, stirring gently. Be careful not to overmix; just combine until you see no dry flour. Your batter should be thick and velvety.
Step 2: Baking the Layers of Red Velvet Tree Cake
Now it’s time to bake! Grease and flour your cake pans. You can use two or three pans, depending on how tall you want your tree cake to be. Pour the batter evenly into the prepared pans. Bake in the preheated oven for about 25-30 minutes. To check if they are done, insert a toothpick into the center. If it comes out clean, your cakes are ready!
Once baked, remove the pans from the oven and let them cool for about 10 minutes. Then, carefully turn the cakes out onto a wire rack to cool completely. This step is crucial, as frosting a warm cake can lead to a melty mess!
Step 3: Making the Creamy Green Frosting for Red Velvet Tree Cake
While your cakes are cooling, let’s whip up the creamy green frosting. In a large bowl, beat the softened unsalted butter until it’s light and fluffy. Gradually add the powdered sugar, mixing on low speed to avoid a sugar cloud. Once combined, add the heavy cream and vanilla extract. Beat until the frosting is smooth and creamy.
Now, add green food coloring to achieve your desired shade. Mix well until the color is uniform. Taste your frosting; if it’s too sweet, a pinch of salt can balance the flavors. Your frosting should be ready to spread!
Step 4: Assembling the Red Velvet Tree Cake
With your cakes cooled and frosting ready, it’s time to assemble your masterpiece! Place one layer of cake on a serving plate. Spread a generous amount of green frosting on top. If you’re using multiple layers, repeat this process with the remaining cake layers. Once all layers are stacked, apply a thin layer of frosting around the sides and top of the cake. This is called a crumb coat and helps keep any crumbs from showing in the final layer of frosting.
Chill the cake in the refrigerator for about 30 minutes to set the crumb coat. This step makes the final frosting layer much easier to apply.
Step 5: Decorating the Red Velvet Tree Cake
After chilling, it’s time for the fun part—decorating! Use the remaining green frosting to cover the entire cake smoothly. You can use a spatula or a piping bag for a more decorative touch. Once frosted, sprinkle colorful sprinkles on top to mimic ornaments on a Christmas tree. If you want to add a little sparkle, sprinkle some edible glitter as well!
Finally, step back and admire your beautiful Red Velvet Tree Cake. It’s not just a dessert; it’s a festive centerpiece that will surely delight everyone at your holiday gathering!
Variations of Red Velvet Tree Cake
While the classic Red Velvet Tree Cake is a showstopper on its own, there are many ways to put a unique spin on this festive dessert. Whether you want to try different frostings or explore new flavor combinations, these variations will keep your holiday baking exciting!
Alternative Frosting Ideas for Red Velvet Tree Cake
If you’re looking to switch things up, consider these alternative frosting ideas:
- Cream Cheese Frosting: A classic pairing with red velvet, cream cheese frosting adds a tangy flavor that complements the cake beautifully. Simply mix softened cream cheese with butter, powdered sugar, and a splash of vanilla extract.
- Chocolate Ganache: For chocolate lovers, a rich chocolate ganache can be a decadent choice. Heat heavy cream and pour it over chopped chocolate. Stir until smooth, then let it cool slightly before pouring over the cake.
- Whipped Cream Frosting: Light and fluffy, whipped cream frosting is a delightful option. Whip heavy cream with powdered sugar and vanilla until soft peaks form. This frosting is perfect for a lighter touch!
Feel free to experiment with these frostings to find your favorite combination. Each one brings a different flavor profile to the cake, making it a versatile dessert for any occasion.
Flavor Variations for Red Velvet Tree Cake
In addition to frosting, you can also play with the flavors of the cake itself. Here are some fun ideas:
- Chocolate Red Velvet: Add an extra layer of cocoa powder to your batter for a richer chocolate flavor. This variation is perfect for those who can’t get enough chocolate!
- Spiced Red Velvet: Incorporate warm spices like cinnamon, nutmeg, or ginger into the batter. This will give your cake a cozy, holiday feel that pairs wonderfully with cream cheese frosting.
- Nutty Red Velvet: Add chopped nuts, such as walnuts or pecans, to the batter for a delightful crunch. This adds texture and a nutty flavor that complements the cake’s sweetness.
These flavor variations can make your Red Velvet Tree Cake even more special. Don’t hesitate to mix and match to create a cake that reflects your personal taste!
Cooking Note for Red Velvet Tree Cake
When baking your Red Velvet Tree Cake, there are a few important cooking notes to keep in mind. These tips will help ensure that your cake turns out perfectly moist and flavorful, making it a delightful addition to your holiday celebrations.
First, always use room temperature ingredients. This includes your eggs and buttermilk. Room temperature ingredients blend more easily, resulting in a smoother batter. It also helps the cake rise better, giving it that light and fluffy texture we all love.
Next, be mindful of your oven temperature. Every oven is different, so it’s a good idea to use an oven thermometer to check if your oven is accurate. Baking at the right temperature is crucial for achieving the perfect cake. If your oven runs hot, your cake may bake too quickly, leading to dryness. Conversely, if it’s too cool, the cake may not rise properly.
Additionally, avoid overmixing your batter. Once you combine the wet and dry ingredients, mix just until you no longer see dry flour. Overmixing can lead to a dense cake, which is not what we want for a light and airy Red Velvet Tree Cake.
Lastly, let your cakes cool completely before frosting. This step is essential to prevent the frosting from melting and sliding off. Cooling on a wire rack allows air to circulate around the cake, ensuring it cools evenly.
By following these cooking notes, you’ll be well on your way to creating a stunning and delicious Red Velvet Tree Cake that will impress your guests and make your holiday gatherings even more special!
Serving Suggestions for Red Velvet Tree Cake
Once your beautiful Red Velvet Tree Cake is ready, it’s time to think about how to serve it. This festive dessert is not only a treat for the eyes but also for the taste buds. Here are some delightful serving suggestions to make your cake the star of the show at your holiday gatherings.
First, consider the presentation. Place the cake on a decorative cake stand to elevate its appearance. A stand can add height and make the cake look even more impressive. You can also surround the base with festive decorations, such as pinecones, holly, or small ornaments, to enhance the holiday spirit.
When it comes to slicing the cake, use a sharp knife for clean cuts. Wipe the knife with a damp cloth between slices to keep the edges neat. This will help maintain the beautiful layers of red velvet and green frosting, making each slice visually appealing.
For an extra touch, serve each slice with a dollop of whipped cream or a scoop of vanilla ice cream. The creamy texture of the ice cream pairs wonderfully with the moist cake, creating a delightful contrast. You can also drizzle some chocolate or caramel sauce over the top for added sweetness.
If you want to add a bit of flair, consider garnishing each slice with fresh berries or mint leaves. This not only adds color but also a refreshing taste that complements the richness of the cake. A sprinkle of powdered sugar on top can also give it a snowy, wintery look.
Lastly, don’t forget to pair your Red Velvet Tree Cake with a warm beverage. Hot cocoa, coffee, or even a festive spiced tea can enhance the overall experience. The warmth of the drink will balance the sweetness of the cake, making for a cozy holiday treat.
With these serving suggestions, your Red Velvet Tree Cake will not only taste amazing but also look stunning on your holiday table. Enjoy the smiles and compliments from your guests as they indulge in this festive delight!
Tips for Perfecting Your Red Velvet Tree Cake
Creating the perfect Red Velvet Tree Cake is an art that combines technique, ingredients, and a sprinkle of love. To ensure your cake turns out beautifully every time, here are some helpful tips to keep in mind.
First, always measure your ingredients accurately. Baking is a science, and even a small deviation can affect the outcome. Use measuring cups and spoons for dry ingredients and a liquid measuring cup for wet ingredients. This precision will help you achieve the right texture and flavor.
Next, don’t skip the sifting step. Sifting your flour and cocoa powder helps to aerate them, making your cake lighter. It also removes any lumps, ensuring a smooth batter. This simple step can make a big difference in the final product.
Another important tip is to mix your batter gently. Overmixing can lead to a dense cake, which is not what you want. Mix just until the ingredients are combined. This will help maintain the cake’s light and fluffy texture.
When it comes to baking, keep an eye on the time. Ovens can vary, so start checking your cakes a few minutes before the recommended baking time. Use the toothpick test: insert a toothpick into the center of the cake, and if it comes out clean or with a few crumbs, your cake is done.
After baking, let your cakes cool in the pans for about 10 minutes before transferring them to a wire rack. This helps prevent them from breaking apart. Cooling completely is crucial before frosting, as it prevents the frosting from melting.
Lastly, don’t be afraid to get creative with your decorations! Use different piping techniques to create beautiful designs with your frosting. You can also add festive touches like edible glitter, candy canes, or even small ornaments to enhance the holiday spirit.
By following these tips, you’ll be well on your way to mastering the art of the Red Velvet Tree Cake. Your efforts will surely pay off, resulting in a stunning dessert that will be the highlight of your holiday celebrations!
Breakdown of Time for Red Velvet Tree Cake
When planning to bake your Red Velvet Tree Cake, it’s essential to have a clear understanding of the time involved. This will help you organize your baking schedule and ensure everything runs smoothly. Here’s a breakdown of the time you’ll need for each step of the process.
Prep Time for Red Velvet Tree Cake
The prep time for your Red Velvet Tree Cake is approximately 30 minutes. This includes gathering all your ingredients, measuring them accurately, and preparing the cake batter. Make sure to have everything ready before you start mixing. This will make the process more enjoyable and efficient!
Cooking Time for Red Velvet Tree Cake
Once your batter is ready, the cooking time will take about 25-30 minutes. This is the time it takes for the cake layers to bake in the oven. Remember to check for doneness by inserting a toothpick into the center of the cakes. If it comes out clean, your cakes are ready to cool!
Total Time for Red Velvet Tree Cake
In total, you should expect to spend around 1 hour and 15 minutes to 1 hour and 30 minutes on your Red Velvet Tree Cake. This includes prep time, cooking time, and a little extra time for cooling before frosting. Planning ahead will help you enjoy the baking experience and create a stunning dessert for your holiday celebrations!
Nutritional Information for Red Velvet Tree Cake
Understanding the nutritional information of your Red Velvet Tree Cake can help you enjoy it in moderation. While this cake is a delightful treat, it’s good to be aware of what’s in it. Here’s a breakdown of the key nutritional components you can expect in a typical slice of Red Velvet Tree Cake.
Calories in Red Velvet Tree Cake
A standard slice of Red Velvet Tree Cake contains approximately 350-400 calories. This number can vary based on the size of the slice and the specific ingredients used. The rich combination of flour, sugar, and frosting contributes to the calorie count. Enjoying a slice during the holidays is a wonderful way to indulge, but be mindful of portion sizes!
Protein Content in Red Velvet Tree Cake
Each slice of Red Velvet Tree Cake typically provides around 4-5 grams of protein. The protein mainly comes from the eggs and buttermilk used in the cake batter. While this isn’t a high-protein dessert, it does offer a small amount that can contribute to your daily intake. Pairing it with a protein-rich beverage, like a glass of milk, can enhance your overall protein consumption.
Sodium Levels in Red Velvet Tree Cake
The sodium content in a slice of Red Velvet Tree Cake is generally about 300-400 milligrams. This sodium mainly comes from the baking soda and salt used in the recipe. If you’re watching your sodium intake, it’s a good idea to enjoy this cake in moderation. Balancing it with low-sodium meals throughout the day can help maintain a healthy diet.
By being aware of the nutritional information, you can savor your Red Velvet Tree Cake while keeping your health goals in mind. Remember, it’s all about balance and enjoying the festive flavors of the season!
FAQs about Red Velvet Tree Cake
What is the best way to store Red Velvet Tree Cake?
To keep your Red Velvet Tree Cake fresh, store it in an airtight container. If you have leftover cake, it’s best to refrigerate it. This helps maintain its moisture and flavor. You can also cover the cake with plastic wrap or aluminum foil to prevent it from drying out. If you want to keep it for a longer time, consider freezing individual slices. Just wrap them tightly and place them in a freezer-safe bag. When you’re ready to enjoy, simply thaw at room temperature!
Can I make Red Velvet Tree Cake ahead of time?
Absolutely! You can prepare your Red Velvet Tree Cake a day or two in advance. Bake the cake layers and let them cool completely. Then, wrap each layer in plastic wrap and store them in the refrigerator. You can also make the frosting ahead of time and keep it in the fridge. Just remember to let the frosting come to room temperature before spreading it on the cake. Assembling the cake on the day of your event will ensure it looks fresh and festive!
What can I substitute for buttermilk in Red Velvet Tree Cake?
If you don’t have buttermilk on hand, don’t worry! You can easily make a substitute. For every cup of buttermilk needed, mix 1 tablespoon of white vinegar or lemon juice with enough milk to make 1 cup. Let it sit for about 5 minutes until it thickens slightly. This homemade buttermilk works perfectly in your Red Velvet Tree Cake, giving it that delicious tangy flavor!
How do I achieve the perfect color for Red Velvet Tree Cake?
To achieve that vibrant red color in your Red Velvet Tree Cake, use high-quality red food coloring. Gel food coloring is often recommended because it provides a more intense color without adding too much liquid to the batter. Start with 2 tablespoons, and if you want a deeper red, you can add a little more. Just be careful not to overdo it, as too much coloring can affect the flavor. Mixing the food coloring well into the batter will help ensure an even color throughout!
Conclusion on Red Velvet Tree Cake
As we wrap up our delightful journey through the world of Red Velvet Tree Cake, it’s clear that this festive dessert is more than just a treat; it’s a celebration of flavors, colors, and memories. The rich, velvety layers combined with the creamy green frosting create a stunning centerpiece that can elevate any holiday gathering. Whether you’re hosting a Christmas party or a cozy winter get-together, this cake is sure to impress your guests and bring smiles all around.
Final Thoughts on Making Red Velvet Tree Cake for the Holidays
Making a Red Velvet Tree Cake is not just about following a recipe; it’s about embracing the spirit of the season. The process of baking can be a joyful experience, especially when shared with family and friends. As you mix, bake, and decorate, you’re creating not just a cake, but also cherished memories that will last a lifetime.
Remember, the beauty of this cake lies in its versatility. Feel free to experiment with different frostings and flavors to make it your own. Whether you stick to the classic recipe or add your unique twist, the most important thing is to enjoy the process and share the results with loved ones.
So, gather your ingredients, put on your apron, and let the holiday baking begin! Your Red Velvet Tree Cake awaits, ready to bring joy and sweetness to your celebrations. Happy baking!
Relevant Recipes Link:
Indulge in the rich and velvety goodness with these irresistible red velvet recipes:
- Red Velvet Brownies: A Decadent Delight
- Red Velvet Strawberry Cheesecake: A Must-Try Dessert
- Red Velvet Cinnamon Rolls: A Must-Try Treat
For more delightful recipes and culinary inspiration, follow us on Pinterest!