Introduction to Vanilla Ice Cream
The Allure of Homemade Ice Cream
There’s something magical about homemade ice cream. The creamy texture and rich flavor can make anyone smile. Vanilla ice cream, in particular, holds a special place in many hearts. It’s a classic that never goes out of style. Whether you enjoy it on a hot summer day or as a comforting treat during winter, vanilla ice cream is always a hit.
Making ice cream at home allows you to control the ingredients. You can choose high-quality heavy cream and pure vanilla extract, ensuring a delicious result. Plus, the process can be a fun activity for families. Kids love to help mix and churn the ingredients. It’s a great way to bond while creating something tasty!
Moreover, homemade vanilla ice cream is versatile. You can serve it on its own or pair it with various desserts. Think about a warm slice of pie or a rich chocolate cake topped with a scoop of this creamy delight. The possibilities are endless! So, let’s dive into the ingredients and steps needed to create your very own vanilla ice cream.
Ingredients for Vanilla Ice Cream
To create your own delicious vanilla ice cream, you’ll need just a few simple ingredients. Each one plays a vital role in achieving that creamy, dreamy texture and rich flavor. Here’s what you’ll need:
- 2 cups heavy cream: This is the base of your ice cream. Heavy cream gives it that rich and creamy texture.
- 1 cup whole milk: Whole milk adds a smooth consistency and balances the richness of the cream.
- 3/4 cup granulated sugar: Sugar sweetens the ice cream and helps create a soft texture.
- 1 tablespoon pure vanilla extract: This is the star ingredient! Pure vanilla extract provides that classic vanilla flavor.
- 1/2 teaspoon salt: A pinch of salt enhances the sweetness and balances the flavors.
These ingredients are easy to find at your local grocery store. When selecting your heavy cream and vanilla extract, opt for high-quality options. This choice will make a noticeable difference in the final taste of your ice cream. Now that you have your ingredients ready, let’s move on to the preparation steps!
Step-by-Step Preparation of Vanilla Ice Cream
Step 1: Gather Your Ingredients
Before you start making your vanilla ice cream, it’s important to gather all your ingredients. This makes the process smoother and more enjoyable. You’ll need the heavy cream, whole milk, granulated sugar, pure vanilla extract, and salt. Make sure you have measuring cups and spoons ready, too. Having everything in one place will help you stay organized and focused. Plus, it’s a great way to get excited about the delicious treat you’re about to create!
Step 2: Mix the Base for Vanilla Ice Cream
Now that you have everything ready, it’s time to mix your ice cream base. In a large mixing bowl, combine the heavy cream and whole milk. Stir them together gently until they are well blended. Next, add the granulated sugar and salt. Mix until the sugar is fully dissolved. This step is crucial because it ensures that your ice cream will be sweet and flavorful. Finally, pour in the pure vanilla extract. This will give your ice cream that delightful vanilla aroma and taste. Stir everything together until it’s smooth and creamy.
Step 3: Churn the Vanilla Ice Cream
Once your base is ready, it’s time to churn the ice cream! If you have an ice cream maker, pour the mixture into the machine and follow the manufacturer’s instructions. Churning incorporates air into the ice cream, making it light and fluffy. If you don’t have an ice cream maker, don’t worry! You can still make delicious ice cream. Pour the mixture into a shallow dish and place it in the freezer. Every 30 minutes, take it out and stir vigorously with a fork. This will help break up any ice crystals and create a smoother texture. Continue this process for about 2-3 hours until the ice cream is thick and creamy.
Step 4: Freeze the Ice Cream
After churning, it’s time to freeze your vanilla ice cream. If you used an ice cream maker, transfer the churned ice cream into an airtight container. Smooth the top with a spatula and cover it tightly. If you used the manual method, simply cover the dish with plastic wrap or a lid. Place the container in the freezer for at least 4 hours, or until it’s firm. This final freezing step is essential for achieving that perfect scoopable texture. Once it’s ready, you can enjoy your homemade vanilla ice cream!
Variations of Vanilla Ice Cream
Adding Mix-Ins to Your Vanilla Ice Cream
One of the best things about vanilla ice cream is its versatility. You can easily customize it by adding mix-ins! These little extras can take your ice cream from classic to extraordinary. Here are some fun ideas to consider:
- Chocolate Chips: Stir in semi-sweet or dark chocolate chips for a delightful crunch.
- Fruit: Fresh berries, sliced bananas, or diced peaches can add a refreshing twist.
- Nuts: Chopped almonds, walnuts, or pecans provide a satisfying texture and nutty flavor.
- Cookie Dough: Add small chunks of cookie dough for a fun and indulgent treat.
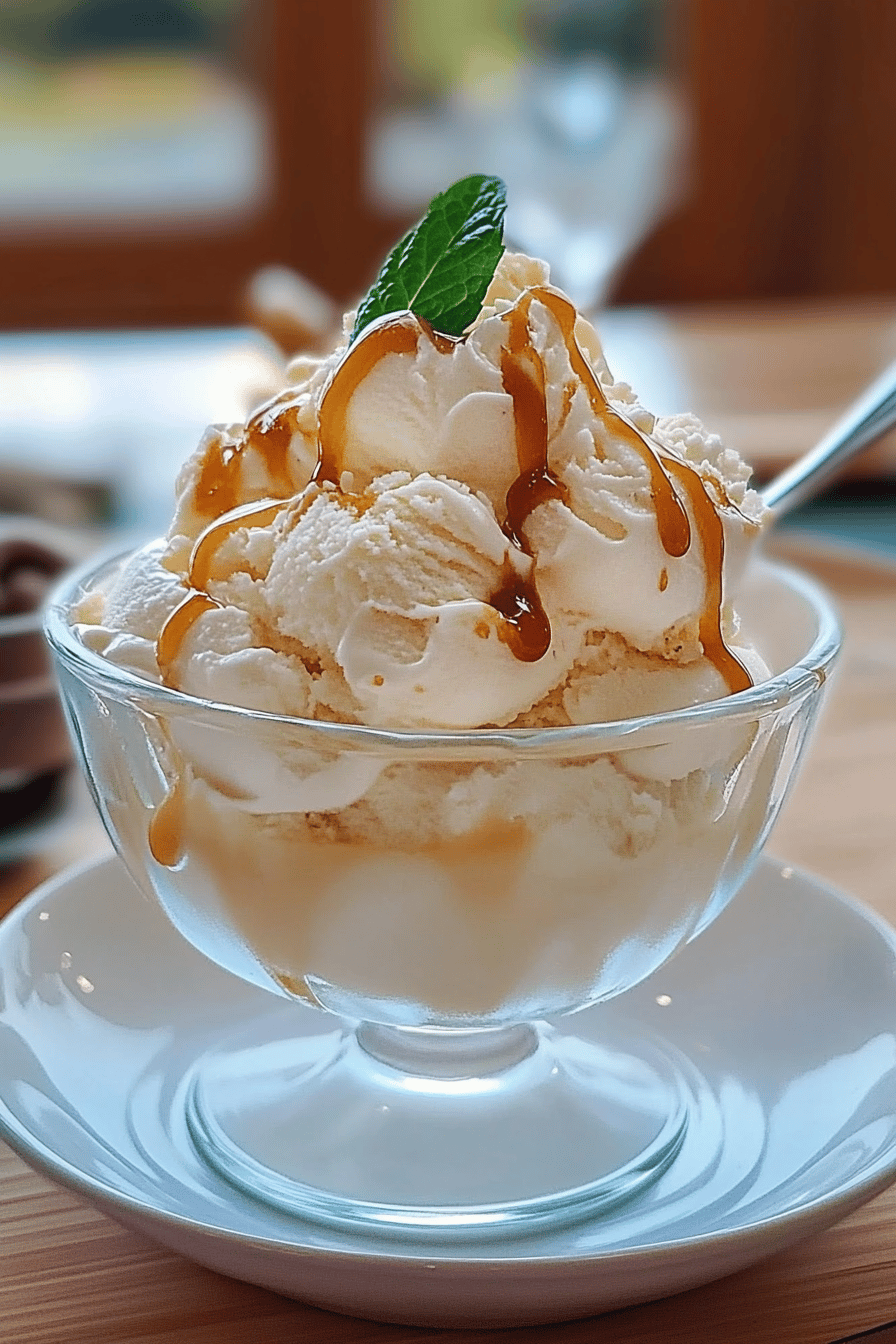
- Swirls: Drizzle in caramel or chocolate sauce for a rich, gooey surprise.
To add these mix-ins, simply fold them into your ice cream base during the last few minutes of churning. If you’re using the manual method, mix them in just before the final freeze. This way, you’ll have a deliciously unique vanilla ice cream that everyone will love!
Alternative Flavors to Try
If you’re feeling adventurous, why not experiment with different flavors? Vanilla ice cream serves as a perfect base for many delicious variations. Here are some ideas to inspire your next batch:
- Chocolate Ice Cream: Replace half of the heavy cream with chocolate milk and add cocoa powder for a rich chocolate flavor.
- Strawberry Ice Cream: Blend fresh strawberries into the base for a fruity twist.
- Mint Chocolate Chip: Add peppermint extract and chocolate chips for a refreshing minty treat.
- Coffee Ice Cream: Mix in brewed coffee or espresso for a delightful caffeine kick.
- Cookie Butter Ice Cream: Swirl in cookie butter for a unique and tasty flavor.
Feel free to get creative! The world of ice cream flavors is vast, and you can make your own signature creation. Just remember to keep the balance of ingredients in mind to maintain that creamy texture. Enjoy the process of discovering new flavors!
Cooking Note for Vanilla Ice Cream
When making vanilla ice cream, a few cooking notes can help ensure your success. First, always use fresh ingredients. Fresh heavy cream and whole milk will yield the best flavor and texture. If possible, opt for organic or locally sourced products. They often have a richer taste that enhances your ice cream.
Temperature is also crucial. Before mixing your ingredients, chill your mixing bowl and any utensils you’ll use. This helps keep the mixture cold, which is essential for a smooth ice cream base. Additionally, if you’re using an ice cream maker, make sure the bowl is completely frozen before pouring in the mixture. This step is vital for achieving that creamy consistency.
Another important tip is to avoid over-churning. While it’s tempting to keep the machine running, over-churning can lead to a grainy texture. Stop churning once the ice cream reaches a soft-serve consistency. If you’re using the manual method, remember to stir just enough to break up ice crystals without overworking the mixture.
Lastly, patience is key! Allow your ice cream to freeze for the recommended time. Rushing this step can result in a less-than-ideal texture. Once it’s ready, scoop and serve your homemade vanilla ice cream with pride. Enjoy the delightful flavors and the smiles it brings!
Serving Suggestions for Vanilla Ice Cream
Pairing Vanilla Ice Cream with Desserts
Vanilla ice cream is a delightful companion to many desserts. Its creamy texture and sweet flavor can elevate any dish. Here are some classic pairings that will make your taste buds dance:
- Warm Apple Pie: A scoop of vanilla ice cream melting over a slice of warm apple pie is a match made in heaven. The cold ice cream contrasts beautifully with the warm, spiced apples.
- Chocolate Brownies: Rich, fudgy brownies topped with a scoop of vanilla ice cream create a decadent dessert. The combination of chocolate and vanilla is simply irresistible.
- Fruit Crumble: Serve vanilla ice cream alongside a warm fruit crumble. The creamy ice cream balances the tartness of the fruit, making each bite a delight.
- Banana Split: Create a classic banana split by layering vanilla ice cream with sliced bananas, chocolate syrup, and whipped cream. It’s a fun and colorful treat!
- Chocolate Cake: A slice of rich chocolate cake paired with vanilla ice cream is a timeless dessert choice. The flavors complement each other perfectly.
These pairings not only enhance the flavors but also add a touch of elegance to your dessert table. Whether it’s a family gathering or a special occasion, serving vanilla ice cream with these desserts will surely impress your guests!
Creative Serving Ideas
Looking to add a twist to your vanilla ice cream presentation? Here are some creative serving ideas that will wow your family and friends:
- Ice Cream Sundae Bar: Set up a sundae bar with various toppings like sprinkles, nuts, and sauces. Let everyone create their own masterpiece!
- Ice Cream Sandwiches: Use cookies or brownies to make ice cream sandwiches. Simply scoop vanilla ice cream between two cookies for a fun treat.
- Milkshakes: Blend vanilla ice cream with milk for a creamy milkshake. Add flavors like chocolate or strawberry for a delicious twist.
- Affogato: Pour a shot of hot espresso over a scoop of vanilla ice cream for a delightful Italian dessert. The hot coffee melts the ice cream, creating a rich and creamy treat.
- Fruit Parfaits: Layer vanilla ice cream with fresh fruits and granola in a glass for a beautiful and tasty parfait. It’s a great way to enjoy a healthier dessert!
These creative serving ideas not only make your vanilla ice cream more exciting but also allow you to showcase your culinary skills. Enjoy experimenting with different presentations and flavors!
Tips for Perfect Vanilla Ice Cream
Creating the perfect vanilla ice cream is an art that combines quality ingredients, proper techniques, and a little patience. Here are some essential tips to help you achieve that creamy, dreamy texture and rich flavor every time you make it:
- Use High-Quality Ingredients: The flavor of your ice cream largely depends on the quality of your ingredients. Always opt for fresh, high-quality heavy cream and pure vanilla extract. This choice will significantly enhance the taste of your vanilla ice cream.
- Chill Your Ingredients: Before mixing, chill your heavy cream and milk in the refrigerator. Cold ingredients help create a smoother ice cream base and reduce the time needed for churning.
- Don’t Skip the Salt: A pinch of salt may seem small, but it plays a crucial role. Salt enhances the sweetness and balances the flavors, making your vanilla ice cream taste even better.
- Monitor the Churning Time: If you’re using an ice cream maker, keep an eye on the churning time. Over-churning can lead to a grainy texture. Stop once the ice cream reaches a soft-serve consistency.
- Let It Rest: After churning, let your ice cream rest in the freezer for a few hours. This step allows the flavors to meld and the texture to firm up, resulting in a more enjoyable scoop.
- Experiment with Add-Ins: Don’t be afraid to get creative! Adding mix-ins like chocolate chips, nuts, or fruit can elevate your vanilla ice cream to new heights. Just remember to fold them in gently to maintain the creamy texture.
- Store Properly: To keep your ice cream fresh, store it in an airtight container. Press a piece of plastic wrap directly onto the surface of the ice cream before sealing the container. This helps prevent ice crystals from forming.
By following these tips, you’ll be well on your way to making the perfect vanilla ice cream. Enjoy the process and the delicious results!
Breakdown of Time for Vanilla Ice Cream
Prep Time
Preparing your vanilla ice cream is a straightforward process. The prep time mainly involves gathering your ingredients and mixing them together. This step typically takes about 15 to 20 minutes. Make sure to measure everything accurately for the best results. Once you have your base ready, you can move on to the next steps!
Cooking Time
The cooking time for vanilla ice cream primarily refers to the churning process. If you’re using an ice cream maker, this usually takes around 20 to 30 minutes. The machine will churn the mixture, incorporating air and creating that light, fluffy texture we all love. If you’re using the manual method, remember to stir the mixture every 30 minutes for about 2 to 3 hours. This helps break up ice crystals and ensures a smooth consistency.
Total Time
In total, you should expect to spend about 4 to 5 hours from start to finish. This includes the prep time, cooking time, and the final freezing period. After churning, it’s essential to freeze the ice cream for at least 4 hours to achieve that perfect scoopable texture. So, while the process may take some time, the delicious reward is well worth the wait!
Nutritional Information for Vanilla Ice Cream
Calories in Vanilla Ice Cream
When indulging in homemade vanilla ice cream, it’s essential to be aware of its caloric content. A typical serving size of vanilla ice cream, which is about half a cup, contains approximately 207 calories. This number can vary slightly based on the specific ingredients used, such as the type of cream or sugar. While it’s a delightful treat, moderation is key to enjoying this sweet dessert without overindulging.
Protein Content
Vanilla ice cream also provides a modest amount of protein. In a half-cup serving, you can expect to find around 3.5 grams of protein. This protein comes primarily from the milk and cream used in the recipe. While it’s not a significant source of protein, it does contribute to the overall nutritional profile of this delicious dessert. Pairing it with fruits or nuts can enhance the protein content while adding extra flavor and texture.
Sodium Levels
Another important aspect to consider is the sodium content in vanilla ice cream. A half-cup serving typically contains about 50 milligrams of sodium. This amount is relatively low, making vanilla ice cream a suitable option for those watching their sodium intake. However, if you’re adding mix-ins like salted nuts or sauces, be mindful of how that may increase the overall sodium levels in your dessert.
FAQs about Vanilla Ice Cream
How long does homemade vanilla ice cream last?
Homemade vanilla ice cream can last in the freezer for about 2 to 3 weeks. To keep it fresh, store it in an airtight container. Make sure to press a piece of plastic wrap directly onto the surface of the ice cream before sealing the container. This helps prevent ice crystals from forming and keeps your ice cream creamy and delicious. However, for the best flavor and texture, try to enjoy it within the first week!
Can I make vanilla ice cream without an ice cream maker?
Absolutely! You can make vanilla ice cream without an ice cream maker. Simply pour your ice cream mixture into a shallow dish and place it in the freezer. Every 30 minutes, take it out and stir vigorously with a fork. This process helps break up ice crystals and creates a smoother texture. Continue this for about 2 to 3 hours until your ice cream is thick and creamy. It’s a fun and easy way to enjoy homemade ice cream!
What can I do if my vanilla ice cream is too hard?
If your vanilla ice cream is too hard, don’t worry! Simply take it out of the freezer and let it sit at room temperature for about 10 to 15 minutes. This will soften it enough to scoop easily. If you find that your ice cream is consistently too hard, consider adding a bit more cream or milk next time. This can help create a creamier texture that’s easier to scoop.
How can I make vanilla ice cream creamier?
To achieve a creamier vanilla ice cream, there are a few tips you can follow. First, use high-quality heavy cream and whole milk, as they contain more fat, which contributes to a rich texture. Additionally, consider adding a tablespoon of corn syrup or sweetened condensed milk to your mixture. These ingredients help prevent ice crystals from forming, resulting in a smoother ice cream. Lastly, be sure to churn your ice cream just until it reaches a soft-serve consistency, and then freeze it properly for the best results!
Conclusion on Vanilla Ice Cream
Final Thoughts on Making Vanilla Ice Cream at Home
Making vanilla ice cream at home is not just a fun activity; it’s a rewarding experience that brings joy to everyone involved. With just a few simple ingredients and steps, you can create a delicious treat that’s perfect for any occasion. Whether you enjoy it on its own or paired with your favorite desserts, homemade vanilla ice cream is sure to impress.
As you embark on your ice cream-making journey, remember that the key to success lies in using high-quality ingredients and following the right techniques. Don’t hesitate to experiment with flavors and mix-ins to create your own unique version. The beauty of homemade ice cream is that you can tailor it to your taste preferences, making it a truly personal treat.
So, gather your ingredients, invite your family or friends to join in, and start churning! The smiles and satisfaction that come from enjoying a scoop of your homemade vanilla ice cream will make all the effort worthwhile. Enjoy every creamy bite, and don’t forget to share your delicious creation with others. Happy ice cream making!
Relevant Recipes Link:
Craving more delightful ice cream recipes to satisfy your sweet tooth? Try these delectable options:
- Mexican Fried Ice Cream: A Must-Try Dessert
- Strawberry Vanilla Bean Ice Cream: A Summer Delight
- Strawberry Vanilla Bean Ice Cream: A Summer Delight
For more mouthwatering recipes and culinary inspiration, follow us on Pinterest!